DIY : VTC/VTEC Solenoid Replacement
*NOTE: This was performed on an RSX K20A3, but I'm pretty sure the the work is the same on any other Honda/Acura VTEC engine. The solenoid seems to always be its own unit located on the outside of the cylinder head for easy access. I know that on the H22A/F20B engines, the solenoid is at the passenger end of the intake cam, near the distributor and above the transmission bell housing. VTEC failure is actually pretty rare. It's the gasket that needs to be looked after, and the metal mesh filter it contains. The gaskets are known to leak, and the filter can clog if you don't keep up with oil changes properly, both of which can cause problems if neglected long enough.
When my check engine light came on and the car was acting like fuel was being cut at 4,000 rpm, I went to AutoZone for a free code scan:
P1259
Definition:
VTEC system malfunction
Probably cause:
1. Low engine oil pressure or level
2. Open or short circuit condition
3. Failed VTEC oil pressure switch
4. Failed VTEC solenoid
Definition:
VTEC system malfunction
Probably cause:
1. Low engine oil pressure or level
2. Open or short circuit condition
3. Failed VTEC oil pressure switch
4. Failed VTEC solenoid
I keep an eye on my oil level, so that wasn't it. Open/short circuit? Wires randomly breaking isn't really an issue unless you have mice or you did a wire tuck yourself and didn't properly grommet metal holes or give wires enough slack (*cough*). The oil pressure switch is screwed into the top of the VTEC solenoid, located on the back side of the head, on the passenger side of the exhaust manifold.
My multi-meter died a long time ago, so it made more sense for me to replace the entire VTEC solenoid/pressure switch unit (you can either buy just the switch, or both of them together from Acura, you can't get just the solenoid) rather than pay for a new meter on top of the failed part, but if you do have a meter, justanswer.com has an excellent diagnostic walk-through: http://www.justanswer.com/acura/65y31-acura-rsx-hey-i-m-getting-p1259-code-acura-rsx-03.html
A lot of people have gotten away with simply cleaning that metal filter that's built into the gasket. If your gasket is hard and brittle, or it's leaking, you'll definitely want to replace that at the very least. This DIY is to walk you through replacing the entire VTEC solenoid assembly.
Tools & Parts Needed:
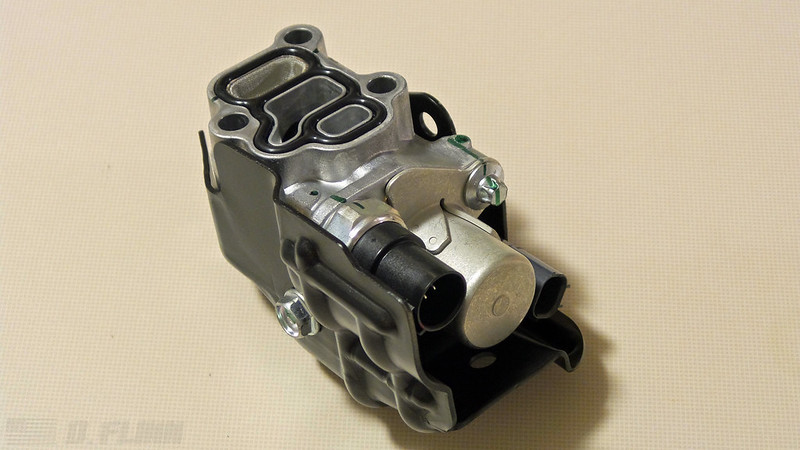
- VTEC solenoid (includes oil pressure switch and new gasket, RSX base part no. 15810-RAA-A03) - about $116 shipped at acuraoemparts.com
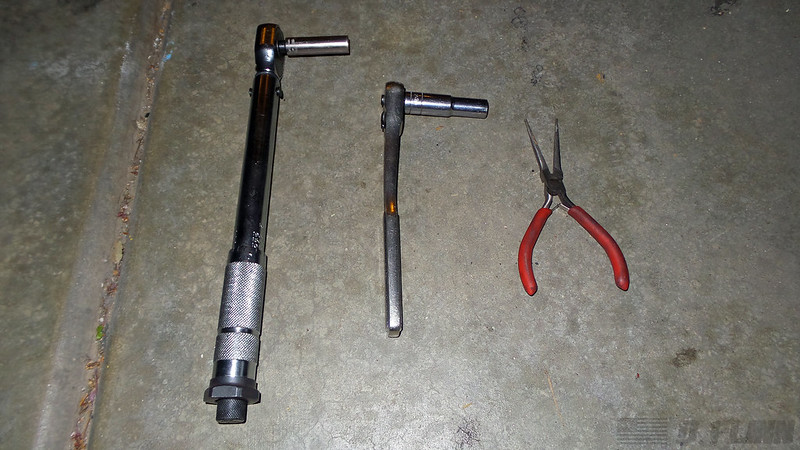
- Ratchet with deep 10mm socket
- Torque wrench that measures in lbs/inch
- Needle nose pliers
- Rag
My multi-meter died a long time ago, so it made more sense for me to replace the entire VTEC solenoid/pressure switch unit (you can either buy just the switch, or both of them together from Acura, you can't get just the solenoid) rather than pay for a new meter on top of the failed part, but if you do have a meter, justanswer.com has an excellent diagnostic walk-through: http://www.justanswer.com/acura/65y31-acura-rsx-hey-i-m-getting-p1259-code-acura-rsx-03.html
A lot of people have gotten away with simply cleaning that metal filter that's built into the gasket. If your gasket is hard and brittle, or it's leaking, you'll definitely want to replace that at the very least. This DIY is to walk you through replacing the entire VTEC solenoid assembly.
Tools & Parts Needed:
- VTEC solenoid (includes oil pressure switch and new gasket, RSX base part no. 15810-RAA-A03) - about $116 shipped at acuraoemparts.com
- Ratchet with deep 10mm socket
- Torque wrench that measures in lbs/inch
- Needle nose pliers
- Rag
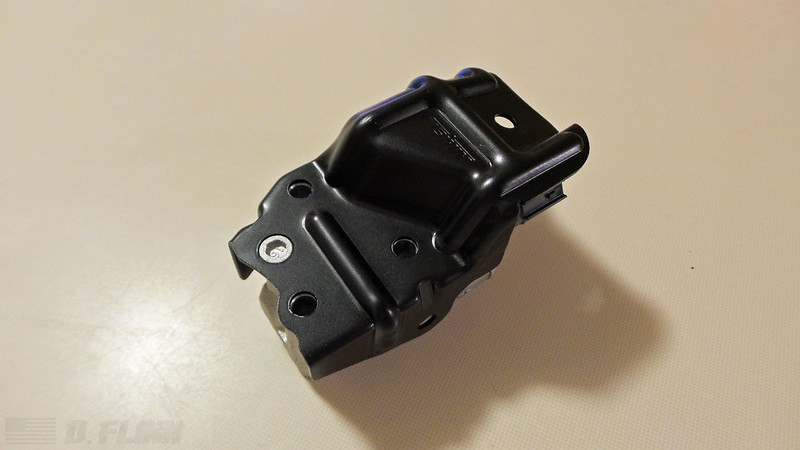
Pre-Prep: Paint Heat Shield
Completely optional, but the bare metal on these solenoid assemblies rusts quickly. There's a single 10mm bolt securing the heat shield. I took mine off and painted it with high-temp black spray paint to help against ugly corrosion. In hindsight, I should have masked the electrical connectors and gasket area, and sprayed the solenoid assembly itself in high-temp clear to keep it looking nice as well.
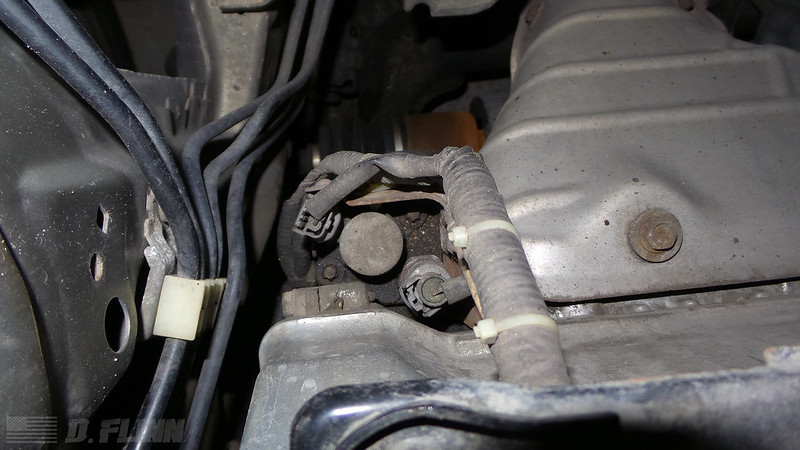
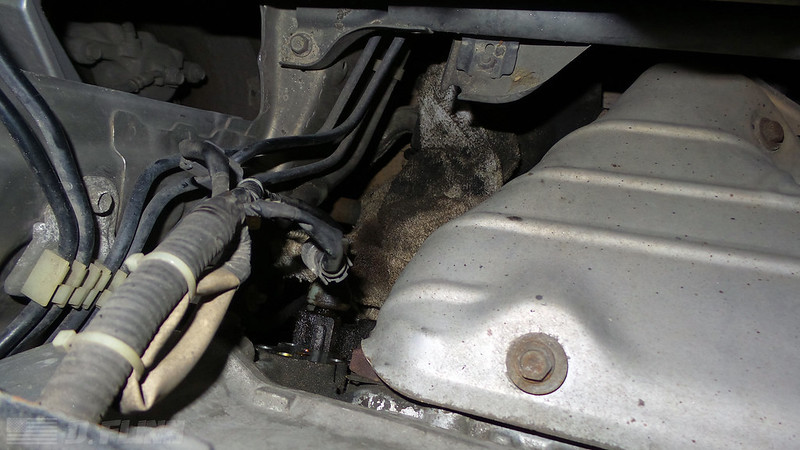
Step 1: Remove Old VTEC Solenoid
Step 1: Remove Old VTEC Solenoid
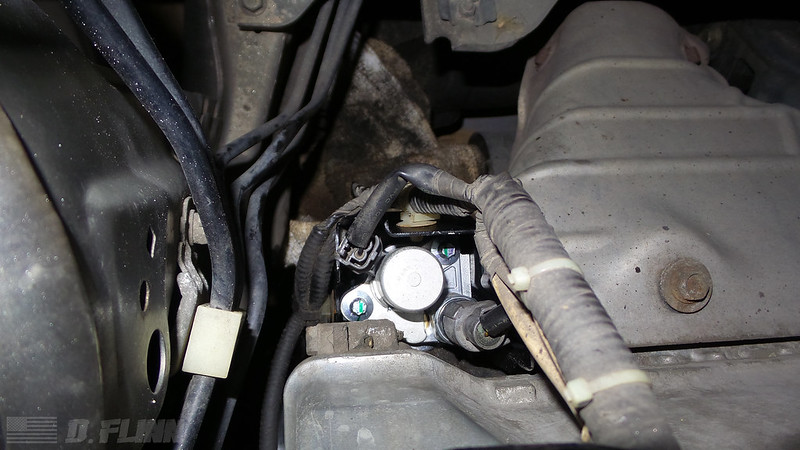
I'm using the above photos as reference, because it's hard to get a camera into that tightly-packed space in the engine bay. In the first photo, you can see the two black electrical connectors you need to unplug to get started.
Next, looking at the second photo, you see the darkened holes for the three 10mm bolts that hold the VTEC solenoid to the cylinder head. You can now undo those on your old solenoid, but first I'd recommend laying a rag underneath the solenoid to catch what few drops of oil might leak out once the solenoid is loose.
The solenoid assembly should now be hanging by two white plastic clips holding the engine harness to the heat shield. Twist the solenoid assembly around to make room to get your needle nose pliers in there and pry them loose. Odds are you'll break the clips, but that's okay.
Use a clean rag to wipe clean the machined surface left behind on the cylinder head.
Step 2: Install New VTEC Solenoid
First off, before going in for the install, I poured a little bit of engine oil into the three holes of the solenoid in hopes of lubricating the internals. It just makes sense to not run it dry for that initial start-up if you can avoid it.
This step is extremely important. It's very easy to over-torque the three bolts holding the solenoid to the cylinder head and create a major headache, which is why I listed the torque wrench in the tools above. A lot of times with car work, you can get away without torquing something to spec and just go by feel, but these are just too easy to screw up. Spec is 7.2 lbs/ft, or 86.4 lbs/in. Triple-check them to make sure tightening one or two didn't create play in another bolt.
From there, just clip the electrical connectors in place and secure the harness clips into the heat shield if they didn't break when you removed them. To reset the ECU and clear the check engine light code, go to the under-hood fuse box and pull the 15A fuse No. 6 ECU (ECM/PCM) for ten seconds and then go for a test drive (get it over 4,000 rpm a few times once the engine is up to temp) to see if that check engine light comes back on.