Bully
+ Canis Canem Edit +
* - "Click here to jump to this section"
The Basics*
- Breaking into lockers
- Bulletin board
- Cliques
- Curfew
- Dorm room trophies
- Getting into trouble
- Library globe facts
- The Majic Moostopholees
- Transportation
- Unlockable and hidden clothes
- Unrequired arcade games
Story Missions
Chapter I: Making New Friends and Enemies*
1) This Is Your School
2) Get to Class
3) The Setup
4) Slingshot
5) A Little Help
6) Save Algie
7) Defend Bucky
8) That Bitch
9) The Diary
10) The Candidate
11) Halloween
12) The Big Prank - not required for 100%
13) Character Sheets
14) Help Gary
Chapter II: Rich Kid Blues*
1) Hattrick vs Galloway
2) Last Minute Shopping
3) Prep Challenge
4) Movie Tickets
5) The Eggs
6) Carnival Date
7) Race the Vale
8) Beach Rumble
9) Panty Raid
10) Weed Killer
11) Tad's House
12) Boxing Challenge
Chapter III: Love Makes the World Go Around*
1) Christmas Is Here
2) Nerd Challenge
3) Jealous Johnny
4) Cook's Crush
5) Bait
6) Cook's Date
7) Wrong Part of Town
8) Tagging
9) Comic Klepto
10) Greasers Challenge
11) Lola's Race
12) Glass House
13) The Tenements
14) The Rumble
Chapter IV: A Healthy Mind In A Healthy Body, And Other Lies*
1) Stronghold Assault
2) Funhouse Fun
3) Paparazzi
4) Jocks Challenge
5) Here's to You Ms. Philips
6) Defender of the Castle
7) Galloway Away
8) Nice Outfit
9) Discretion Assured
10) The Big Game
Chapter V: The Fall and Rise of Jimmy Hopkins, Age 15*
1) Cheating Time
2) Making A Mark
3) Rats In The Library
4) The Gym Is Burning
5) Finding Johnny Vincent
6) Revenge on Mr. Burton
7) Townies Challenge
8) Preppies Vandalized
9) Smash It Up
10) Go See the Principal
11) Busting In Part I
12) Busting In Part II
13) Complete Mayhem
Chapter VI: Endless Summer
Classes* (complete Level 5 of each)
1) Art
2) Chemistry
3) English
4) Gym
5) Photography
6) Shop
Odd Jobs*
- 6 Radio Transistors
- 40 Grottos & Gremlins Cards
- 75 Rubber Bands
- A Little Help (series of 6)
- Arcade Games
- Beat Up the Pirate
- Bike Races: Old Bullworth Vale
- Bike Races: Bullworth Town
- Bike Races: New Coventry
- Bike Race: Bullworth Academy
- Boxing
- Buy 100 Sodas
- Buy All the Clothes
- Carnival Games
- Carnival Go-Kart Races (win 5 races)
- Carnival Rides
- Destroy 19 Halloween Tombstones
- Destroy 25 Lawn Gnomes
- Destroy 27 Halloween Jack-o-Lanterns
- Drink 500 Sodas
- Errands
- Fail 5 Classes
- Go-Kart Street Races
- Keep-Ups
- Lawn Mowing: Old Bullworth Vale Gardens
- Lawn Mowing: House 23
- Paper Route (Complete level 5)
- Penalty Shots
- Pull the Fire Alarm 20 Times
- Travel 41.8 Kilometers on Foot
- Travel 100 Kilometers on Bike
- Yearbook Photos
+ The Basics +
Why? Because your friends don't need the stuff they keep locked up. Find a locker with a red marker in front of it and press Triangle to grab hold of the lock. Use the left analog stick to slowly turn the lock in the direction the arrows point to. An excellent time to raid lockers is during the mission "Halloween." The clock is gone, and all the Prefects are off at a party, leaving you to do your lock-picking without risking getting caught. There are lockers on both floors of the school, as well as the gym's locker rooms. If you've emptied all the locked lockers in a building, they'll refresh if you leave and re-enter the building. Each locker holds its own treasure, some more worthwhile than others:
- Bullworth Letterman Jacket
- Bandit Mask
- Werewolf Mask
- Bullworth Hoodie - Blue
- Bullworth Gym Pants
- Bullworth Polo Shirt
- Team Football Jersey
- Low Tops - Red
- Cowboy Boots
- Carton of Eggs
- "Kick Me" sign
- Textbook (throw at people)
- Banana (drop in front of walking people)
- Stink Bombs
- Box of Chocolates (girlfriend gift)
- Fire Crackers
- Volcano 4000 Firework
- Bouquet of Flowers (girlfriend gift)
- Bag of Marbles
- Apple
Locations: Boys dorm (2), first floor of school (2), and second floor of school (1).
- The principal's office is located on the second floor of the school.
- Class Schedule. Morning classes start at 9am sharp and end at 11:30am. Afternoon classes resume after lunch at 1pm until 3:30pm.
- If the prefects catch anyone hitting or teasing girls, they'll be sent straight to the principal's office.
- To all Students: Curfew is at 11pm. If you are caught after curfew, you will be sent to your room immediately.
- Not funny. Will whoever filled my locker with water balloons please not do it again? - Algernon
- Errands. Some people will offer you errands. Look for the [blue "x"] on the mini map and talk to them.
- Lost Popularity. If found, please return to Beatrice. Love - Mandy
- Notice: Please DO NOT pick the flowers from in front of the girls' dorm.
- Cheerleading Tryouts. Beatrice, you didn't make it. Again. Love - Mandy
- Science Club Homework Help. We will help anyone with their homework, except Mandy. - B.
- Beware. Crazy old man behind the school. May have rabies. Don't feed him!
- Problem Teachers? If you see any English teachers behaving inappropriately, please see me. - Mr. Hattrick
- Lost Pet Rat. His name's George. Last seen near the cafeteria. I miss him. - Bucky
- Gym Class. Tired of being a wimp? Better get your butt to gym class. - Burton
- Jobs. Want to make extra cash? Follow the "$" icon on the world map.
- Pillow Fight. Tonight. Girls' dorm. No boys allowed.
- Need Money? Harrington House employs poor students for menial work. Please see Chad or Gord.
- Rubber Bands. There are 75 rubber bands scattered throughout the world. Collect them all for a special prize.
- Roleplaying Guild. Looking for new members. Especially girls. - Contact Melvin.
- Wet Proof Sheets. Now available! Algernon and others who may need them, see Miss Peabody.
- Astronomy Club. Meeting postponed due to jock attacks.
Cliques
Nerds: They mostly hang around the Library. They're on your side most of the time, but some won't hesitate to fight if you tempt them. But if you do fight them, remember that they're smart, so they know how to make good weapons, like stink bombs. They are identified by their green vests (or skirts, in girls' cases).
Jocks: They mostly hang around the football field and gym, and will attack you on sight. They are identified by their letterman jackets.
Preppies: They mostly hang around Harrington House, and may or may not attack you. They are identified by their blue plaid ("Aquaberry") vests.
Greasers: They mostly hang around the auto shop, and may or may not attack you. They are identified by their brown/black leather or blue denim jackets.
Bullies: These guys are all around campus, identified by their white shirts. They will attack you on sight.
Curfew
Curfew is 11pm, and if you're not in bed by 2:00am, you'll fall asleep wherever you're standing. Do your best not to pass out anywhere other than your bed or someone will steal your shoes during the night.
Dorm Room Trophies
Throughout the game, you'll unlock 'trophies' to be displayed in your dorm room as a reward or souvenier of the things you have accomplished.
1) Russell's shirt: Complete the mission "Help Gary".
2) #1 Ribbon: Complete level 5 of Paper Route odd job.
3) Wrestling headgear: Complete level 5 of Gym class.
4) Rock poster: Buy at carnival souvenier tent.
5) Bullworth shield: Complete the mission "Complete Mayhem".
6) Picture of Pinky: Complete the mission "Carnival Date".
7) Picture of Lola: Complete the mission "Lola's Race".
8) Picture of Beatrice: Complete the mission "The Diary".
9) Picture of Mandy: Complete the mission "Discretion Assured".
10) Picture of Zoe: Complete the mission "Smash It Up".
11) Panties: Complete the mission "Panty Raid".
12) Art set: Complete level 5 of Art class.
13) Boxing gloves: Complete the mission "Boxing Challenge".
14) Singed Bullworth banner: Complete the mission "The Gym is Burning".
15) Steering wheel: Win 5 go-kart races at the carnival.
16) Bike frame: Complete level 5 of Shop class.
17) Photo of Lola and Gord: Complete the mission "Jealous Johnny".
18) Crapulus Maxima: Complete the mission "Weed Killer".
19) Character sheets: Complete the mission "Character Sheets".
20) Picture of Ms Philips: Complete level 5 of Photography class.
21) Yearbook: Complete level 2 of Photography class.
22) Girl/car poster: Buy at carnival souvenier tent.
23) Earnest's presidential campaign poster: Complete the mission "The Candidate".
24) Johnny's jacket: Complete the mission "The Rumble".
25) Large trophy: Win all the bike race at Bullworth Academy.
26) Small trophy: Complete the mission "Beach Rumble".
27) Tombstone: Destroy all 19 Halloween tombstones.
28) Jack-o-lantern: Destroy all 27 Halloween pumpkins.
29) Teddy bear: Complete the mission "Carnival Date".
30) Grim reaper: Complete the mission "Funhouse Fun".
31) Gnome: Destroy all 25 lawn gnomes.
32) Orderly uniform: Complete the mission "Finding Johnny Vincent".
33) Football jersey: Complete the mission "The Big Game".
34) Dodgeball: Complete the mission "Jocks Challenge".
35) Rat in a jar: Complete the mission "Rats in the Library".
36) Blue Skies poster: Complete the mission Bustin In Part II".
37) Planet mobile: Complete the mission "Stronghold Assault".
Getting Into Trouble
Detention: The first time you are busted, you'll be brought to the Headmaster's office for a warning. If you're caught while you're supposed to be in class, you'll get taken to whatever class is currently in session, and if you're caught outside past 11:00pm, you'll be sent to your dorm. Outrun the Prefects if you can, but if they stay on your tail, entering your dorm room is the only sure way to shake them. The first time you're caught, you'll be brought to the principal's office for a short lecture, and the second time will land you a detention. After that, your detentions will be separated by lectures and a few times where you just appear in front of the principal's office. For fall, spring, and summer detentions, you'll have to mow one of the school's lawns (simply drive over the grass to cut it). Winter detentions will have you shoveling snow. In order to get the Prison Uniform, you'll need to serve lawn-mowing detentions 9 times, mowing the Harrington House, parking lot, and football field lawns three times each - winter detentions aren't required for this outfit.
Infractions that will result in your trouble meter increasing:
- Break and Enter (I think this only pertains to lockers)
- Bullying (stuffing people in trash cans)
- Harrassing Authority (Prefects, teachers - giving them wedgees)
- Harrassing Girls (pinching their butts)
- Harrassing Little Kids (they're noticeably shorter than other students)
- Impudence (taunting authority [target + Circle])
- Lockpicking (I think this only pertains to lockers)
- Misconduct (skateboarding in school hallways)
- Theft (grabbing fire extinguishers off the walls)
- Trespassing (being in the girls dorm or bathrooms, or in the school after 7:00pm)
- Truancy (skipping class)
- Vandalism (breaking windows, school decorations)
- Violating Curfew (being out past 11:00pm)
- Violence (fighting, running people over with your bike)
- Violence - Authority (Prefects, teachers)
- Violence - Girls
- Violence - Little Kids (they're noticeably shorter than the other students)
- Weapon Violence (using a weapon against someone)
Library Globe Facts
On the first floor of the library, you'll find a globe. Walk up to it and press Triangle to spin it and learn some interesting facts:
- Canada: Dildo is a town in Newfoundland, Canada.
- Canada: Swearing in French has been outlawed in Montreal.
- China: Rescuing a drowning person is not allowed as it would be interfering with their fate.
- France: In 1778, fashionable women of Paris never went out in blustery weather without a lightning rod attached to their hats.
- Germany: In WWII, the Germans lost 126 generals. 84 of these were executed by Hitler.
- Italy: In 1892, Italy raised the minimum age for marriage for girls to 12.
- Italy: To "testify" was based on men in the Roman court swearing to a statement made by swearing on their testicles.
- Sweden: Twenty percent of all road accidents in Sweden involve a moose.
- UK: Every month the Thames water treatment plants remove over a ton of pubic hair, whereupon it is taken away to a landfill site and buried.
- UK: In Chester you are allwed to shoot a Welsh person with a bow and arrow provided it is done inside the city walls after midnight.
- UK: Scotland is estimated to have been Europe's biggest persecutor of witches, putting to death over 4,000 alleged witches in the 17th and 18th centuries.
- USA: In Alabama, it is forbidden for a man to beat his wife more than once a month.
- USA: The IRS employee manual includes provisions for collecting taxes in the aftermath of a nuclear war.
- Zanzibar: The shortest war there has ever been was between Britain and Zanzibar during 1896. It lasted for 38 minutes.
Location: At the carnival, across from the souvenier tent
Cost: $0.25 each
- 80% of people consider themselves above average.
- A bird in the hand is better than a bird on the roof, unless it has really sharp claws.
- A house without a toilet is uncanny.
- All signs point to: no chance.
- All signs point to: you suck.
- A man's house is his castle, only less resistant to catapults.
- Avoid taking unneccessary gambles. Lucky numbers: 12, 32, 28, 31, 44.
- Bad advice causes mistakes, then laughter.
- Before you act, check with your mother.
- Being rude is no substitute for being right.
- Believe the best of everybody. It saves you so much trouble.
- Beware of angry men carrying weapons.
- Big words prove nothing except that you have a big mouth.
- Boxing is a gentleman's sport, but only if gentlement play it.
- Bully is as bully does.
- By swallowing evil words unsaid, no one has ever harmed his stomach.
- Confession is good for the soul but bad for your reputation.
- Consider a career in politics.
- Consider the possibility that no one likes you.
- Consider this: no turkey ever voted for an early Christmas.
- Consider trying less hard.
- Do not throw glasses if you live in a stone house.
- Don't argue with the person packing your parachute.
- Don't be so self-centered.
- Don't blow out another's candle to make yours shine brighter.
- Don't bring your wife to a bun fight.
- Don't forget to change your socks.
- Don't mistake a short memory for a clear conscience.
- Don't trust fortune tellers.
- Do you know who your friends are?
- Everything is not yet lost.
- Facts don't stop existing just because they're ignored.
- Forgive your enemies - it really annoys them.
- Get a life.
- Get over yourself. Jerk.
- Good luck. You'll need it.
- Have you considered getting plastic surgery? You should.
- - Have you considered running away from your problems?
- Help! I'm trapped in this machine!
- However beautiful the strategy, you should occasionally look at the results.
- If at first you don't succeed, consider giving up.
- If life gives you lemons consider going into the citrus business.
- If life gives you lemons, give life a raspberry.
- If people flatter you they're probably lying.
- If you don't succeed, you run the risk of failure.
- If you don't try, you can't fail.
- If you expect nothing, you won't be disappointed.
- If you go camping, beware of evil intent.
- If you live in a glass house, change in the basement.
- If you need to get the point, sit on a tack.
- If you put your face in fruit drink, you may get punch in nose.
- If you're a real jerk all the time, people might not notice you're useless.
- If you're on high cliff, don't jump to conclusion.
- If you're on time, people will think you have nothing important to do.
- If your house is burning you might as well try to stay warm.
- In later life, you will find somewhere you fit in and belong. Jail.
- Isn't it about time you got a job?
- It is always wise to look ahead, but difficult to look further than you can see.
- It's a good time to stop waffling. Maybe.
- It's hard to prophecy, especially about the future.
- It's only going to get worse.
- Just give up.
- Just imagine you'll succeed.
- Keep trying.
- Let's hope you will grow into your face.
- Love is blind; friendship closes its eyes.
- Never test the depth of the water with both feet.
- No one likes a whiner.
- No plan survives contact with the enemy. Plan accordingly.
- Nothing is impossible for a man who doesn't have to do it himself.
- One day you will be very famous, like many serial killers.
- Peeing your own pants only keeps you warm for a short while.
- Regular showers are a good thing.
- Right now, somewhere out there, someone is making out with a girl.
- Running behind a car is exhausting.
- Soon you will have some new clothes.
- Stand up to be seen. Speak up to be heard. Shut up to be appreciated.
- Stay home, read a book.
- Surprisingly, you may succeed in the end.
- The answer to your question is: maybe.
- The best marmalade is made from forbidden fruit.
- The greatest danger could be your own stupidity.
- The pen is mightier than the sword, especially if properly sharpened and in the hands of a well trained ninja.
- The reality is: the customer is not always right.
- There's never time to do it right, but there's always time to do it over.
- The smarter you think you are, the less likely it is that you're right.
- The weather pays no attention to criticism.
- They say they're your friends, but they laugh at you behind your back.
- Those who cannot change their minds cannot change anything.
- Today is the first day of the rest of your life, such as it is.
- Today, tell someone you love them. You might get lucky.
- To err is human, to blame someone else even more so.
- To know nothing is bad. To not wish to know anything, worse.
- To make life interesting, believe everything you hear.
- Tomorrow will be a nice day.
- Travel broadens the mind, f you have one to begin with.
- Two wrongs don't make a right, but 3 lefts do.
- Whatever it is you're looking for, it'll be in the last place you look.
- What exactly is your problem?
- - What you looking at bitch?
- What you really need is some sort of medication.
- When in charge, think. When in trouble, delegate. When in doubt, mumble.
- When things go wrong, don't follow along.
- You are almost there.
- You can definitely fool some of the people some of the time.
- You can't have everything, where would you put it?
- You may attend a party where strange customs prevail.
- You might as well keep trying. It might make you feel better.
- You need a haircut.
- You're a winner. No really. You are.
- You're doomed. Sorry.
- You're not all that.
- You're not as dumb as you look. That would be impossible.
- You're not paranoid - everyone really does hate you.
- You're smart and handsome, just like your mom always says you are.
- You're wasting your life.
- - Your face is your fortune. You will live in poverty all your life.
- You should go to bed early tonight.
- You will be involved in a fight soon.
- You won't get anywhere if you think you're already there.
Transportation
Skateboard
You'll unlock this after completing the mission "Defend Bucky". It provides a quick way to get around campus in the early parts of the game.
Primary Bikes
These will always spawn in your garage, and are earned by completing Shop classes. Once you unlock the next bike, you can't get any of the previous ones to spawn there.
Basic BMX
- Unlock: Shop class 1
- Speed: 2/5
- Acceleration: 2/5
- Handling: 4/5
Retro BMX
- Unlock: Shop class 2
- Speed: 2/5
- Acceleration: 2/5
- Handling: 3/5
Green BMX
- Unlock: Shop class 3
- Speed:
- Acceleration:
- Handling:
Flames BMX
- Unlock: Shop class 4
- Speed: 3/5
- Acceleration: 3/5
- Handling: 4/5
Red BMX
- Unlock: Shop class 5
- Speed: 4/5
- Acceleration: 4/5
- Handling: 5/5
Secondary Bikes
Buy these at the Shiny Bikes stores and they will spawn next to the primary bike in your garages.
Mountain Bike
- Buy: $35.00
- Speed: 5/5
- Acceleration: 4/5
- Handling: 3/5
*Handles better on rough terrain
Racer
- Buy: $15.00
- Speed: 5/5
- Acceleration: 5/5
- Handling: 3/5
Aquaberry Cruiser
- Buy: $25.00
- Speed: 5/5
- Acceleration: 5/5
- Handling: 4/5
Parked Bikes
These bikes are found parked all around Bullworth.
Basic BMX
- Locations: Across from Bullworth Vale hair salon. In front of boxing gym. In front of the Bullworth Town bike shop.
- Speed: 2/5
- Acceleration: 2/5
- Handling: 4/5
Cruiser
- Locations: On the dock running along the Bullworth Vale beach (by the street). In front of Leighson's Bank. This bike isn't actually given a name or stats.
Racer
- Locations: In front of Bullworth Vale bike shop. In front of the abandoned Bullworth Town movie theater.
- Speed: 5/5
- Acceleration: 5/5
- Handling: 3/5
Scooter
Buy one at the carnival's souvenier tent for 75 tickets and it will spawn in your garages next to the primary bike. If you buy a secondary bike, it will replace the scooter in the garages, but you can re-buy it at the carnival for free. Helmets that make driving a scooter 'legal' are the Bike Helmet, BMX Helmet, Crash Helmet, and the Viking Helmet.
Go-Kart
Win all of the carnival and city go-kart races and one will spawn by the school's bike garage. This is easily the fastest vehicle in the game.
Bus
Walk up to any bus stop sign and press Triangle to make a bus appear and take you back to school.
Unlockable & Hidden Clothes
There is a grand total of 308 articles of clothing to be collected, including those purchased in the various stores.
- Bandit Mask: Found in a locker
- Bike Helmet: Win the first bike race in Old Bullworth Vale
- Bike Jersey: Win the first bike race in Old Bullworth Vale
- Black Cowboy Hat: Complete the errand for the hobo by the comics shop
- Black Ninja Outfit: Fill the yearbook
- BMX Helmet: Win the bike race at Bullworth Academy
- Boxing Outfit: Complete the mission "Boxing Challenge"
- Bullworth Gym Pants: Found in a locker
- Bullworth Hoodie - Blue: Found in a locker
- Bullworth Letterman Jacket: Found in a locker
- Bullworth Polo Shirt: Found in a locker
- Cheerful Reindeer Sweater: Complete the mission "Christmas Is Here"
- Cowboy Boots: Found in a locker
- Crash Helmet: Win the first go-kart race at the carnival
- Dunce Cap: Fail 5 classes (do not need to be consecutive)
- Edna Mask: Destroy all 19 Halloween tombstones
- Fast Food outfit: Complete the errand for the Burgers restaurant owner
- Firefighter Helmet: Pull 20 fire alarms
- Gnome Outfit: Destroy all 25 lawn gnomes
- Gold Suit: Buy all the clothes in the game (including those at the carnival)
- Green Ninja Outfit: Complete the mission "Defender of the Castle"
- Grotto Master Outfit: Find all of the Grottos & Gremlins cards
- Halloween Costume: Complete the mission "Halloween"
- Incognito Hat: Complete the errand for the cop in front of town hall
- Low Tops - Red: Found in a locker
- Mascot Outfit: Complete the mission "Nice Outfit"
- Orderly Uniform: Complete the mission "Finding Johnny Vincent"
- Pirate Hat: Beat up the pirate on the island
- Prison Uniform: Serve lawn-mowing detentions 9 times (does not count towards clothing item stat)
- Pumpkin Head Mask: Destroy all 27 Halloween jack-o-lanterns
- Red Ninja Outfit: Complete the mission "The Big Prank"
- Running Shorts: Travel 41.8km on foot
- Spandex Bike Shorts: Travel 100km on bike
- Team Football Jersey: Found in a locker
- Tiny Swimsuit: Complete the errand for the Prep by the lighthouse
- Viking Helmet - Plastic: Destroy all 25 lawn gnomes
- Werewolf Mask: Found in a locker
Unrequired Arcade Games
Future Street Race 2165
Location: Boys dorm, carnival souvenier tent, Blue Skies/Townie safehouse
Cost: $0.05
A very straightforward racing game with an overhead view. At the menu, press Circle to bring up the objective (win all 3 races) and controls (X to accelerate, L-stick to steer, R1 to fire your rockets, and Square to reverse). Arrows on the track that have circles around them give you a speed boost, while electric blockades will fry your ship. The races increase in difficulty a little as you progress.
Future Street Race 3D
Location: Bullworth Vale/Prep safehouse, Carnival souvenier tent
Cost: $0.50
This game is very straightforward; it's basically FSR 2165 in 3D. At the menu, press Circle to bring up the objective (win all 3 races) and controls (X to accelerate, L-stick to steer, R1 to fire your rockets, and Square to reverse). Glowing markers on the ground will give you a speed burst. Watch out for paths blocked off by electricity; you can pass them while the electric field is down, otherwise you'll get fried. The first two races are pretty easy, but the third one is full of tight turns and trigger-happy opponents.
Weapons
Fists/Feet
Used for punching and kicking. You can learn new fighting moves through Gym class and the "A Little Help" odd job. Increase the strength of your punches by visiting the boxing gym in Bullworth Town.
Slingshot
You'll earn your first slingshot for completing the mission "The Setup". It's a simple Y-shaped stick with a rubber band on it. Auto-target with L1, and use R1 to fire (hold it longer to increase your shot's strength). You can also enter manual-aim mode by pressing Up on the D-pad (press Down to get back out of manual aim). For completing "The Candidate", you'll upgrade to the super slingshot, which has a scope. The controls are the same, but you can now zoom by pressing Up twice; in scope mode, press Up/Down too zoom in/out. To go into regular manual-aim, zoom out all the way and then press Down again; then again to exit manual aim.
Eggs
Buy these at a Yum Yum Market.
+ Storyline +
After the first scenes, watch the screen for the game's basic controls as well as some useful tips. Head for school and some Bullies (kids in white shirts) will test you on your first and most important lesson: self defense. You can try and fend off the ambush if you like, but I suggest you keep running (repeatedly tap X). Follow the yellow "X" on the radar to the school's main building, stepping into the blue marker at the door and hitting Triangle to enter. Once inside, go upstairs to the headmaster, Dr. Crabblesnitch's office and step into the yellow marker. If you get busted by a Prefect for fighting, you'll fail the mission and start back at the entrance gate.
===========================================================
When exiting the office, you may notice a blue rubber band on the ground, by the front desk. Don't worry about that now; it's one of the game's collection items I'll cover in the Odd Jobs section. Follow the yellow X to the boys dormitory for more on-screen instructions, on how to fight. On your way, Prefects will try to bust you for violating dress code, so try to avoid them. Once you reach the target, Square is to punch and Triangle is to grapple (grab onto) your opponent. While holding Triangle, you can press Square to punch or press Triangle again to throw the person. However, you'll be given basic commands to follow to formally introduce you to fighting. Hold L1 to lock onto your target, then approach him and press Square three times for a combo punch. Then grab onto him, while simultaneously hitting Square to perform grapple punches, then hit Triangle again to push him away from you. Once he's down, kick him with Square.
Now just use these fighting techniques to further kick his ass and humiliate him in front of his friends. To officially humiliate him once his health meter is empty, target him, then get close and press Circle. When you've finished up with the Bully, you'll activate a couple more cutscenes. Follow your new "friend" around: first get a soda (your health source in this game; $1.00 each) at the nearby vending machine, and read the bulletin board if you want. Next, change into your School Uniform at the closet in your dorm room. After yet another scene, save your game or continue on to the next task.
*From here on out, missions will be marked on your radar with a yellow "X."
1. This Is Your School
Follow Gary around the school. Your first obstacle is Russell, one of the biggest bullies of the school. Be nice and pay the man and he'll leave you alone (target him with R1 and press X to compliment him; then repeat to pay him off with $2). Now go up to the nearby locker with the red marker in front of it and pick the lock by rotating the left analog stick. Keep an eye on your radar. If a Prefect (red dot) is near, press Triangle to let go of the locker and wait until he's gone. Breaking in will unlock the Bullworth Classic cap, which you'll then find in your closet in your dorm room so you can wear it whenever you want. A school Prefect will now try to bust you, so walk up to the trash can ahead of you and press Triangle to get in. Wait until your trouble meter clears before getting back out (Triangle). Next, Gary will lead you to Eunice. Target her (L1) and press X to talk to her. She'll ask you to get her chocolates back, which are marked on your radar with another yellow "X". You'll find them in the boys bathroom on the other side of the school, where you'll need to beat up the kid that stole them. After you get your... uh... sweet reward, follow Gary to the cafeteria so he can introduce you to the main cliques you'll encounter while at Bullworth Academy. Afterwards, you'll have to get to your first class by 9:30, and it's marked on your radar by an orange bell. See the 'Classes' section for details on each class.
Reward: None
*The 'Future Street Race 2165' arcade game is now available in the game room in the boys dorm.
2. Get to Class
Get to your first class before 9:30. It should be Chemistry, right near where you ended up after the last mission. This is simple enough; just press the buttons as they pass through the little square on the screen.
Reward: You now have a chemistry set in your dorm, where you can make fire crackers.
*From now on, you don't have to go to class if you don't want to. However, the rewards are pretty beneficial, so you've really got nothing to lose. They're also required if you plan on reaching 100% game completion. See the Classes section for details.
3. The Setup
8:00am to 7:00pm, by the school's front doors
After the scene, chase after Davis (a Bully). Sprint by repeatedly pressing X while running and jump low walls by pressing Circle when you're near them (you can do this while running). Once you pass the fountain and Davis runs into the Auto Shop area, he'll close the fence behind him, leaving you to beat up another Bully (he'll drop soda once you've done so). Walk up to the gate and repeatedly press Triangle to open it up. Once inside, go around the fence ahead of you and continue chasing after Davis. Soon he'll hide in one of the garages, once again requiring you to fight a Bully. Take care of him, collect the soda if you need it, and then open the garage door to find another (Davis will have escaped through the door on the other side, closing it behind him). This one will also drop soda once he's down, so be sure to pick it up if needed and open the other door to fight two more Bullies; both of them should drop sodas in case you're low on health. Now it's a final battle against Davis, who's armed with a slingshot. Pick up the bricks and trash can lids off the ground (press Triangle), get close, and throw them at Davis (target with L1, throw with R1). Four successful hits should take care of him.
Reward: Slingshot, Bully respect -5
*Throughout the story, your missions will either gain or cost you respect from the different cliques, affecting how they treat you when you're around them.
4. Slingshot
8:00am to 7:00pm, in the boys dormitory
Follow Gary to the old school bus to break in your new slingshot. Auto-target the windows with L1 and use R1 to fire. The longer you hold R1, the stronger your shots become. If you don't release L1, the game will automatically switch your target to a window you haven't shot yet. Once the windows are all broken, Gary will lead you to the football field. Climb up the tree and shoot the jocks. Use the right analog stick to manually aim your slingshot when they're out of range for auto-target and knock out all the jocks.
Reward: Nerd Respect +5
5. A Little Help
8:00am to 11:00pm, in the boys dorm
Go back to the old school bust and walk inside and out the other door. There's a rubberband in there, but again, I'll cover that in the Odd Jobs section so ignore it for now. Walk up to the homeless guy to activate a cutscene. Once that's done, follow the radar's yellow X to the roof of the Auto Shop area and pick up the radio transistor. Be quick about it and avoid fights with the Greasers. Take it back to the hobo and he'll teach you the uppercut (hold Square). Use it on the bum a couple times.
Reward: Uppercut
*Find the other 5 transistors and return them to the hobo to learn more fighting moves. Check out "A Little Help" in the Odd Jobs section for details.
6. Save Algie
8:00am to 7:00pm, at the Library
Your goal is to take Algie to his locker, but you'll hit a few snags along the way. Almost immediately after you leave the Library area, a Bully will attack Algie. Take the guy out and then Algie will need to go to the bathroom, so get him there before the timer runs out, defeating any more Bullies along the way. Once Algie's in the stall, a couple more Bullies will come in and start fighting you. Take them out as quickly as possible. Your trouble meter will rise, so hide in the trash can right outside the door until it dies down or you'll risk getting caught by a Prefect and failing the mission. Once Algie is done emptying his bladder and has washed his hands, take him down the hall to his locker. You shouldn't run into any trouble on the way.
Reward: $5.00, Nerd respect +5, Bully respect -10
*The Errand Odd Job becomes available the next time you enter the boys dorm. Sometimes people will approach you with things they want done. You have no choice but to do this first Errand, for Pete. He wants a package delivered to Beatrice. Target him with L1, then press X to accept the mission. Follow the blue "X" on your radar to Beatrice, walk up to her, and she'll accept the package. You'll earn $5.00 in return. 30 Errands are required to reach 100%.
7. Defend Bucky 8:00am to 11:00pm, in the boys dorm
Prerequisite: "A Little Help" and "Save Algie"
Find Bucky in the Auto Shop area and beat up the two Bullies that are picking on him. If you walk up close to the Bully with the bat, you can enter a Triangle-mashing mini-game and steal his bat. Take it if you can to cause extra damage and end the fight sooner. Continue further into the Auto Shop area to encounter two more Bullies. Once they're taken care of, open up the marked garage door to let Bucky in to get what he needs, then safely show him back out of the area. There are, of course, two more Bullies to take care of.
Reward: Skateboard, Nerd respect +5, Bully respect -10
8. That Bitch
8:00am to 7:00pm, in the girls dorm (your trouble meter will rise for trespassing, so get to the starting marker quick!)
Prerequisite: "A Little Help" and "Save Algie"
Go to the gym and down into the girls locker room. Break into the marked locker to get Beatrice's lab notes. If a prefect appears on your radar, hide in the laundry basket by the sink until he leaves, then continue your work with the lock. Take the notes back to Beatrice.
Reward: None
*Beatrice is now your girlfriend. If you ever see her again, you can compliment her, kiss her, or give her flowers (found in front of the girls dorm) if you want. Otherwise, you don't need to go looking for her. She'll kiss you, reviving some of your health.
9. The Diary
7:00pm to 11:00pm, in front of the girls' dorm
Go around to the back of the school and look for the break in the gate on the low balcony to climb up onto. Climb up the vine fence and then into the marked window. Once inside, be very cautious of Prefects. If any spot you, get out of their eye sight and hide in a trash can. When you get to the classroom, you'll discover that the door is locked. Go downstairs, to the staff room, and get the diary out of the desk. Read it if you like, otherwise, get it back to Beatrice. Avoid the Prefects and exit out the front door.Meet Beatrice back by the girls' dorm.
Reward: $20.00 and a health-inducing kiss
*Another bulletin is on the board, and you've unlocked a picture of Beatrice in your room, one of the game's dorm room trophies (see Miscellaneous section for details).
10. The Candidate
8:00am to 6:30pm, first floor of school
Prerequisite: "Defend Bucky" and "That Bitch"
Get up to the second floor and onto the auditorium balcony to protect Earnest during his speech. All throughout his speech, jocks will show up to throw eggs at him. Keep an eye on your radar for red blips. If they point down, they're on the ground. If they're an "x," they're in the balconies to your left or right, or on the scaffolding above Earnest. Your shots don't even need to be exact - or strong. Just aim close enough that the target turns red and tap R1 to fire; no need to waste time increasing the firing strength. They each take only one hit to get rid of. Eventually the school mascot will show up. He takes three hits to scare off. After he's gone, the jocks will start coming in at a faster rate.
Reward: $10.00, Jock respect -5, Nerd respect +5, Super Slingshot
*You have unlocked Earnest's presidential campaign poster in your room, one of the game's dorm room trophies (see Basics section for details). Before you start the next mission, notice that the clock in the top-left corner of the screen has disappeared. You can use this infinite daylight to do whatever you like, such as destroying the 19 tombstones around campus (they'll still be findable after Halloween if you don't).
11. Halloween
In your dorm room Gary's waiting on your bed; he put a skeleton costume in your closet, so put it on. First exit the room to collect Pete. Your next objective is to find a kid with an arrow over his head to perform one of five required pranks, but there are some things you can do first, if you're looking to reach 100% game completion. Remember, the clock is gone, and it won't reappear until you've completed this mission. If you ever lose Pete and/or Gary during the mission, don't worry, as they aren't required to complete it.
- Destroy the 19 tombstones scattered throughout the campus.
- Destroy the 27 jack-o-lanterns decorating the school campus (they're only out tonight!).
When it's not Halloween, these are both stored together, but if you want to get them while they're out, now's a good time. When you decide to get back to the mission, here are the possible pranks. There are six students with favors, but you only need to do five of them.
- Slap student with "Kick Me" sign: Walk up behind someone and press Square to stick the sign on their back. It's funny if you stick it on a Bully that's talking to another Bully. One second they're in a friendly conversation, the next one's kicking the other's ass.
- Egg 3 students: You'll be given a carton of eggs. Throw them at three students.
- Light Volcano 4000 near some students: This is one you really want to do. With the Volcano 4000 equipped, simply press R1 to light and drop it near a group of students. Stand back and watch the show, it's funny as hell. "Ooh, pretty"... BOOM!
- Hit 3 students with stink bombs: You'll be given some stink bombs to throw at three students.
- Cause 3 students to itch: You'll be given some itching powder to throw at three students.
- Trip 1 student with marbles: You'll be given a bag of marbles to drop in front of a walking student.
Reward: Halloween Costume
12. The Big Prank
Halloween night only, in front of Harrington House
*This is NOT required for 100%*
While Gary is chasing Chad's dog, Chester, around the yard, beat up Chad. With your newfound sack o' crap, go inside the school and to the door of the teacher's lounge (the radar says to enter the school from the front, but there are doors on your side). Once there, press Triangle to drop the bag in front of the door. Gary will light it on fire, then your job is to pull the fire alarm on the opposite side of the hall (Triangle). Immediately after you're rewarded, the teacher will try to grab you. Run for it!
Reward: Red Ninja Costume
13. Character Sheets
8:00am to 9:00pm, in front of the Library
Get to each yellow "x" on the map and beat up the Bullies that have Melvin's sheets. The guys right next to the library don't even require a fight. One will kick you in the nuts and you'll have to rapidly press Triangle to get up. They'll drop the sheets and run. The guy just outside the Library arch will run. Knock him down with a powerful fire of you slingshot, then finish him off to get the sheet. The Bully next to the boys dorm is picking on another Nerd. Use your slingshot strategy again and he'll drop the sheet easily. The last guy is in the Auto Shop area, and he's accompanied by another Bully, both taunting some Nerds. Beat up the guy with the sheets and return them to Melvin for your reward.
Reward: $10.00, Character Sheets dorm room trophy, and no wenches
14. Help Gary
8:00am to 11:00pm
Follow Gary to the parking lot and beat up the Bullies. Make sure no Prefects are around or you'll probably get busted. Once they're all taken care of, follow Gary to the nearby basement door and go inside. Hit the red switch he mentions to open the locked door. In this next room go around to the east side of the cage. Climb over the bent fence (Circle) to get in and activate another blinking switch.In the next room there's no way to get inside the cage. Use your slingshot to hit the broom (press Up to activate manual aim) and knock the switch. In the next room, if you try to activate the switch, nothing will happen. Go to the north end of the cage and find the hole at the bottom. Press R3 (right trigger as a button) to get down and crawl through the opening. There's another rubber band in here, but ignore it for now. Get to the blue arrow on the ground and activate the switch. In the room that Gary goes into, you'll find all the jack-o-lanterns used for Halloween decorations if you didn't already destroy them. Go around and kick them all now (Square) and you'll unlock the Pumpkin Head hat, as well as another trophy in your room.
Now back to the mission. Look for the fire extinguisher to the right of the furnace (you'll have to pick up another radio transistor to get to it; take that to the hobo later). Fire it into the furnace and the steam will stop. Now follow Gary up the stairs, then down another set, to the end of the hall, and into the pit... bastard. If you can get a good distance away from Russell, fire at him with your slingshot or firecrackers. At all costs, avoid his charging attack. If you can move while he's charging you, he might hit the wall and get dazed, giving you a chance to wail on him. When he's right up on you, you won't be able to grapple him, as he's strong enough to reverse it every time. Some quick punches (rapidly press Square) will lower his health fairly quickly. Keep at it and he won't be able to lay a finger on you... for a while. Eventually he'll catch on and knock you over with his stomach or a strong punch. Try using some uppercuts (hold Square), it deals twice the damage of a normal punch. When he taunts the crowd, that's a perfect opening for some more hits.
Reward: Nerd respect +5, Bully respect +100, Russell's shirt as a dorm room trophy, and part of the town is open
===========================================================
1. Hattrick vs Galloway
8:00am to 6:30pm, first floor of school
Find Galloways bottles around the school. One is in the cafeteria behind the stairs to the second floor. Go into the back kitchens to find it in the freezer. You'll probably pick up the rubber band here as well. The other two bottles are on the second floor. One is in the trophy case right outside the office, but don't get that one yet; you'll just draw unwanted attention to yourself. Get the other one, in the girls' bathroom. A teacher will try to bust you for trespassing, so hopefully you'll get the Triangle-mashing mini game to escape. Lose the teacher then hide in a trash bin until you've emptied your trouble meter. Mr Hattrick might walk around this part of the school, so keep an eye on your radar for a red blip with a green cone of vision. Now get to the trophy case and break all the windows until you find the last bottle. Take them all to Ms Philips in the parking lot.
Reward: Camera
*The first two Photography classes are now available.
2. Last Minute Shopping
8:00am to 7:00pm, in the cafeteria
The... uh... cook, Edna, needs some ingredients from town. You're on a time limit, so be quick. First follow the yellow "x" to her bike. Take this road east and then north into town. Do NOT run into anyone on your bike or you'll gain the attention of the police, who'll put you in jail for the night if they catch you. Once you reach the first intersection, keep going straight, to get the first ingredient. It's in Yum Yum Market on your left. Walk up to the meat on the table to pick it up. The next item, Edna's razor, is in The Happy Mullet, across the street. The third and final collection is Edna's laundry, a block east in Worn Ja Fine Used Clothing. Take all these items back to Edna in the cafeteria.
Reward: $15.00
*The "Paper Route"and "Lawn Mowing" Odd Jobs are now available. See the Odd Jobs section for details.
3. Prep Challenge
8:00am to 1:00am, in the boxing club in town
Prerequisite: "Hattrick vs Galloway" and "Last Minute Shopping"
This mission starts at the red marker by the east wall, not the yellow one by the ring. The fighting mechanics aren't the same as usual. You can only punch (Square), dodge (X), and block (L1). You can strengthen your punches by holding Square. I just held L1 while rapidly pressing Square the whole time. Chances are you'll be taken into a second round by the time his health completely drops, but when it does finally empty, knock him out with a strong punch. If you wait too long to knock the guy out, he'll regain health and continue fighting, so be quick. Repeat for the next two opponents (you health meter fills back up each time). They don't get too much harder, it's just that they block a lot more, and their health meters take longer to lower. It took me 3 rounds to defeat the third guy. He was a little ahead of me on health, but in the end, I beat him with a few strong punches.
Reward: The Beach Clubhouse is now your safehouse, Boxing Outfit
4. Movie Tickets
8:00am to 8:00pm, in front of the movie theater
Prerequisite: "Hattrick vs Galloway" and "Last Minute Shopping"
The bitch... er, Pinky, doesn't want to get bad seats in the theater, so it's your job to scare off the rest of the line. Get on the marked bike and the Preps will chase after you, leaving the line. After the scene, go back to the theater and talk to Eunice by targeting her and pressing X to compliment her. If you don't have any chocolates, go get some at the store, then return and give them to her. Once she starts holding your hand, follow the yellow "x" on the radar to the secluded alley (don't you just love the music?). After the kiss, get back to the theater and walk up to the other couple (is it just me, or are they both guys?) to scare them off and watch another cutscene.
Reward: $15.00, Prep respect -5
5. The Eggs
8:00am to 11:00pm, in the boxing club
Back at the gym, go upstairs to talk with the Prep. He'll tell you to buy an Aquaberry sweater before you're let in. So head to the Aquaberry clothing store to pick one up ($17.50). Now back to the gym, upstairs, of course. "Are you English?" "Well, no, I speak this way because I'm very insecure." Hahahaha! Get to the Yum Yum Market down the street to pick up a carton of eggs ($1.50). Now follow the yellow "x" to Tad's house and meet up with the Preps. After the scene the gate has been locked. If you think you can do it, beat up all the Preps. But you need to get the key from the kid that is standing at the gate. Try to get some quick slinghot hits in, or just beat it out of him. Get to the gate and press Triangle to unlock it and leave. Hop on your board and ride away to complete the mission.
Reward: Eggs spawn in your room, Prep respect -10
6. Carnival Date
4:30pm to 11:00pm, in front of the movie theater
You're going to need some flowers for this date, so head over to Yum Yum Market to pick some up ($1.00), then get back to the theater. Ride over to the carnival, buy an admission ticket ($1.00), and go through the gate. After the scene, go play some games to earn 10 tickets and buy Pinky a teddy bear before 1:00am. There are four games to choose from:
Strike Out ($1.00) - You have six baseballs to hit the moving targets in front of you (throw with R1). Hit the catchers (crouching figures) to get a strike and gain points - take one out in each row. Hit the rare baseball mit for a bonus ticket. If you hit a batter (red shirt, holding baseball bat), it's a walk and doesn't count towards your score. If you hit an umpire (white shirt), you're out.
High Striker ($1.00) - Rapidly press X to hit the ball as high as possible. You get 3 tickets if you can make it to the top.
Splish Splash ($1.00) - Just like the Penalty Shots odd job, move the left analog stick to change the direction that the moving ball is going in. Once it's over the target, hit X to throw the ball. If you hit it and knock the guy into the water, you get 3 tickets.
Shooting Range ($2.00) - Try to shoot the cowboys and booze bottles, but avoid the girls. Shoot the rare sheriff star for a bonus ticket.
Once you've earned 10 tickets, find the souvenier tent right outside the "Rides" area and buy the Prize Teddy Bear. Go back outside the tent for a cutscene.
Reward: Pinky is now your girlfriend
*The Prize Teddy Bear is now a dorm room trophy.
7. Race the Vale
8:00am to 11:00pm, in the boys dorm
Prerequisite: "The Eggs" and "Carnival Date"
You'll need a bike for this mission, and I strongly recommend doing atleast one day of Shop class beforehand, so one will spawn in the red-doored garage near the old school bus. The more days you do, the better the bike. If you haven't done, or don't want to do, any classes, start skating towards Bullworth vale and steal the first bike you see - just make sure there aren't any cops around or you'll have to ride back to your dorm to lose them. Once you've got a bike, get to the yellow "x" on the radar to begin the race on the beach. Simply follow the checkpoints. Like I said, if you did some Shop classes and have a decent bike (I had a racing BMX - great bike), you'll leave the other racers in your dust. The path leads through the beach, onto a beaten trail, through some neighborhoods, then back onto the beach. The checkpoints are all very easy to follow, but if you're every unsure, just look at your radar for the next "x." After the race, the bike shop owner will tell you that you can collect your trophy in the shop. However, if you go in there, notice that the marker by the door is a yellow one, meaning you automatically start the next mission. So if you're not ready (you'll need full health), don't go in yet.
Reward: $15.00, Prep respect -10
8. Beach Rumble
8:00am to 11:00pm, in the Shiny Bikes bike repairs shop in Old Bullworth Vale.
Get over to your beach clubhouse to get your trophy back from the Preps. You don't even need to fight them... unless you want to. Just find the guy with the trophy (he was on the bridge for me) and pry it out of his hands in a Triangle-mashing mini game.
Reward: Prep respect -10
*The Bike Races are now unlocked. See the odd jobs section for details. The trophy has also become a dorm room trophy.
9. Panty Raid
7:00pm to 12:00am, by the Come Hither sex shop in Bullworth Town.
As your gym teacher goes back inside the adult store, get to the north side of the girls dorm and climb up the vine fence, into the open window. Go to the far end of the attic (don't worry about the G&G card; I'll cover that in the Odd Jobs section) and down the stairs. If you want to act more stealthy, press R3 to crouch down. Keep an eye on your radar for the teacher patrolling the halls (red blip with green vision cone). If she's coming your way, hide behind the open door so she doesn't see you. When she's walking away from the room you're in, run into the room across the hall and walk over the panties by the bed to pick them up. If the teacher is still gone, run across to the hall to the next room and get the panties in there. Keep going to each room, collecting the panties within. If the teacher ever comes your way, hide in a closet in whatever room you're in or closest to. The room with the stairs to the attic is locked now, so you won't be able to get back up there. When you've collected the last pair of underwear, a girl will freak and pull the fire alarm. Run downstairs, make a right, and go to the end of the hall, out the door. Don't give any teachers the chance to catch you. Mr Burton is waiting outside the school gates for his panties.
Reward: $30.00
*The panties are now a dorm room trophy.
10. Weed Killer
8:00am to 9:00am, 11:30am to 1:00pm, 3:30pm to 7:00pm, in Biology classroom
First, you'll need to put on your Aquaberry Vest and get a haircut from the salon in Old Bullworth Vale. Pick any color and style you want ($12.00, $15.00, or $18.00) then get back to Harrington House and walk in the front door. Walk forward and talk to Bif (target + X) so he can open the door for you. Go up the stairs at the other side of the room and go into the first room on your right. Follow the room around, go through the door guarded by suits of armor, and follow the balcony up to the greenhouse. To the left of the plant, you'll find the poison. Target the Crapulus Maxima with R1 and hold L1 to infect it with the poison. Just hold the trigger until it dies completely. Now the Preps will attack you. Ignore them for now and run out the way you came in. The door to the balcony will be closed, so wait for a Prep to catch up to you. Grab onto him with Triangle, push him towards the door, and press Triangle again and throw him through it to break it open. Take care of as many Preps as you can here or else the next door won't open. From there, just run back outside to finish the mission.
Reward: $30.00
*The Fly Trap is now a dorm room trophy.
11. Tad's House
8:00am to 11:00pm, by the Yum Yum Market
Go to Tad's house. You've still got the key from "The Eggs," so you'll be able to unlock the gate. There are six open windows around Tad's house. There's a Prep by the house, to your left. Take him out with your slingshot. To hit the window, equip your eggs and press Up to go into aiming mode and fire with R1. A Prep will now come around from the south side of the house, so get your slingshot ready and take him out. At this southwest corner of the house, equip your eggs again and quickly throw some into the two windows. Another Prep will be sent out, so once again pull out your slingshot. Throw an egg in this southeast-corner window, then take care of yet another Prep. Stand between the two north windows and quickly fire some eggs in. Three Preps will come out the back door, and one out the front. If you can, take them out from a distance with your slingshot. Russell will run right at them. Once everyone's down, exit the yard through the front gate.
Reward: $15.00, Prep respect -15
12. Boxing Challenge
8:00am to 1:00am, at the end of the dock on the beach in Bullworth Vale
Make sure you have full health before starting this mission. Notice the snow and fallling leaves? Winter's a' comin'! Anyway, get to the boxing club. It's just like the "Prep Challenge" you did earlier, except you only have one fighter - Bif. He's only a little tougher than the last guy you had to fight, so use the same strategies as before. I had him knocked out in two rounds. After the fight, it's back to normal gameplay and there are two Preps you'll have to lay out before heading upstairs. Pick up their sodas if you need 'em. At the top of the stairs, take out your slingshot and use it to knock out the Prep ahead (3 power shots will do it), then enter the door. Your main goal here is to knock out Bif, but he'll have two cronies in the room to help them out. One of them might have a cricket bat, so enter a Triangle-mashing mini game to take it away from him. When the two back-up Preps are knocked out, Bif will hide behind the bar again and two more will come in. The longer you take to empty Derby's health bar, the more Preps he'll call in. Knock them out and finish off Derby to activate the last cutscene of the chapter.
Reward: Boxing Outfit, New Coventry opens up, Nerd respect +10, Prep respect +100
===========================================================
It's Christmas time! It only sticks around for this chapter, so if you like the snow, create a new save file so you can come back to it after you've beaten the game. If you've been wondering why you haven't seen Photography 3 start, it's because New Coventry wasn't opened yet. Well, it's opened now, so you can do that class when it comes back around.
1. Christmas Is Here
In the principal's office
The morning after you first go to sleep during this chapter, a voice on the school intercom will call you down to the principal's office, saying there's a present waiting for you. The clock even disappears during this time. Go change afterwards, before too many people see you.
Reward: Cheerful Reindeer Sweater
2. Nerd Challenge
8:00am to 1:00am, in the Dragon's Wing Comics shop in Bullworth Town
Beat the high score of 1,010 pounds in the arcade game, ConSumo. Once you press X to begin, a menu will show up, displaying all the icons you can eat, and which ones you should avoid. Once you begin, use the left analog stick or the D-pad to move your character around and collect the good icons. Your goal is to fill the meter in the top of the screen. If you fail, keep trying until you get it. As you eat more, your guy gets fatter and the screen becomes more crowded with bad items. The key is patience and waiting, sometimes even standing still, until you've got a clear opening. The most important thing is to stay away from the orange puffer fish.
Reward: Comic shop basement becomes a safehouse, Bottle Rocket Launcher spawns in room
*There's a radio transistor in the basement of the comic shop.
3. Jealous Johnny
8:00am to 11:00pm, in the tunnel entrance to New Coventry
You're going to need to have completed Photography class 1 to get a camera. Find Lola and Gord and take pictures of them from across the street. You need three specific shots: one of them kissing, one of them holding hands, and one of Gord giving Lola a gift. If they see you, they'll just stop walking, so get atleast a street's-width away from them. Once you've got them all, return to Johnny in the tunnel.
Reward: $20.00, Greaser respect +5
4. Cook's Crush
8:00am to 5:00pm, in the cafeteria
Edna needs Ms Philip's perfume, candy, and sedatives for her date. You'll find the perfume in the staff room, but it's guarded by two scientists. To get them away from the door, hit one of them with your slingshot, preferably from a distance. Your trouble meter will of course rise because of this, so lose the teachers and any tailing prefects and hide in a bin until your meter is empty. Even though skating in the halls counts as misconduct, it'll still easily outrun your pursuers quick. Now just run back to the staff room and walk inside. The perfume is on the desk. The next two items are in town. Algernon has the candy; he's standing near the bike shop. Just target him and pay him off to get it. Finally, the sedatives are in the alley behind Easy Drugs. Just kick over the track cans to find them. A prescription bottle will pop out of one of them and you'll automatically have it. Return everything to Edna.
Reward: $40.00
5. Bait
8:00am to 11:00pm, in the tunnel entrance to New Coventry
Find Gord riding his bike around Bullworth Town. To tick him off, just ride next to him and press L1 or R1 to throw a punch from your bike, then lead him to the bike park in New Coventry. Ride into the red garage to trigger a scene. This next part is easier off your bike. Just use your slingshot to take out the Preps.
Reward: $20.00, Greaser respect +5, Prep respect -5
6. Cook's Date
3:30pm to 11:00pm, by Aquaberry in Old Bullworth Vale
Quickly climb up the marked tree (right where the marker was to start the mission). Once you reach the branch, press Triangle to sit on it. Use your slingshot to quickly take out the marked students. For a while, they'll only take weak shots; quick taps of R1. Later, some require a bit more strength. You still need to be very quick though. If Edna's happiness meter empties, you fail the mission.
Reward: $50.00
7. Wrong Part of Town
8:00am to 11:00pm, at the Library
Make sure you have full health before starting. Find Cornelius by the boys dorm and keep the two greasers off him, especially the bigger one. He has a move where he'll grab someone and pull them up off the ground. That will take Cornelius out pretty quick, and if he gets knocked out, you fail. If you've got your bottle rocket launcher loaded, two shots with that will take both of them out. If you lost any health, go to the vending machine in the dorm to recoup. Now that they're taken care of, get to New Coventry and rescue Algie. After the scene, you'll be on the back of a bike, armed with your slingshot. Take out any pursuing Greasers. Stay prepared by holding down R1 until you see one. That way, you've already got your shot powered up and you'll quickly knock them off their bikes. Once you're back at school, walk up to Algie.
Reward: $20.00, Greaser respect -5, Nerd respect +5
8. Tagging
8:00am to 11:00pm, at Harrington House
You've been equipped with some spray paint, which you need to take to New Coventry and tag specific locations. One is in the tunnel where you started the missions for Johnny. To tag, walk into the marker and press Triangle. If you've played The Warriors, you'll know exactly what to do here, but if not, hold X while using the Left analog stick to follow the line on the screen. They've made it much simpler here than in The Warriors, where you have to follow it exactly or you get stopped and have to re-shake your can. Here, there's no risk of mistake. You'll have to re-shake your spray can after a certain amount of use, but that's normal. When Jimmy is shaking the can, keep pressing X so you don't stop spraying. Now you need to get to the marked Yum Yum Market to buy some more paint. Once you exit the store, a bunch of yellow x's will appear on your radar, spread out all over New Coventry. A few of them are arrows pointing up, meaning the tags are at a higher level than you. You need to spray 5 of them.
Reward: Depends on the location of the tags you sprayed; the harder to reach, the more they're worth, Greaser respect -25, Prep respect +5
*While you're exploring town, you'll notice tag locations on some walls. As long as you have spray paint, you can tag there. Just don't let any cops or prefects catch you.
9. Comic Klepto
3:30pm to 11:00pm, in the Dragon's Wing Comics shop
Chase after the comic thief and try to get right up next to him. Throw punches with R1/L1. Avoid any firecrackers he throws at you or they'll knock you off your bike. Once his health meter empties, he'll fall off his bike and disappear (like bodies do in most games where you kill someone). Grab the comic he drops and return it to the shop owner.
Reward: $30.00
10. Greasers Challenge
8:00am to 1:00am, at the Blue Balls pool hall.
Beat up the three Greasers. While switching through my arsenal to find some itching powder (to distract them), I accidentally took a picture of Lucky, adding him to my yearbook. Anyways, once the first three Greasers are down, three more will enter the room. The hangout is yours once you lay them out.
Reward: The Greaser hangout becomes your safehouse
11. Lola's Race
8:00am to 11:00pm, by a sign pointing to Blue Skies Industrial Area
Prerequisite: "Tagging" and "Wrong Part of Town"
It's your second checkpoint race of the story, and you've got a generic BMX bike like the rest of the Greasers. If you're quick with the X button, you should be able to pass them soon enough. Johnny will occasionally catch up to you, but punch him a few times and he'll fall back again. When you enter the trainyard, keep an eye on the tracks ahead of you for moving trains. If you don't take the next two shortcuts through the train tunnels, watch out for Greasers knocking down trees to block your path. Just jump over them. After you pass the school and continue towards Old Bullworth Vale, you'll have to make a right turn onto a beaten trail. Two Greasers will push down trees, so be prepared to jump over them. The finish line is coming up soon.
Reward: Greaser respect -20, Lola is now your girlfriend.
12. Glass House
3:30pm to 7:00pm, in the English classroom
Get to the school parking lot. When you reach it, Mr Hattrick will pull away in his truck. Follow him to his house by either skitching his car (get right up behind it and press Triangle) or simply following him. Don't crash into him too much or you'll fail the mission for attacking his car. Don't follow directly behind him either, because he occasionally slams on his brakes. That would cause you to slam into him, attacking his car, yada yada. Once he gets to his house, enter the property and destroy as much as you can on the front of his house with your slingshot - his car, pottery, and windows. Soon the cops will show up. Run around back, kicking any pottery on your way, and start destroying things back there. There's a greenhouse made almost entirely of glass for you to knock out with your slingshot. Keep an eye on your radar, so when the cops come around back, you can watch their patrol routes and stay out of it. If you do get spotted, just run around the yard and you should lose them pretty easily. Just be sure not to walk into another cop's cone of vision. When you've filled your vandalism meter, run back out of Hattrick's property. He'll be waiting out front with a large cone of vision, and there's no way of escaping it. Even after the mission is complete, Hattrick will be chasing you, so hop on your skateboard and book it.
Reward: $40.00
13. The Tenements
8:00am to 11:00pm, where you usually meet Johnny
Follow the yellow "x" on the radar to a barracaded alley and enter it. Go up to the marker (there's a radio transistor there) and press Triangle to enter the window. Once inside, go through the door ahead, on your left. Beat up the Greaser across the hall and in the room he came out of. Lola's address book is in that room. Exit the room and go down the wide hall. Go into the first room on your right. There's a broken wall you need to break open to continue - make note of it. Go back out in the hall and up the stairs. Use your slingshot to take out the two Greasers across the hall. Go into the room on your left (note another wall that need breaking) and take the Greaser out with your slingshot before he goes onto the balcony. Now go out there yourself and make use of your slingshot on another guy. Continue to the end and enter the room. There's yet another wall in here that needs breaking, but you don't have the appropriate tool yet.
Continue out into the second-floor hall. You'll find Lola's lipstick in the room directly across. Now continue up more stairs and pull out your slingshot again - there are three Greasers up here. Go into the room on your right, then immediately left. Lola's laundry is in this room, and you'll find the guy with the "appropriate tool." Keep a safe distance from him and keep firing your slingshot. If you've got a loaded bottle rocket launcher, that will be better. When he's finally down, grab his hammer and knock through the broken south wall, back into the hallway, and downstairs to the second floor. Go back into the room on your right and smash through the broken wall to get to Lola's keys. Break through the next wall and enter the hallway again on your left. Go downstairs and into the first room on your right. Break through the wall to find Lola's perfume. Break through the next wall and go back out the window. You'll drop the mallet, but there's no use for it anymore. Skate back to Lola to return her things.
Reward: $20.00, Greaser respect -10
14. The Rumble
8:00am to 11:00pm, where you just met Lola
Make sure you have full health before starting this mission. After the scene, follow the yellow "x" to Peanut. He'll get on a bike and haul ass for an alley where you'll have to fight off three Greasers. You fail if you run too far from the fight. Once they're all down, you'll get another cutscene. Afterwards, follow the alley as fast as you can on your bike to lose the cops. You'll never outrun a car on a bike, so just wait 'til the end for another scene. Johnny will be circling the yard on a bike. Stay away from him and use your slingshot to take him down. If you take out the Greasers throwing eggs at you, Petey will be able to control the giant magnet and take Johnny's bike away. However, I find it easier to knock out all the eggers but one, and fire away at Johnny while he's still riding his bike. That way it's less likely he'll hit you if you keep moving around, and you can save your health. If Petey does get to the magnet and Johnny rides under it, he'll be pulled off his bike and then it's just a one-on-one fist fight between you two, and Johnny packs a powerful punch. If you get knocked out, it restarts you from this junkyard fight. When he's finally down, you'll get another cutscene.
Reward: Greaser respect +100, Nerd respect +10
===========================================================
1. Stronghold Assault
8:00am to 9:00pm, at the Library
Walk up to the nearby Nerds to find out where Ernest is. Stuff him into the trash and he'll talk. Now hop the wall on the south side of the Library and knock the Nerd around a little bit. He'll tell you the code to get through the fence is 1138... which you don't actually have to type in. Finish off the nerd and follow the path. Once you hop the first barricade, there are three Nerds you can target from here with your slingshot. Take them down and continue on. Pick up any sodas or weapons they drop. Another three are right after the next barricade. Once you reach the rocks, there will yet again be three Nerds to take out. Follow the turn in the path and shoot the Nerd on the high rock on the right, then two more on the ground after that. Go through the doorway and you'll get a cutscene as you approach the final barricade.
Hop the barricade and take out the two Nerds ahead of you. If you go past the boulder on your right, you'll get shot at by Ernest and his cannon. Between his firing bursts, run to behind the closest short pillar. Work your way northwest, to behind the group of boulders. There's a wall blocking Ernest from a clear shot at you, so use the cover to take out the two Nerds guarding the gate. Now look for the tall pole behind Ernest. Shoot the box at the top and he'll run inside the buildling. The gates will now open, so go up the stairs to the spud cannon. Use it to destroy the doors to the observatory. Shoot any Nerds that appear in the windows or on the balcony to avoid damage from their bottle rocket launchers. You have now completed the first part of this mission.
Reward: Nerd respect -100, Jock respect +5
Hide behind a pillar to avoid the potatoes. Get a position so you just have enough room to target and shoot the marked generators circling around the ceiling of the room, but at the same time avoiding his fire. Each of the four generators takes three shots to destroy. The first ones you have to take out are the ones above Ernest. After the quick scene, he'll throw some firecracker packs down at you - run somewhere you won't get hit by the blasts. He'll keep throwing them, so between launches, shoot at the generators nearest Ernest. The shelf will fall down and he'll be forced to a final section. This time he'll be throwing eggs at you. Stand behind a pillar and get at a safe enough position to shoot at the generators and avoid behing hit.
Reward: Observatory safe house, Spud Cannon, Nerd respect +50
2. Funhouse Fun
8:00am to 11:00pm, in the Library
Get to the funhouse at the carnival before the timer runs out. Once you've entered the mouth, follow the short catwalk to the small hole. Crouch (R3) to get in, then beat up the Jocks that are fighting the Nerds. One of them will drop a soda if you need it. After the scene, climb up on the table and push the blue book. A ladder will drop down on your right for you to climb. Now you're basically playing an old school side-scroller game. Wait for the reapers' scythes to go up before running past them, and enter the door at the end. Use the control panel to stop the reapers and let the Nerds past. Once the three jocks show up, use X to drop the scythes before they pass. Exit the room and walk into the marker to enter the maze. You radar shows the maze's path. To open a door, press the red button beside it. Opening one door will close another, but there are switches on both sides of each door. Go into the first door on your left, then go left and follow the hall as it turns right.
Open the door ahead of you to find Bucky. Now enter the door right next to the one you just opened. Follow the hall around to the open door and you'll find Fatty. Continue following the hall to the next door and go through. This hall leads to a door with a marker in front of it.Open. It's another game where the props try to block your path. Climb up the ladder near the door you just came out of and beat up the Jock. He'll drop a soda if needed. Use the control panel to disable the miners. Now follow the catwalk around to the next Jock and the next control panel. There's one more set of miners you need to disable, and the Jock guarding the next control panel is armed with a bat. Take it from him and knock him out. After the miners are disabled, climb down the nearby ladder and go through the door. Bucky and Fatty are looking at the two mirrors on your right. Once they've joined you, go up the stairs on the left. Walk in front of the curtan to open it up and go through the door at the end of the isle.
Reward: $25.00, Nerd respect +5, Jock respect -10
*While you're already at the carnival, you might as well take care of some odd jobs if you haven't already, if you're going for 100% completion. There are 5 arcade games in the souvenier tent, Go-Karts by the ferris wheel, games spread out all over the place, and of course the rides.
3. Paparazzi
8:00am to 7:00pm, at the Observatory
To get to the observatory, you don't have to follow that long path you did in the mission where you fought Ernest. There's an entrance to the area at northeast the corner of the football field. After the scene, go into the gym, pull out your camera, and take a picture of Mandy. After another scene, go to the girls dorm. Climb up the ladder on the north side of the building and go in through the attic window. Go down the stairs at the other end of the room. You need to get into the bathroom on this floor, but don't let the patrolling teacher see you or she'll kick you out and you'll have to enter through the attic again. Once you make it into the bathroom, take a picture of the shower stall Mandy's in, as you can see her silhouette - but do not enter the shower room or you'll fail the mission! Once you've snapped the shot, go next door to her room (no need to go inside) and take a picture of her shaving her legs. Take the pictures to Ernest at the Library.
Reward: $25.00, Jock respect -10, Nerd respect +5
4. Jocks Challenge
8:00am to 11:00pm, in the gym
It's a game of dodgeball. I'm assuming you've done this in gym class by now. Otherwise, press L2 to bring up the layout of the game and beat the Jocks.
Reward: $15.00 and the Jocks' clubhouse becomes a safehouse
*Beating this mission unlocked the dodgeball dorm trophy.
5. Here's to You Ms. Philips
3:30pm to 7:00pm, in the Art room
You need to pick up some things for Ms Philips. In Bullworth town, head to Worn Ja Used Clothing for her dress. By the time you get there, chances are the Greaser that was spying on you has caught up, so knock him out before continuing - but be quick (if you've got a spare firecracker, that should do it). Next go to Bullworth Vale (another Greaser will follow you) to Aquaberry for her necklace, and Old Bullworth Hair Nails & Beauty for her perfume. Get back to Ms Philips on time and without getting knocked out and you pass the mission.
Reward: $50.00
6. Defender of the Castle
8:00am to 11:00pm, at the observatory
Follow the path to the yellow "x" on your radar. On your way, you'll meet up with a crowd of Nerds. Be prepared for the Jocks to break through this gate, but hold off as many as you can. Once they have destroyed the gate, head back to the fort and take control of the spud cannon above the entrance. Even if you do completely defend the block, you'll still have to return to the fort to protect it. Don't let even one Jock reach the gate or you fail the mission. Hey, atleast you're right next to the starting marker. Once a Jock gets knocked down, it doens't mean he's out, so keep your finger held on R1 and pointed at each Jock until they're completely knocked out.
Reward: Green Ninja Costume, $25.00, Nerd respect +20, Jock respect -10
7. Galloway Away
8:00am to 7:00pm, in the Art room.
Get a bike and get to the dirt trail by the observatory. Follow it east until you reach the marked tunnel. From there, you've got markers all the way to the meeting point. After the scene, follow the trail to your right to the marked tree and climb up. Once you've reached the branch, shimmy over the asylum yard and press Circle to drop down. From here on out, you need to be very stealthy. If you fail, you will appear in front of the gates you met Ms Philips by and you'll have to run all the way over to the tree to get your bike, then go all the way back to school to start again. The first thing you can do is crouch down (R3). Follow the nearby solid bush east, almost to the end. Watch the guard's patrol route. When he's walking away, move out in the open a little ways, pull out your slingshot, and enter first-person viewing mode (press Up twice).
Zoom in on the blinking box at the base of the statue and, when the aiming reticule's red, fire a strong shot. When the lights on the statue go out, a guard will run towards the tree you dropped down from. Use that opening to run to the front doors and go inside. Stay crouching! A guard will come in and out of the room on your right. When he's out, go to the marker on your left and go through the next two doors. After the second door, you'll notice on your radar there are guards in the hallway to the right, so go left. They've got their hands full with a patient, so they won't see you cross the next hallway. Continue to the east wall and make a right. Mr Galloway is in the room just feet away from the doctors, but again, they won't notice you go in.
Reward: $60.00
8. Nice Outfit
8:00am to 7:00pm, at the observatory
Get to the football field and up the tree near the path to the observatory. Shoot at the mascot with your slingshot. Once his meter fills, you'll get a cutscene. If you need it, grab the soda can. Beat up the mascot to take his costume. If you think he's too strong for you, know that, unlike you, he'll tire out from running. So keep running around in circles and he'll tire out. When he's catching his breath, put in a few strong sling shot hits, or use fireworks if you've got them. If he does the move where he goes near the water and gets ready to charge, run out of the way and he might run into the wall. Another good opening for weapon hits.
Reward: Mascot Outfit, Jock respect -10, Nerd respect +5
9. Discretion Assured
8:00am to 9:00pm, in the gym
Get to each of the posters put up by the school and tag 'em up. Once the first two are done, two will pop up in Bullworth town. You'll want a bike for this mission, so head over to the bike garage in the parking lot before going into town. You'll get a cutscene after tagging one of the town posters. You need to have all 5 posters tagged at once to continue with the mission, and a Nerd will keep trying to replace the posters that have been defaced. This is where a bike comes in. It will get you to posters faster than anything else. Try not to atract any cop attention, or this mission will be nearly impossible. If you run out of paint, the store will be marked on the radar, and you'll need to go there to buy some more. Once they're all tagged, meet Mandy at the boys dorm.
Reward: Nerd respect -5, Mandy is now your girlfriend (her picture is now a dorm trophy)
10. The Big Game
8:00am to 9:00pm, at the observatory
Prerequisite: "Nice Outfit" and "Discretion Assured"
Make sure you have full health before beginning this mission. Get a bonus from a kiss if you have to. Ernest has set up agents in the football field, but first you have to prove you can dance before you're let out there. Hold L1 while pressing X to start the Cow Dance and a Chemistry-esque mini game will start. Don't miss a step and you'll be admitted onto the field. Your main conern now is the four agents set up around the field, but if anyone asks you to dance along the way, you've gotta do it.
Agent 1: Behind the east bleachers. Take the ball you're given and get to the marked duffel bag to swap it for the real ball. You'll have to dance for the Jocks before they'll move out of sight. Then walk into the marker to make the switch.
Agent 2: Behind the west bleachers. Go put the glue on the benches. Dance for the football players to they'll move somewhere else and not see you do it. Go up to each marker and press Triangle to apply the glue.
Agent 3: In front of Harrington House. Go into the gym, down the stairs near the locker rooms, and dance for the Jocks to make them leave. Then piss in the cooler. Leave the gym to get another cutscene.
Agent 4: In front of the auto shop area. Get to the football field and drop the marbles in the three markers.
Agent 5 (N/A until first 4 are complete): By the fountain. Get to the scoreboard at the far side of the field and dance for the cheerleaders to make them leave. Walk into the marker in the booth and use the keyboard to change the message on the scoreboard.
Reward: $25.00, Jock respect -10
But wait, there's a second part to the mission! Run around to dodge the balls being thrown at you. Pick them up with Triangle, target one of the football players with arrows over their heads, and throw it back. Keep doing that until all the marked players are knocked out. After the scene, a football player will rush you. Knock him out. Even though the camera is a bit distant, it's a pretty easy fight. After that, it's another football return game. Pick up the balls and throw them back before another player rushes you. Throw the balls at the marked players whenever you get the chance. You don't necessarily have to beat up the Jock that's trying to fight you. Once all the players are knocked out again, they'll go further back and send two more Jocks your way. Once the marked players are finally out, take out Ted. Just a Takedown will suffice.
Reward: Jock respect +100, Nerd respect +10
===========================================================
The last area of the world map, the Blue Skies Industrial Park is now open.
1. Cheating Time
8:00am to 7:00pm, by the school's parking lot
Get to the roof of the auto shop (you should know where the ladder is from "A Little Help"). After the scene, press Up to aim your camera and then look down. Take a picture of the transaction. The next one is at the gym. Go down the stairs, past the locker rooms, and up into the pool area. Turn left and go up the stairs, up to the bleachers. After another scene, take another picture. Now run downstairs and out the door and climb the ladder to your immediate right. Drop down to the dirt trail for another scene. Take a picture of Hattrick making the deal. Hop back over the gate and get back to Mr Galloway for a final scene.
Reward: $60.00
2. Making A Mark
8:00am to 11:00pm, in the boys dorm
Travel to the City Hall building in Bullworth Town. Go up the steps and around the right side of the building. Climb up the marked ladder, go right, hop up the ledge, and climb the next two ladders. Tag the wall up here. There are three spots to tag, and you'll notice that the pattern is bigger than the ones you did in "Tagging" and "Discretion Assured." Climb back down the building, get to the statue out front, and take a picture from there (zoom in until the boarder of the box turns green). Get back to your dorm room.
Reward: Townie respect +25, everyone else except Bullies respect -75
3. Rats In The Library
8:00am to 9:00pm, in front of the Library
Simply pull out your slingshot and kill all 20 rats in the building. They're all on the first floor.
Reward: $30.00, Nerd respect +15, rat in a jar dorm trophy
4. The Gym Is Burning
8:00am to 9:00pm, near the gym
You're under a time limit here, so be quick. Get the fire extinguisher at the top of the stairs to your left and use it to put out the fires by the two of the three marked students. For the two guys that are stuck under something, you'll have to enter Triangle-mashing mini games to pull it off them. The guy that's under the baskebtall hoop will also encounter fire you'll have to put out. Now put out the rest of the fires for another scene. Head downstairs and into the girls bathroom to discover the Townie behind it all. He'll make a run for it, ending the mission.
Reward: $30, Jocks respect +15, burning school banner dorm trophy
5. Finding Johnny Vincent
8:00am to 11:00pm, in the tunnel where you started Johnny's early missions
Prerequisite: "Rats in the Library" and "The Gym Is Burning"
Get to the asylum and climb into the yard using the same tree as in "Galloway Away." Crouch (R3) and get behind the bush just northeast of you. When the orderly is walking the other way, run to the front door and go inside. Just like before, there is an orderly in the room on your right. When he's gone, go through the marked door on your left, and the next. If you look at your radar, you will see that there are two orderlies ahead of you, looking in opposite directions. Take the left hall. When you get to the middle hallway, they will say "I don't know, but he sure does yell alot, huh?" and then they'll split up. One will walk away from your direction and the other will walk towards you, but in the right hall. Continue up the left hall, towards the place where both of them were standing. When the coast is clear, go through the door.
If you look through the window by the next door, you'll see that the orderly that went this way is now sitting on a chair at the opposite end of the room, facing away from you. Go into that room and *open* the far door on your left, by the soda machine - don't go through it yet! There is another caged room on your right with a patrolling orderly inside. Even if you're crouching, he'll see you, so don't give him the chance or you'll be thrown out and will have to go over to the tree again and start over. However, there is a small window of opportunity. When he's looking away from the door you're at, hold X to crouch-run (while you're still crouching, of course) and go to the wall under the cage, and he won't spot you. Move to the wall ahead of Jimmy. When the guard is looking towards the door you were just in, you'll have to make another quick dash to the door, open it, and go through.
There is an orderly patrolling this area, so take the left hall again (note the marked door!). Cross over to the right section and walk into the marker in front of the door Johnny is in. You need to find an orderly suit to put on, but first you need to get past the orderly you just passed again. Crouch behind the short wall below the caged window on the opposite side of Johnny's door. Wait for the patrolling orderly to pass by you (don't worry, he won't see you) and then go straight north to the far wall. Make a right and go through the marked door you saw when you first entered this room. Before going through the next door, look at your radar. A guard is patrolling around a thin wall. When he's on the other side of your door, wait until after he stops at the corner, looks both ways, and head south.
Now go through the door and stay on this side of the wall. He'll stop at the southeast corner of the thin wall, look both ways, and then continue on. Right when he continues to your side of the wall, go to the other. Wait for him to start going north before going through the marked door. Walk up to the sparkling laundry basket to put on the uniform. You don't need to crouch any more. Get to the yellow marker near Johnny's room to talk to the orderly behind the gate. He'll leave so you can go in there through the marked door. Go into the room he was just in and activate the alarm. Follow Johnny to the room where the orderly was sitting on the chair for a scene.
Go to the gate on the north side of the wall (notice it's a little bent up?) and use Triangle to open it. Follow the hallway, turn left, then right (through the open gate), through the gate ahead of you, right again, through the door, through the hall, and left into the room with the marked dor. Walk into the marker to finish the mission. Oh, geez, I just made it out at 1:35 in the morning. I passed out and fell off my scooter before I even got off the trail!
Reward: $30.00, the Orderly Uniform, Greaser respect +25
*The Orderly Uniform is also unlocked as a dorm room trophy.
6. Revenge on Mr. Burton
8:00am to 7:00pm, in the trailer park in Blue Skies
Go to the alley behind the hardware store in Bullworth Town and pick up the bolt cutters. Meet Zoe in the park in Old Bullworth Vale. After the scene, you've got to destroy the other three port-o-potties so Mr. Burton has no choice but to use the one Zoe is rigging. Follow the path you're on south to the main part of the park. The port-o-potties are all here. Shoot them with your slingshot until the door caves in; or if you've got your spud cannon, you'll get it done quicker. You're on a fairly tight time limit, so hurry up. Once they're all deemed out of order, meet up with Zoe again. After the scene, get on the lawn mower and crash into the front of it to send it rolling down the hill.
Reward: $30.00
7. Townies Challenge
8:00am to 1:00am, across the street from the shipping yard in Blue Skies
Beat up the three Townies. A spud cannon will take them out in one shot. Once they're all down, two more will come in to fight you.
Reward: Townies safe house.
8. Preppies Vandalized
8:00am to 11:00pm, in the boxing club in Bullworth Vale
Get to the Greaser hangout in New Coventry. As Jimmy expected, they didn't take the trophies. Get to the warehouse in Blue Skies. Once you enter the building, look to your left, at the far wall - that's where all the tombstones from Halloween are stored out of season, so if you don't want to destroy them now (and I recommend you don't), come back later. As for the mission, keep an eye on your radar for Townies patrolling the building. Avoid their cones of vision (you can't be seen or you fail the mission), crouch down, and go up the stairs at the far end of the warehouse. A safe path would be to *run* straight, on the right side of the first shelf, to avoid the Townie on your left. Then immediately after this shelf, go left, to the other end of the room, to avoid the Townie that's just starting to patrol that right path. Now go up the steps.
Take a picture of the Townies up here (notice the box from "Rats in the Library"?) and you'll get a scene. After the scene, you'll automatically be positioned so that the exiting Townies can't see you. Follow them, but not too fast - notice the one on the far left keeps looking right, through the shelves. Once you get outside, it doesn't matter if they spot you. However, they will try to fight you, so hop on your board/bike/scooter to lose them. Follow the "x" on the map to the docks and take a picture of the Townies burning the Preps' trophies. I think the Townie right near you is supposed to be beating you up, but he was too busy either cheering or hitting himself in the head with his board that he didn't care. Oh well, all the more health for you! Take your picture back to the ungrateful Preps.
Reward: $30.00, Townie respect -25, Prep respect +15
*The next morning you'll be called down to the office. You're "in trouble." However, I had time today, so I did the next mission before I went to sleep.
9. Smash It Up
7:00pm to 11:00pm, at Zoe's house in Blue Skies
Follow Zoe to the Spencer Shipping warehouse and walk into the marker. It's a game. Destroy more stuff than she does in the time limit and you win! Although it may appear a good idea at first, do not use your rubber band ball (if you've unlocked it from collecting all the rubber bands) here. If Zoe gets knocked out, you fail the mission. Look for objects like glass, boxes, and furnature to destroy. Use power kicks or the weapons you have at your disposal. If you run out of things on these ground shelves to break, look for ladders to climb on top of them or go upstairs. There's only a box or two up there, but on the west side, you can jump onto the nearby shelf to get three statues. On the east side of that second floor, there's a board you can walk on to reach the shelf there and destroy some more statues. Jump to the next shelf for even more.
Reward: $60.00 and photo of Zoe dorm trophy (she's now your girlfriend)
10. Go See the Principal
This isn't even a mission. Sorry, Jimmy Hopkins, but you've been expelled from Bullworth Academy. You cannot attend classes anymore.
Reward: Ha! As if!
11. Busting In Part I
8:00am to 11:00pm, in front of the boys dorm
Get to Russell's house in Bullworth Vale. Get on his scooter and follow him to Blue Skies for a scene with Russell crashing through a gate. The next mission starts automatically.
12. Busting In Part II
Automatically begins after completing Part I
Follow Zoe to the open gate and beat up the two Townies in here. They should both drop soda if you need it. Climb up the nearby stairs and press the red button on the right. Now you can safely crawl under the generator to the left of the stairs and beat up two more Townies. One of them will drop soda if you need it. Continue northwest and go up the stairs to press a second red button. Exit the plant the way you came in and follow Zoe to the Red Star building. Go through the door on the left. Grab the spud cannon ammo on the table in here if you're low, and press the red button in the northeast corner. Go back out to Zoe and through the gate you just opened. Follow her to the chem plant.
If a Townie catches up to you during the trip, beat him up before continuing on. When you get to the gate, it's locked. Grab the nearby bike and ride over to the train yard and activate the switch that changes the direction of the tracks. Now go south and activate another switch to turn the train car again. Now go east, into the alley, and beat up the two Townies; they'll both drop soda. Go up the ramp next to Zoe and follow the path around. Look for the board on the ground just before the two Townies you have to fight. Continue following the alley around to the red button. Press it and then hop over the bent fence behind you, down to the alley, and continue following Zoe.
After the scene, Zoe will be distracting the Townies so you can go past them and up the spiraling ramp to fight three Townies, including Omar. Beat them all up. One of them will drop a soda, and Omar will drop the key to the nearby door. Go through it and follow the curving hallway to the door. Walk up to the keypad to open it. When you reach the elevator, Edgar will go down. Climb down the ladder to the right, walk onto the tanks, drop down to the floor, and crawl under the pipes. At the end, go left and balance-walk across the pipe and onto the next platform.
Follow the path around, go down the next ladder, across the next (longer) pipe, and down yet another ladder. Walk towards the elevator for a boss battle. Take out your spud cannon, get as far away from him as you can, and fire away. Once his health is almost half gone, he'll drop his pipe and run through a door. Pick up his pipe and go after him. Use your pipe to beat him down. He'll occasionally block you, but he shouldn't get more than a couple hits in if you keep pressing Square. When his health reaches zero, you'll get a final cutscene.
Reward: Townie respect 100%, Blue Skies poster dorm trophy
13. Complete Mayhem
8:00am to 7:00pm, at Zoe's house
Get to the Wonder Meats factory. Once you enter the area where the cops are, your trouble meter will rise for trespassing. Ignore it. Follow the street as it turns right, then go to the end and make another right. Walk through the door of the red brick building with the yellow "Wonder Meats" sign on it to find Russell in the warehouse. Follow him out. He's quick, so get on your board. After the scene, search the school for the faction leaders (you can do these in any order). Leave Russell to the other two clique members while you take out the leader. Except for Derby, they're all pretty easy, so once he's down, help Russell finish of the other two. They'll both drop soda.
- Greasers (Johnny): In the girls dorm.
- Jocks (Ted): In the Library.
- Preps (Derby): In Harrington House.
- Nerds (Ernest): In the gym. Pathetically easy fight.
Once they're all taken care of, meet Edgar inside the school. You might as well buy some soda to replenish any missing health before walking through the door. Get ready for a final boss battle. Gary is hiding behind a pile of bricks ahead, throwing bricks at you. Your goal is to cross the wooden beam to the platform he's on, and unfortunately, your weapons were taken away during that last cutscene, so you've got no offense. Hide behind the scaffolding on your right. Immediately after Gary throws a brick, he'll duck behind the bricks. There's your chance to start crossing. He'll hit you, but you won't completely fall off. Just keep pressing Triangle to pull yourself back up.
When you get a little over half way across, Gary will start to climb a ladder. Go up after him, but on your way up, he'll drop a wheel barrow full of bigger bricks down. Push your left analog stick left or right and hold it to avoid the hit. At the top, it's two more beam vs brick challenges. If you're quick to reaching the beam, you shouldn't even get hit on the first one. I wasn't hit on the second beam eather, but only because Gary missed his brick shot. Climb the next ladder and avoid another wheel barrow. Climb the rest of the way up, and then walk across the ledge and up the stairs. When you reach the top, a bell will drop. Go towards Gary and two more will drop, in the second row on the left, then two more in the next row on the right. Go around them for a final fight.
One on one, you versus Gary. This is actually a pretty easy fight if you keep nailing Square and don't give him a chance to fight back. If he ever pins you against the railing, mash Triangle to push him back and continue fighting. After each pin-down, you'll fall down to another level, but neither of you will lose any health because of it. When Gary's health is almost gone, you'll both fall through a glass ceiling, into the headmaster's office. Mr Crabblesnitch must have good ears if he heard Gary through glass, three floors below. Enjoy the final scenes and credits (there's no way to skip the latter, and they're long, so pull out a book or something).
Reward: All cliques respect you 100%, Bullworth shield dorm trophy
===========================================================
I suggest going for 100%, otherwise you're probably going to become very board with this game. You, along with Zoe, have been welcomed back into the school, so the classes are available for you again, if you so wish to attend/graduate them.
Classes
Morning classes take place from 9:00am to 11:30am, and afternoon classes are from 1:00pm to 3:30pm. Although these are required for 100% completion, feel free to skip as many classes as you want. Just don't get caught by prefects or cops, or they'll try to bust you. If you fail 5 classes (they don't have to be consecutive), the Dunce Cap is added to your wardrobe. Once you have completed 5 levels of a class, you no longer have to attend it if you don't want to. The usually-orange bell icon that appears on your radar to remind you to go to class will turn grey, signifying that you don't have to go, and prefects/cops won't bust you for not being there. Complete all 5 levels of all 6 classes and you'll unlock the Mortar Board/Graduation Hat. The classes follow a cycle:
Day 1: Chemistry and English
Day 2: Art and Gym
Day 3: Shop and Photography (unlocked at the start of ch.2)
Art
The objective here is to cut out as much of the picture as possible. Memorize the icons that are good and bad, as you're limited to three 'lives' and you'll need all the help you can get - collect the power ups! You can destroy an enemy object by boxing it in, but if it touches the line you are on (excluding the outer border of the picture), you die. Each class the picture becomes more crowded, and the objects move faster. Patience is key. Make a move when you're positive you can, otherwise, just run around the border to avoid the scissors (which follow the lines). If they're coming at you from both directions, cut into the picture and quickly move around one of them, then continue on. The rewards for completing each class are as follows, and yes, each picture is of your large-breasted teacher posing on a couch. Complete all 5 classes to unlock the art set dorm trophy.
Class 1: Kissing improves your health by 25%
Class 2: Kissing improves your health by 50%
Class 3: Kissing improves your health by 75%
Class 4: Kissing improves your health by 100%
Class 5: You can kiss girls without having to give them a gift first
Chemistry
If you've played throuh GTA San Andreas, then you'll probably be familiar with its dancing mini games. This mission is exactly like that. Press the correct button as it passes through the box at the bottom of your screen. The first class only has you using the face buttons (X, O, Square, Triangle), and then it will start to incorporate the shoulder buttons (L1, R1, L2, R2). The patterns are completely random, so I can't help you there, but here are the rewards:
Class 1: You get a chemistry set in your dorm, with which you can make firecrackers.
Class 2: You can make stink bombs with your chem set.
Class 3: You can make itching powder with your chem set.
Class 4: You get max ammo of the things you make with your chem set.
Class 5: The chem set is no longer limited to one use per day.
English
Use the six letters your given to create words. You need atleast 55% to pass the class. Here's the cheat sheet... don't let the teacher see it. If you don't want to cheat, press Triangle to go to the exit menu, but don't exit. Notice the menu's transparent, and the timer is paused? You can see the letters you're given. Write them down on a piece of paper and find as many as you can before continuing.
Class 1: ELLMOW: Elm, Low, Mew, Moe, Owe, Owl, Woe, Meow, Mewl, Mole, Moll, Well, Mellow.
Class 2: FGHITS: Fig, Fit, His, Hit, Ifs, Its, Sit, Figs, Fish, Fist, Fits, Gift, Gist, Hits, Sift, Sigh, This, Fight, Gifts, Shift, Sight, Fights.
Class 3: EILMSS: Elm, Lei, Lie, Mil, Elms, Isle, Leis, Less, Lies, Lime, Mess, Mile, Mise, Miss, Semi, Slim, Isles, Limes, Miles, Seism, Slime, Slims, Smile, Slimes, Smiles.
Class 4: ACNORY: Any, Arc, Can, Car, Cay, Con, Coy, Cry, Nay, Nor, Oar, Ran, Ray, Rya, Yon, Cony, Corn, Cran, Cyan, Narc, Nary, Orca, Racy, Roan, Yarn, Acorn, Carny, Corny, Crony, Rayon, Crayon.
Class 5: ADEGGR: Age, Are, Dag, Ear, Egg, Era, Erg, Gad, Gag, Gar, Rad, Rag, Red, Aged, Dare, Dear, Drag, Dreg, Egad, Gage, Gear, Grad, Rage, Read, Agger, Gager, Grade, Raged, Dagger, Ragged.
The rewards:
Class 1: You can apologise to bullies more effectively
Class 2: Improved taunts (target + Circle)
Class 3: You can apologise to Prefects for small crimes and they'll leave you alone
Class 4: Improved taunts
Class 5: Same as class 3, but with police
Gym
There are two types of gym classes: wrestling and dodgeball. For wrestling, you will be instructed to perform certain moves on your opponent. Perform them successfully three times and you'll pass the class and learn a new fighting maneuver. For dodgeball, just press L2 to bring up the briefing menu. Everything you need to know is right there. My strategy: when you've got the ball, jump to throw the ball at the opponents; it'll almost always knock them down. When it's their ball... keep nailing X to catch it. They will always aim at the person you're in control of, so do your best to catch the ball and not get knocked down. Losing all three members of your team means you lose that round. Win two out of three to pass the class. Complete all 5 classes to unlock the wrestling headgear dorm trophy.
Class 1 (wrestling): Headbutt (while in a grapple [Triangle], hold Square) and 3 Hit Combo (while in grapple, press Square twice, then hold Square).
Class 2 (dodgeball): Improved weapon accuracy.
Class 3 (wrestling): Grapple Takedown (while in a grapple, press Circle), Knee Drop Takedown (while in a Grapple Takedown, press Circle), and 3 Hit Combo Takedown (while in a Grapple Takedown, press Square twice, then hold it).
Class 4 (dodgeball): Improved weapon accuracy.
Class 5 (dodgeball): Improved weapon accuracy.
Photography
This class unlocks when you complete Chapter 1 of the story. For this class, you just have to take pictures of things. Equip your camera and press Up to go into aiming mode. Move Jimmy with the left analog stick and move the camera with the right. You can zoom in and out with Up and Down. To take a picture, press R1. To exit the camera viewing mode, zoom out all the way then press Down again. Your objectives are marked on your radar for classes 1 and 4. Class 3 doesn't unlock until you've completed chapter 3 of the story missions, as it requires you to visit New Coventry. For class 4, the vantage points for your shots are what's marked on your radar. You're also on a time limit, so hopefully you've completed atleast one Shop class, so you can grab a bike to get around faster (if not, there should be one parked just outside the school gates). Complete all 5 classes to unlock the Picture of Ms Philips dorm trophy.
Class 1: Flags around the campus.
Class 2: 3 random students in the school.
Class 3: Travel to New Coventry and take 3 pictures of hobos (look for guys with 'hobo' clothes or a face like Santa) and/or dogs.
Class 4: Bullworth Academy, the lighthouse on the beach in Bullworth Vale, the carnival, Bullworth Dam, and the church (if you cross the dam to get there, you might pick up a radio transistor for the 'A Little Help' odd job).
Class 5: Go to the carnival and see the Freak Show, by the ferris wheel. Take a picture of each freak: The Skeleton Man, The Bearded Woman, the Siamese Sisters, Midget Wrestling, the Crazy Painted Man, and the Last Mermaid.
The rewards:
Class 1: Unlocks a black & white camera and the photo album, where you can save 5 pictures.
Class 2: Unlocks the Yearbook Photos odd job.
Class 3: You can now save 15 photos in your photo album.
Class 4: Unlocks the digital camera, which takes pictures in color.
Class 5: You now earn double the tickets at the carnival games.
Shop
This class unlocks when you complete Chapter 1 of the story. You're too young to work on cars (notice the Stallion from the GTA series?), so they stuck you with bikes. It's just like Chemistry, only the button presses are more of a rapid pressing, and it involves rotating the left analog stick. Luckily the patterns are not random, so I can give them to you here:
Class 1: L stick clockwise, rapid X, L stick counter-clockwise
Class 2: L stick clockwise, rapid Square, rapid X, L stick counter-clockwise
Class 3: Clockwise, X, clockwise, Square, counter-clockwise
Class 4: Counter-clockwise, X, clockwise, Square, Circle, clockwise
Class 5: Circle, Triangle, clockwise, X, counter-clockwise, Square, Circle, counter-clockwise
The rewards (bike stats increase the higher the class) spawn in the red garage in the school's west parking lot, and other garages as you unlock the rest of the town. Pass all 5 classes to also unlock the bike frame dorm trophy.
Class 1: Basic BMX
Class 2: BMX
Class 3: Racing BMX
Class 4: Hot Rod BMX
Class 5: Best BMX
===========================================================
===========================================================
Day 1: Chemistry and English
Day 2: Art and Gym
Day 3: Shop and Photography (unlocked at the start of ch.2)
The objective here is to cut out as much of the picture as possible. Memorize the icons that are good and bad, as you're limited to three 'lives' and you'll need all the help you can get - collect the power ups! You can destroy an enemy object by boxing it in, but if it touches the line you are on (excluding the outer border of the picture), you die. Each class the picture becomes more crowded, and the objects move faster. Patience is key. Make a move when you're positive you can, otherwise, just run around the border to avoid the scissors (which follow the lines). If they're coming at you from both directions, cut into the picture and quickly move around one of them, then continue on. The rewards for completing each class are as follows, and yes, each picture is of your large-breasted teacher posing on a couch. Complete all 5 classes to unlock the art set dorm trophy.
Class 1: Kissing improves your health by 25%
Class 2: Kissing improves your health by 50%
Class 3: Kissing improves your health by 75%
Class 4: Kissing improves your health by 100%
Class 5: You can kiss girls without having to give them a gift first
If you've played throuh GTA San Andreas, then you'll probably be familiar with its dancing mini games. This mission is exactly like that. Press the correct button as it passes through the box at the bottom of your screen. The first class only has you using the face buttons (X, O, Square, Triangle), and then it will start to incorporate the shoulder buttons (L1, R1, L2, R2). The patterns are completely random, so I can't help you there, but here are the rewards:
Class 1: You get a chemistry set in your dorm, with which you can make firecrackers.
Class 2: You can make stink bombs with your chem set.
Class 3: You can make itching powder with your chem set.
Class 4: You get max ammo of the things you make with your chem set.
Class 5: The chem set is no longer limited to one use per day.
Use the six letters your given to create words. You need atleast 55% to pass the class. Here's the cheat sheet... don't let the teacher see it. If you don't want to cheat, press Triangle to go to the exit menu, but don't exit. Notice the menu's transparent, and the timer is paused? You can see the letters you're given. Write them down on a piece of paper and find as many as you can before continuing.
Class 1: ELLMOW: Elm, Low, Mew, Moe, Owe, Owl, Woe, Meow, Mewl, Mole, Moll, Well, Mellow.
Class 2: FGHITS: Fig, Fit, His, Hit, Ifs, Its, Sit, Figs, Fish, Fist, Fits, Gift, Gist, Hits, Sift, Sigh, This, Fight, Gifts, Shift, Sight, Fights.
Class 3: EILMSS: Elm, Lei, Lie, Mil, Elms, Isle, Leis, Less, Lies, Lime, Mess, Mile, Mise, Miss, Semi, Slim, Isles, Limes, Miles, Seism, Slime, Slims, Smile, Slimes, Smiles.
Class 4: ACNORY: Any, Arc, Can, Car, Cay, Con, Coy, Cry, Nay, Nor, Oar, Ran, Ray, Rya, Yon, Cony, Corn, Cran, Cyan, Narc, Nary, Orca, Racy, Roan, Yarn, Acorn, Carny, Corny, Crony, Rayon, Crayon.
Class 5: ADEGGR: Age, Are, Dag, Ear, Egg, Era, Erg, Gad, Gag, Gar, Rad, Rag, Red, Aged, Dare, Dear, Drag, Dreg, Egad, Gage, Gear, Grad, Rage, Read, Agger, Gager, Grade, Raged, Dagger, Ragged.
The rewards:
Class 1: You can apologise to bullies more effectively
Class 2: Improved taunts (target + Circle)
Class 3: You can apologise to Prefects for small crimes and they'll leave you alone
Class 4: Improved taunts
Class 5: Same as class 3, but with police
There are two types of gym classes: wrestling and dodgeball. For wrestling, you will be instructed to perform certain moves on your opponent. Perform them successfully three times and you'll pass the class and learn a new fighting maneuver. For dodgeball, just press L2 to bring up the briefing menu. Everything you need to know is right there. My strategy: when you've got the ball, jump to throw the ball at the opponents; it'll almost always knock them down. When it's their ball... keep nailing X to catch it. They will always aim at the person you're in control of, so do your best to catch the ball and not get knocked down. Losing all three members of your team means you lose that round. Win two out of three to pass the class. Complete all 5 classes to unlock the wrestling headgear dorm trophy.
Class 1 (wrestling): Headbutt (while in a grapple [Triangle], hold Square) and 3 Hit Combo (while in grapple, press Square twice, then hold Square).
Class 2 (dodgeball): Improved weapon accuracy.
Class 3 (wrestling): Grapple Takedown (while in a grapple, press Circle), Knee Drop Takedown (while in a Grapple Takedown, press Circle), and 3 Hit Combo Takedown (while in a Grapple Takedown, press Square twice, then hold it).
Class 4 (dodgeball): Improved weapon accuracy.
Class 5 (dodgeball): Improved weapon accuracy.
This class unlocks when you complete Chapter 1 of the story. For this class, you just have to take pictures of things. Equip your camera and press Up to go into aiming mode. Move Jimmy with the left analog stick and move the camera with the right. You can zoom in and out with Up and Down. To take a picture, press R1. To exit the camera viewing mode, zoom out all the way then press Down again. Your objectives are marked on your radar for classes 1 and 4. Class 3 doesn't unlock until you've completed chapter 3 of the story missions, as it requires you to visit New Coventry. For class 4, the vantage points for your shots are what's marked on your radar. You're also on a time limit, so hopefully you've completed atleast one Shop class, so you can grab a bike to get around faster (if not, there should be one parked just outside the school gates). Complete all 5 classes to unlock the Picture of Ms Philips dorm trophy.
Class 1: Flags around the campus.
Class 2: 3 random students in the school.
Class 3: Travel to New Coventry and take 3 pictures of hobos (look for guys with 'hobo' clothes or a face like Santa) and/or dogs.
Class 4: Bullworth Academy, the lighthouse on the beach in Bullworth Vale, the carnival, Bullworth Dam, and the church (if you cross the dam to get there, you might pick up a radio transistor for the 'A Little Help' odd job).
Class 5: Go to the carnival and see the Freak Show, by the ferris wheel. Take a picture of each freak: The Skeleton Man, The Bearded Woman, the Siamese Sisters, Midget Wrestling, the Crazy Painted Man, and the Last Mermaid.
The rewards:
Class 1: Unlocks a black & white camera and the photo album, where you can save 5 pictures.
Class 2: Unlocks the Yearbook Photos odd job.
Class 3: You can now save 15 photos in your photo album.
Class 4: Unlocks the digital camera, which takes pictures in color.
Class 5: You now earn double the tickets at the carnival games.
This class unlocks when you complete Chapter 1 of the story. You're too young to work on cars (notice the Stallion from the GTA series?), so they stuck you with bikes. It's just like Chemistry, only the button presses are more of a rapid pressing, and it involves rotating the left analog stick. Luckily the patterns are not random, so I can give them to you here:
Class 1: L stick clockwise, rapid X, L stick counter-clockwise
Class 2: L stick clockwise, rapid Square, rapid X, L stick counter-clockwise
Class 3: Clockwise, X, clockwise, Square, counter-clockwise
Class 4: Counter-clockwise, X, clockwise, Square, Circle, clockwise
Class 5: Circle, Triangle, clockwise, X, counter-clockwise, Square, Circle, counter-clockwise
The rewards (bike stats increase the higher the class) spawn in the red garage in the school's west parking lot, and other garages as you unlock the rest of the town. Pass all 5 classes to also unlock the bike frame dorm trophy.
Class 1: Basic BMX
Class 2: BMX
Class 3: Racing BMX
Class 4: Hot Rod BMX
Class 5: Best BMX
===========================================================
Odd Jobs
1) Collected during the story mission "A Little Help." It's on the roof of the auto shop; find the ladder leaning against the building to climb up there.
2) In the school's boiler room. You'll (unintentionally) have to collect this during the mission "Help Gary."
3) In a short alley in New Coventry, right next to the window you crawl into during the mission "The Tenements." I don't think there's any way to avoid picking it up then.
4) On the the road on the dam between Old Bullworth Vale and Bullworth Town. You take a picture of the dam in Photography 4, and it's the quickest way to get to the church you also have to take a picture of.
5) In the basement of Dragon's Wing Comics in Bullworth Town. This place becomes your safehouse for completing the mission "Nerd Challenge."
6) By the back door of the Mexican Restaurant across the street from the Shiny Bike Shop.
Now take these transistors to the hobo behind the old school bus in the school's west parking lot for the "A Little Help" odd job.
Bullworth Academy campus

1) From the northeast corner of the football field, follow the brick path. Instead of turning left, to the observatory, go right, and follow the dirt path until you reach a tunnel on your right (keep an eye on your radar). Follow this tunnel to the next trail. On your right will be another tunnel entrance, where you'll find the card. The card is not in the image because I accidentally collected it during the mission "Galloway Away."
2) In the observatory's yard, east of the entrance gate (behind the stairs that lead to the spud cannon).
3) In the boys locker room in the gym, in the toilet stall closest to the door.

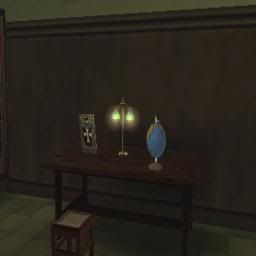

4) Climb up the ladder next to the door to the gym's pool building and drop down into the yard on the other side of the gate. Follow the wall north until it turns; the card is by a bush.
5) In the Library, by the globe in the southeast corner of the first floor.
6) On the school's south balcony. Hop up onto the lower balcony, then climb the vine fence to get to the higher level.

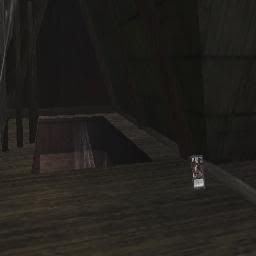
7) Behind a dumpster in the auto shop area.
8) Just north of the entrance to the parking lot, there's a dirt trail branching off the driveway and heading south. Follow it a short ways until you find a break in the rocks on your left. The card is below the gap in the high fence.
9) Go to the north wall of the girls dorm and climb the ladder into the attic. The card is at the far end, by the stairs.
Old Bullworth Vale
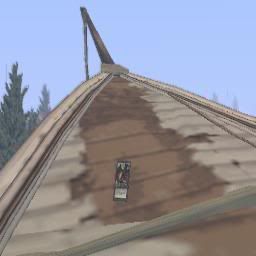
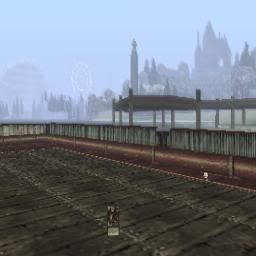

10) You'll find an island between the carnival and the school. If you look at your map, there's a brown shape in the water by the southeast side of the island. That's a half-sunken ship, where you'll find the card.
11) Just southeast of the dock on the beach, there's a platform out in the water. Get on it via the ramp at its east corner.
12) At the end of lighthouse's narrow dock.
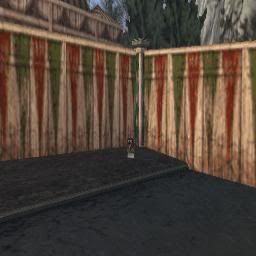
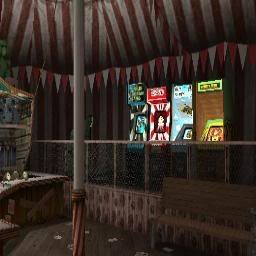
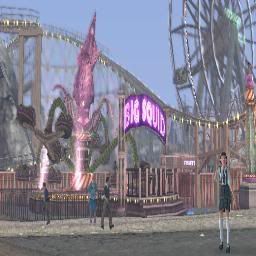
13) In the corner of the parking lot by the entrance to the carnival.
14) In the carnival's souvenier tent, in front of the arcade machines.
15) Ride the Big Squid at the carnival.

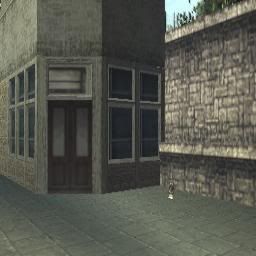
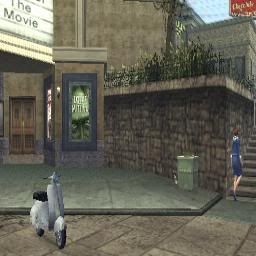
16) Behind the car in front of Tad Spencer's House. You'll have to complete the mission "Tad's House" before you can enter Spencer Estates.
17) In the area at the top of the stairs on the west side of the Burger Restaurant.
18) By the trash can in front of the movie theater.

19) At the top of the rock-stairs by the bridge at the southeast corner of the beach.
20) By a grave stone in the cemetary.
Bullworth Town


21) In the yard on the south side of Leighson's Bank. Go around back and crawl in through the little hole to reach it.
22) Behind the Dragon's Wing Comics shop, at the bottom of the stairs.
23) In your bedroom in the basement of the Dragon's Wing Comics shop, on the couch. You need to complete the mission "Nerds Challenge" before it becomes a safehouse.
24) In the alley behind The Happy Mullet hair salon.
25) On the low south roof of the police station (by City Hall). Use the ladder around back to climb up there.
26) On the dumpster behind the building next to (south of) the police station.
27) In front of the abandoned motel by the entrance to New Coventry.
New Coventry
 [ . . . . . . . . . . #29 photo n/a . . . . . . . . . . ]
28) On the traintracks above the Bullworth Town entrance, by the train cars. Use the dirt trail south of the entrance to get up there.
29) By the dirt trail that runs up to the railroad tracks south of New Coventry's west entrance. I accidentally collected this one, so I don't have a picture yet.
30) In The Final Cut, where you purchase clothes.


31) From the east bus stop, follow the street north, left, then right. Enter the trail on your left. The card is on the right side, just before the left turn.
32) In the alley just west of the eas bus stop, on a low roof. You can climb up onto the dumpster to reach it.
33) Across the street to the southwest of the bike garage, by the orange traffic cone on the platform.
Blue Skies Industrial Park
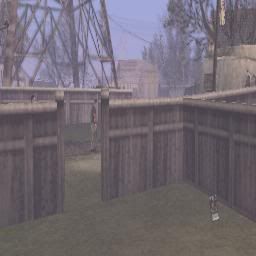
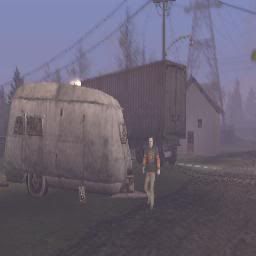
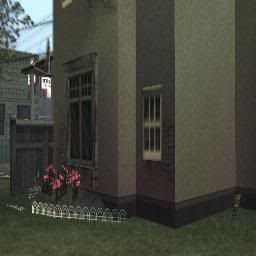
34) When entering Blue Skies from New Coventry, take the first dirt trail on your left. After the trailer on your left, kick the wooden gate until it brakes. The card is on your left in this yard.
35) When entering Blue Skies from New Coventry, take the second dirt trail on your right. Just after the train track, there is a trailer on your right, with the card on the other side.
36) Behind Zoe's house; break down the wooden gate to get back there. Or, if you don't know who Zoe is or where she lives: when entering Blue Skies from New Coventry, take the third dirt trail on your right. Zoe's house is the one right after the medical center's white & red cross sign.
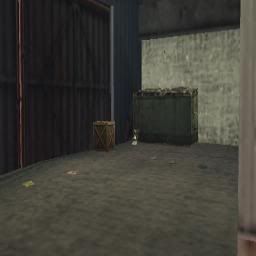
37) Behind your safehouse; break down the wooden gate to get back there. Or, if you haven't unlocked the Blue Skies safehouse yet: just south of the entrance to the docks area, look for a "Desiccant Juice" billboard (white with purple lettering and an orange wavy stripe). Break down the wooden gate below it to find the card.
38) In your safehouse, unlocked in the mission "Townies Challenge."
39) Go up the stairs by the south bus stop. It's by the building with the red and white chequer pattern on its lower half.
40) From the south bus stop, go east and turn left at the street (under the high "Keep Out" sign; it opens during the mission "Busting In Part I"). Follow the street as it turns right, then make another right into the area with the brick "Wonder Meats" warehouse. Go around to the east side of the building and go through the door. Turn left, then go straight, all the way to the wall. The card's on your left.
Reward: Grotto Master outfit
Bullworth Academy campus

1) On the second floor of the Library, between some book shelves on the north wall.
2) Go to the south side (outside) of the Library and hop the short wall. Then hop the wall on your immediate right. The rubber band is right in the middle of this path.
3) Go to the south side (outside) of the Library and hop the short wall. When you get to where the path narrows and there are tall boulders on either side, look straight ahead and you'll see it laying in the grass.

 [ . . . . . . . . . . #06 photo n/a . . . . . . . . . . ]
4) From #3, continue following the path and go between the next two large boulders forming a narrow 'doorway.' Look to your left and you'll see it by a tunnel entrance.
5) In front of the Jocks' clubhouse, at the west end of the football field.
6) By the door to the gym's indoor basketball court.

7) In a shower stall right inside the girls locker room in the gym.
8) Climb the first ladder by the door to the gym's pool and drop down onto the dirt path. The band is by some bushes on your right.
9) In the water in the school fountain, between Harrington House and the auto shop.
 [ . . . . . . . . . . #12 photo n/a . . . . . . . . . . ]
10) On a bench in an auto shop garage.
11) Directly west of the school's front doors.
12) In the cafeteria's freezer; walk through the kitchen to get there.
 [ . . . . . . . . . . #15 photo n/a . . . . . . . . . . ]
13) In the principal's office, right inside the door.
14) Enter the school's boiler room and go down the stairs on your right (not straight ahead of you). Go around to the opposite side of The Hole and into the L-shaped hallway. It's at the end.
15) Enter the school's boiler room and go down the stairs ahead of you (not to your right). Make a right, into the next room. The rubber band is inside that fenced-in area. There is a hole you can crawl under on the left/west side.
16) By the northwest corner of the boys dorm.
17) Inside the boys dorm, at the north end of the hallway.
18) By the south (outside) door of the girls dorm.

19) In the girls dorm, at the top of the stairs.
20) In the girls dorm, by the showers in the bathroom.
21) From the school's front gates, look directly north. A little to your left you'll see that the wall is broken. The rubber band is just beyond that break.
 [ . . . . . . . . . . #24 photo n/a . . . . . . . . . . ]
22) In the school's west parking lot, by the red garage door where your bikes from Shop class are stored.
23) Inside the old school bus in the west parking lot.
24) Halfway down the driveway to the west parking lot, there is a dirt trail that leads off the driveway and goes south behind the parking lot and auto shop. Follow it as it curves to the left, around a boarded up tunnel. Break through the boards and you'll find the rubber band inside.

25) Halfway down the driveway to the west parking lot, there is a dirt trail that leads off the driveway and goes south behind the parking lot and auto shop. Follow it as it curves to the left, around a boarded up tunnel. When you're almost past the tunnel, there is a grass path that branches off to the left. Follow the path and in a few feet there will be a tree bridging two high grassy platforms. The band is on the tree.
Old Bullworth Vale

26) At the end of the pier on the beach.
27) Press Select to bring up your map. Look southeast of #26 for a small patch of beach by the school. Normally you wouldn't be able to reach that until chapter 5, but you can swim there from the Bullworth Vale beach. The band is right in front of the tunnel entrance.
28) Swim to the island south of #26, to the small beach near the southwest corner. Follow the plankts of wood connecting the rocks to the grassy cliffs. When you reach the other end, turn left and follow it to the end, climbing up the rock to get the band.
29) From the southwest end of Bullworth Vale's beach, get in the water and follow the rocks on your right. When they make a sharp right, look ahead and you'll see a rock formation going over the water, almost like a short tunnel. Swim through it and get to the beach. Immediately on your right will be a tunnel. At the other end, use the tree-bridge to get to the rock and collect the band.
30) In the Freak Show at the carnival, in front of the Crazy Painted Man.
31) From the east end of the tunnel that leads to the carnival, follow the street north until it turns right. At the turn, look for the building with a blue awning on your left. Go up the tall flight of stairs next to it and follow the road west. Make your first left (street, not driveway). Just before the loop in the road, go onto the driveway on your left and follow it through the 'tunnel' in the house. The band is at the foot of the broken table/ramp.


32) From the driveway in #31, continue to the loop and get onto the dirt trail and take your first right, to a small area with benches and a good view of the beach and carnival. The band is by the far guard rail.
33) Get on the trail behind the lighthouse and follow it north. When the trail turns up and to the left, look to the right to find the band by a bush.
34) In the alley behind the bike shop, east of the red bike garage.
35) In the grass behind the Burgers restaurant, behind a short vine fence.
36) In the planter next to the Aquaberry store.
37) In the dressing room of the Aquaberry store.

38) On the second floor of the boxing club, between the bar and the trophy case.
39) Outside the boxing club, at the southeast corner.
40) At the northeast end of the beach.


41) From the northeast end of the beach, follow the path west and follow it as it curves north. When you reach the street, turn left. After the first house on your left, you'll find the rubber band laying next to a tree.
42) From the east side of the Burgers restaurant, go north and take your first left. Enter Old Bullworth Vale Gardens on your right, then immediately turn right again once inside. Follow this path as it curves slightly east, to the broken table (a ramp facing east). The band is right next to the ramp.
43) In the gazebo in the Old Bullworth Vale Gardens park.
44) On the westernmost north-south road on the map, you'll find Hattrick Manor at the south end, where the road turns east. From Hattrick Manor, go north to the next driveway. If you follow the wall a little further north, you'll find that the part of the top gate is missing. Hop the wall, then hop the vine fence right behind it. Go to the south side of the steps in front of the house and you'll find another vine fence with a low section you can hop over. The band is under the tree in that small yard.
45) In the northwest corner of the basketball court in the northeast corner of the map (from #44, follow the street north a few yards and look to your right).
46) I don't think you'll be able to reach this one until you've completed the mission "Tad's House." In the gazebo of the Spencer Estate (the yard on the north side of Tad's house).
47) From the basketball court mentioned in #45, use the northeast exit to reach the street. Across the street to the northeast, you'll find a house with an open front gate. The band is on the north side of the garage.
48) From the basketball court mentioned in #45, use the northeast exit to reach the street and go east to the "T" intersection. Use the gate that's leaned up against the wall across the street to get into the yard (you'll be trespassing, so keep your eyes peeled for men in white clothes). Look ahead and to your left and you should spot the band under the small bridge.
49) Go in the cemetary by the dam, to the east wall of the church. There's a broken section of wall you can jump to get to the church. Walk around to the west door to collect the band.
Bullworth Town
50) From the trail that goes to the dam, cross the street and go down the paved hill. On your left will be the Oil Spill gas station. Use the ladder leaning against the west wall to get to the roof and collect the band.
51) In the basement of the Dragon's Wing Comics shop.
52) In the alley across the street from the Mexican Restaurant.

53) Go up the ramp behind the abandoned movie theater near New Coventry's southwest entrance, walk on the board to pass over the gap between this building and the next, then climb up the latter on your immediate left. Turn left and you'll see the band on the roof of the theater. To get there, I started at the other end of the roof you're on now and used some of the length of the it to gain speed with my skateboard and jump across.
54) From the abandoned theater mentioned in #53, follow the sidwalk north; it's right next to the yellow "This Week" sign.
55) Behind the statue in front of the town hall-like building.
56) Go up the first set of stairs in front of the town hall-like building and take a left, up another short set of stairs. The band is in the grass on your left.
57) Go around the east side of the town hall-like building and climb the ladder. Go right and hop up onto the higher platform, the turn left and climb up the next ladder. The rubber band is on this level.
New Coventry

58) Go to the northeast neighborhood of New Coventry and get onto the dirt trail that heads back west. When it turns south, look in the grassy corner for the rubber band. It's right up by the fence.
59) Enter New Coventry through the tunnel on the west side (where you meet Johnny for his early missions), go into the first alley on your left.
60) In front of the Yum Yum Market.
61) From the bike garage, go directly south. After the first red storage container on your left, look into the alley it's walling off and you should spot the band by the trailer.
62) In the parking lot next to the Blue Balls Pool hall.
63) On the northernmost road in the northeast corner of New Coventry, you'll find the band in a short alley on the north side of the road.
Blue Skies Industrial Park
-If you haven't completed the story missions yet, watch out for the Townies clique; they'll attack you on sight!).
64) This is accessible before Blue Skies is even unlocked. In fact, it's only accessible from New Coventry. Just get on the railroad in New Coventry (there's a trail behind the train yard across the street from the Yum Yum Market that leads up to the tracks) and follow it to the south end.
65) In the trailer park, in front of a trailer with a couch sitting out front, and a neon "OPEN" sign in the window.
66) From the southwest exit of the trailer park, follow the road south then turn right to go under the train tracks. Go through it and turn right (like you have any other choice...), then left immediately after the BMX bike. Follow the dock and turn right at the end, then left, then left again at the end, up the ramp. See the abandoned boat in the water? That's where your rubber band is.
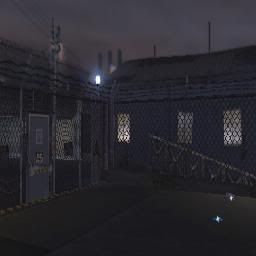
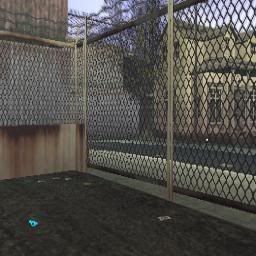
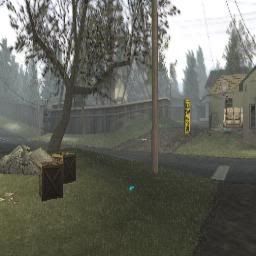
67) From the southwest exit of the trailer park, follow the road south then turn right to go under the train tracks. Go through it and turn right (like you have any other choice...), then left immediately after the BMX bike. Follow the dock and turn right at the end. Go straight and turn right again when you hit the wall. Follow this path around to a caged-in area with the band.
68) From the southwest exit of the trailer park, look across the street and you'll see a small fenced-in area. The band is in there. Climb over the low wall on the east side of the cage.
69) When entering Blue Skies from the north bridge, follow the road south until you see a yellow "Bust Stop" sign on your right. The band is on the ground right next to that sign.
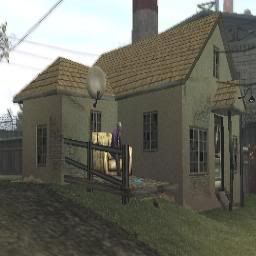
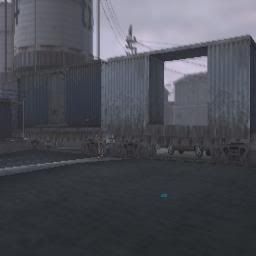
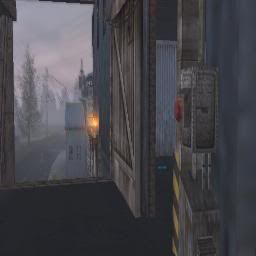
70) On the porch across the street to the east of #68.
71) From #68, go south and turn right after the first semi trailer on your right. The band is on the ground in front of the trailer, between that and an open train car.
72) From the trailer mentioned in #70, cross the street to the east and go south a few yards. On the east side of the road, there is a metal ramp going up two levels. There is a door you can open on both of the levels. The rubber band is behind the higher of the two doors.

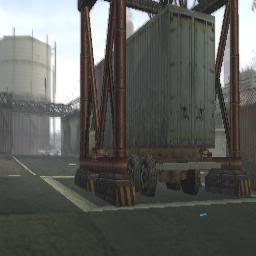
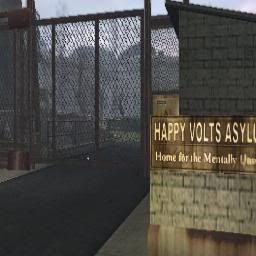
73) Look for the Spazz Industries building east of the southern bus stop. At the southwest corner of the building, there is a part of fence missing above the short wall enclosing the pile of storage containers. Climb into the yard and you'll spot the band right away.
74) Across the street to the south and then west of Spazz Industries, you'll find a shipping yard with a large truck underneath a crane. The band is behind the truck.
75) Right inside the front gates of the Happy Volts Asylum. To get in there, use the same strategy as in the mission "Galloway Away." Crouch-walk behind the bushes, which should lead you straight to the front gate. To get back out, find the building just south of the rubber band (there's a ladder leaning against its back wall). Climb up the tree nearby to get back onto the dirt trail.
Reward: Rubber Band Ball (weapon that ricochets off walls)
This is all done with one of the transistors in the story mission of the same name. Go to the school's west parking lot and you'll find an old school bus. Go inside and out the other door. If you have collected at least one transistor, there will be a marker to begin "A Little Help _," the blank standing for the number of the mission. Each time you collect a transistor, an "H" icon will appear on the radar. Visit the hobo and he'll teach you a fighting move. Use them on him 3 times to master it. You'll get a special cut-scene once he's received all the transistors and taught you all the moves.
1) Uppercut (hold Square)
2) Leg Sweep (press Square, then hold Square)
3) Heavy Kick (press Square twice, then hold Square)
4) 5 Hit Combo (press Square 5 times)
5) Roundhouse Kick (press Square 3 times, then hold Square)
6) Overhead Punch (press Square 4 times, then hold Square)
Each game costs $0.50 to play. The racing games aren't required for 100%, so they'll be covered in the Basics section.
ConSumo
Location: Carnival souvenir tent, Dragon's Wing Comics shop basement
High Score: 1,010
Don't worry about this now, as you'll have to beat the high score in the mission "Nerd Challenge." For the sake of this guide though, I'll post the gist of the game here. Use the left analog stick or the D-pad to move your character around and collect the good icons. Your goal is to fill the meter in the top of the screen. If you fail, keep trying until you get it. As you eat more, your guy gets fatter and the screen becomes more crowded with bad items. The key is patience and waiting, sometimes even standing still, until you've got a clear opening. Stay away from the orange puffer fish. This game's actually pretty easy once you get used to it.
Nut Shots
Location: Carnival souvenir tent
High Score: 69,900
Once you begin, the controls and good/bad icons will be displayed on-screen. Destroy the enemies (Hornets, Bats, Eagle) on screen by shooting Nuts at them (X). Avoid flying into the trees or below falling animals or you will lose a life. Destroy 10 Hornets to fight Bats. Destroy three of those to unlock an Eagle. Kill the Eagle to score high. Avoid attacks from the Bats, Bees, and the Salmon missiles the Eagle drops. The Eagle will take several shots before it loses its feathers and drops dead. You score points by destroying animals. Obviously the longer you last, the more animals you can harm.
Monkey Fling
Location: Carnival souvenir tent, New Coventry/Greasers safe house
High Score: 333
Fling your Poo (X or R1) to knock down Bananas (to eat and gain more poo) and and Spiders (poo kills them). Spiders are worth 2 points a piece, while eating bananas is worth 3. I used to have so much trouble with this game because I conserved my poo for the spiders. When I realized eating was actually worth points, I went all out, shooting at both the bananas and spiders, and before long, I had surpassed the high score on my first try!
There's an island between the carnival in Bullworth Vale and the school. On its southeast beach, there's a pirate just waiting to attack you. Knock his sorry ass out (notice his leg isn't really missing; it's tied up behind him!).
Reward: Pirate Hat
The bike you use in these races is the one you bring to the marker - or if you don't have a bike, you're given the same one as your opponents. You can even race on a scooter if you've purchased the one from the carnival. The only downside to the scooter is that it doesn't turn very well at speed. There are 7 races you need to win here. Try to lose your opponents, but if they're giving you trouble, get right up next to them and throw your fists around with L1/R1. If you've got firecrackers, drop those and they'll knock them off their bikes. The next checkpoint isn't always immediately visible, so keep an eye on your radar so you know where to turn.
Location: Old Bullworth Vale, in the alley on the east side of Shiny Bikes, 12:00pm to 11:00pm
Prerequisite: "Beach Rumble"
Rewards:
Race 1: $20.00, Bike Helmet, and Bike Jersey
Race 2: $25.00
Race 3: $30.00
Race 4: $35.00
Race 5: $40.00
Race 6: $45.00
Race 7: $50.00
Location: Bullworth Town, in the alley on the north side of Shiny Bikes, 12:00pm to 11:00pm
Prerequisite: "Beach Rumble"
Race 4 is full of last-second turns, so keep your eyes peeled for the directions that the checkpoint markers are pointing.
Rewards:
Race 1: $20.00
Race 2: $25.00
Race 3: $30.00
Race 4: $35.00
Location: New Coventry, just outside the train yard, 12:00pm to 11:00pm
Prerequisite: "Beach Rumble"
Rewards:
Race 1: $30.00
Race 2: $40.00
Location: Bullworth Academy, by the parking lot, 12:00pm to 11:00pm
Prerequisite: "Beach Rumble," win all 13 other bike races
This is a long one, taking you halfway around the campus, through Blue Skies, and back to the school.
Reward: $50.00, BMX Helmet
Location: The boxing gym. From the bridge that leads to the school, go east and take your first right (street) turn. The gym is straight ahead. Available 3:30pm to 12:30am.
Goal: Defeat Challenger 4 and one "Random Challenger"
You should know how to box from the missions you've done in here during the story mode. The controls are still displayed at the bottom-left corner of the screen. My strategy is to just keep nailing Square, and get a strong punch (hold Square) in whenever I can. Both of you will regain some health at the beginning of another round. Once his health meter is emptied, knock him out with a final strong punch. Don't wait too long to knock him out or he'll regain health.
Reward: Your punches increase in strength for each level completed, $20.00
Pretty self-explanatory. The story mode alone, as well as some of the odd jobs, will create need for enough of these on their own so you can wait until afterwards to stand in front of a vending machine all day chugging the rest down.
Reward: Sodas become free
My total clothing item count, including both these and the unlockable/hidden clothes (see basics), is 308.
School Store
On the first floor of Bullworth Academy
Head:
- Bullworth Cap - Team ($3.50)
- Bullworth Cap - Green ($3.50)
- Bullworth Visor - Classic ($3.50)
- Bullworth Visor - Green ($3.50)
- Bullworth Visor - Red ($3.50)
Upper Body:
- Bullworth Letterman Jacket ($?.??; I found this in a locker)
- Gray Bullworth T-Shirt ($3.50)
- Team Polo Shirt ($3.50)
- Team T-Shirt ($3.50)
- Team B-ball Jersey - White ($3.50)
- Team B-ball Jersey - Red ($3.50)
- Team B-ball Jersey - Blue ($3.50)
- Bullworth Hoodie - Gray ($6.00)
- Team Zip-Up ($8.00)
- Bullworth Zip-Up - Green ($8.00)
- Astronomy Club Vest ($7.00)
- School Sweater ($7.00)
- Bullworth Sport Jacket ($11.00)
Left Arm:
- Team Sweatband - Blue ($2.00)
- Team Sweatband - Red ($2.00)
- Team Sweatband - White ($2.00)
Right Arm:
- Team Sweatband - Blue ($2.00)
- Team Sweatband - Red ($2.00)
- Team Sweatband - White ($2.00)
Legs:
- School Shorts ($5.00)
- Bullworth Gym Shorts - Blue ($5.00)
- Bullworth Gym Shorts - White ($5.00)
- Bullworth Gym Shorts - Red ($5.00)
Feet:
- Gym Shoes ($6.00)
- Cheap Dress Shoes ($10.00)
TOTAL: $133.50+ (Letterman Jacket)
Carnival Souvenier Tent
- Devil Horn Hair Band (15 tickets)
- Some Incredibly Strange Hat (40 tickets)
- Clown Trousers (40 tickets)
- Clown Shoes (40 tickets)
- "I'm With Stupid" T-Shirt (20 tickets)
- Big Novelty Watch (10 tickets)
- Clown Wig (40 tickets)
- Beaded Bracelet (15 tickets)
- Checkered Party Hat (20 tickets)
- Angel Halo Hair Band (15 tickets)
TOTAL: $133.50
Aquaberry
Blue shirt icon in Old Bullworth Vale
Head:
- Luxury Stud Hat - Gray ($14.00)
- Luxury Stud Hat - Brown ($14.00)
- Luxury Stud Hat - Black ($14.00)
- Panama Hat ($25.00)
- Porkpie Hat ($25.00)
- Top Hat ($55.00)
Upper Body:
- Aquaberry Vest ($17.50; bought during the mission "The Eggs")
- Aquaberry Sweater ($17.50)
- Aquaberry Shirt ($17.50)
- Rough 'n Rich Shirt - White ($12.50)
- Rough 'n Rich Shirt - Blue ($12.50)
- AB Casual Polo - Black ($14.00)
- AB Casual Polo - Brown ($14.00)
- AB Casual Polo - Blue ($14.00)
- Zip Sweater - Crimson ($17.50)
- Zip Sweater - Slate ($17.50)
- Zip Sweater - Forest ($17.50)
- Zip Sweater - Coal ($17.50)
- Urban Parade Sweater ($28.00)
- Lambswool V-Neck Sweater ($28.00)
- LS Training Jacket ($28.00)
- LS Casual Jacket ($28.00)
- Duffel Coat ($50.00)
- Tuxedo Jacket ($100.00)
Left Arm:
- Aquaberry Watch - Gold ($35.00)
- Aquaberry Watch - Steel ($25.00)
- Aquaberry Watch - Silver ($30.00)
- Aquaberry Watch - White Gold ($35.00)
Right Arm:
- Bracelet - Gold ($30.00)
- Bracelet - Silver ($30.00)
- Bracelet - Steel ($25.00)
- Bracelet - Onyx ($25.00)
Legs:
- LS Casual Pants - Gray ($20.00)
- LS Casual Pants - Black ($20.00)
- Aquaberry Slacks - Slate ($28.00)
- Aquaberry Slacks - Cream ($28.00)
- RnR Shorts - Black ($14.00)
- RnR Shorts - Burgundy ($14.00)
- RnR Shorts - Green ($14.00)
- RnR Shorts - Tan ($14.00)
- RnR Shorts - Blue ($14.00)
- Tuxedo Pants ($70.00)
Feet:
- LS Casual Moccasins ($18.00)
- LS Casual Sneakers ($18.00)
- RnR Suede Sneakers ($18.00)
- Aquaberry Loafers ($22.50)
- Aquaberry Boots ($25.00)
- Country Boots ($25.00)
- Italian Shoes ($35.00)
TOTAL: $1,213.50
Worn Ja Used Clothing
Blue shirt icon in Bullworth Town
Head:
- Ball Cap - Blue and White ($6.00)
- Ball Cap - Black ($6.00)
- Ball Cap - White ($6.00)
- Ball Cap - Quartered ($6.00)
- Ball Cap - White and Green ($6.00)
- Ball Cap - White and Blue ($6.00)
- Tradesman Cap - Blue ($7.50)
- Tradesman Cap - Brown ($7.50)
- Wool Hat - Boarder Style ($7.50)
- Wool Hat - Urban Style ($7.50)
- Beach Bucket Hat ($8.50)
- Urban Bucket Hat ($8.50)
- Newsie Hat ($8.50)
- Old Time Racing Hat ($10.00)
- Shortbeaked Cap ($8.50)
- Unionist Hat ($10.00)
- Lumberjack Hat ($10.00)
- Cowboy Hat - Brown ($14.00)
Upper Body:
- Soccer Polo - Snow ($7.00)
- Soccer Polo - Emerald ($7.00)
- Rugby Jersey - LB ($7.00)
- Rugby Jersey - Celt ($7.00)
- Football Jersey - Green ($7.00)
- Football Jersey - Black ($7.00)
- Hockey Jersey - Blue ($7.00)
- Hockey Jersey - Black ($7.00)
- Dark Side Baseball Jersey ($7.00)
- Bright Side Baseball Jersey ($7.00)
- Tiki Shirt ($9.00)
- Hawaiian Shirt ($9.00)
- Lips Long T-Shirt ($9.00)
- 68 Long T-Shirt ($9.00)
- Urban Sports Long T-Shirt ($9.00)
- Zip Up Black Hoodie ($10.00)
- Sevener Black Hoodie ($10.00)
- Conduct Hoodie ($10.00)
- Green Bomber Jacket ($12.00)
- Black Hooded Jacket ($12.00)
- Jean Jacket ($12.00)
Left Arm:
- Classic Watch ($13.00)
- Black Digital Watch ($13.00)
- Black Sports Watch ($13.00)
- Blue Sports Watch ($13.00)
- Low Profile Watch ($13.00)
Right Arm:
- Good Luck Wrist Band ($6.50)
- Wristband - Black ($10.00)
- Wristband - Brown ($10.00)
- Wide Wrist Band - Black ($11.00)
- Wide Wrist Band - Brown ($11.00)
Legs:
- Track Pants - Green ($10.00)
- Track Pants - Black ($10.00)
- Army Cargo Pants ($12.00)
- Desert Cargo Pants ($12.00)
- Ratty Jeans ($14.00)
- Soccer Shorts - Snow ($9.00)
- Soccer Shorts - Emerald ($9.00)
- 3/4 Shorts - Tan ($11.00)
- 3/4 Shorts - Brown ($11.00)
- 3/4 Shorts - Black ($11.00)
- Beach Shorts ($9.00)
- Cargo Shorts ($11.00)
- Crisp Jeans ($14.00)
Feet:
- Urban Loafers - Brown ($9.00)
- Urban Loafers - Black ($9.00)
- Fashion Boots - Tan ($12.50)
- Fashion Boots - Brown ($12.50)
- Skate Shoes - Black ($9.00)
- Urban Walker Classic ($7.00)
- Urban Walker Canvas ($7.00)
- Riot Shoes - Classic ($7.00)
- Riot Shoes - Caramel ($7.00)
- Riot Shoes - Chocolate ($7.00)
- Riot Shoes - Black ($7.00)
- Budget Basketball Sneaks ($7.00)
- Workman Boots ($10.00)
- Brown Loafers ($17.00)
- Country Shoes ($20.00)
TOTAL: $729.50
The Final Cut
Barber shop in New Coventry
- Cap - Blue ($5.00)
- Cap - Purple and Black ($5.00)
- Cap - Red and Tan ($5.00)
- Cap - White and Black ($5.00)
- Cap - Yellow and Black ($5.00)
- Cap - Black and Red ($5.00)
- Army Cap ($5.00)
- Army Bucket Hat ($5.00)
- Army Wool Hat ($5.00)
- Bandana - Blue ($3.50)
- Bandana - Red ($3.50)
- Bandana - Black ($3.50)
- Skater Beanie - Black ($5.00)
- Skater Beanie - Red ($5.00)
- Skater Beanie - Gray ($5.00)
Upper Body:
- T-Shirt - White ($5.00)
- T-Shirt - Blue ($5.00)
- T-Shirt - Red ($5.00)
- T-Shirt - Yellow ($5.00)
- T-Shirt - Green ($5.00)
- T-Shirt - Black ($5.00)
- T-Shirt - Gray ($5.00)
- Undershirt - Black ($3.00)
- Undershirt - Blue ($3.00)
- Undershirt - Gray ($3.00)
- Long T-Shirt - White ($9.00)
- Long T-Shirt - Dark Blue ($9.00)
- Long T-Shirt - Yellow ($9.00)
- Long T-Shirt - Light Blue ($9.00)
- Long T-Shirt - Red ($9.00)
- Long T-Shirt - Green ($9.00)
- Long T-Shirt - Black ($9.00)
- Long T-Shirt - Gray ($9.00)
- Metal T-Shirt ($9.00)
- Creepy Clown T-Shirt ($9.00)
- Fool Hammer T-Shirt ($9.00)
- New Flannel Shirt ($9.00)
- Worn Flannel Shirt ($9.00)
- Punk Hoodie ($11.00)
- Army Sweater - Green ($11.00)
- Army Sweater - Black ($11.00)
- Hoodie - Black ($9.00)
- Hoodie - Blue ($9.00)
- Hoodie - Gray ($9.00)
- Rock On Shirt ($7.00)
- Rocker Hoodie ($9.00)
- Army Jacket ($13.00)
- Arctic Camo Jacket ($13.00)
- Forest Camo Jacket ($13.00)
- Black Bomber Jacket ($13.00)
- Old School Punk Vest ($22.50)
- Leather Jacket ($30.00)
Left Arm:
- Cheap Digital Watch ($9.00)
Right Arm:
- Red Bandana ($3.00)
- Narrow Studded Punk Brace ($7.00)
- Square Studded Brace ($7.00)
- Wide Studded Punk Brace ($9.00)
- Spiky Studded Punk Brace ($9.00)
- Leather Archer Brace ($11.00)
- Black Restraint Brace ($13.00)
- Black Bracelet ($12.00)
Legs:
- Jogging Pants ($6.00)
- Ripped Jeans ($12.50)
- High Cuffed Jeans ($10.00)
- Black Cargo Pants ($10.00)
- Desert Cargo Shorts ($8.00)
- Camo Cargo Shorts ($8.00)
- Forest Camo Cargo Pants ($8.00)
- Cut-Off Camo Shorts ($6.00)
- Cut-Off Jean Shorts ($6.00)
- Plaid Punk Pants ($15.00)
- Pistol Pants ($20.00)
Feet:
- Low Tops - Black ($6.00)
- Low Tops - Gray ($6.00)
- Low Tops - Green ($6.00)
- Low Tops - Red ($6.00)
- Low Tops - Brown ($6.00)
- Skate Shoes - Green ($9.00)
- Skate Shoes - Red ($9.00)
- Skate Shoes - Brown and Tan ($9.00)
- Skate Shoes - Black ($9.00)
- Fat Sneaks - Black and White ($12.00)
- Fat Sneaks - Gray and White ($12.00)
- Fat Sneaks - Gray ($12.00)
- Fat Sneaks - Red and Gold ($12.00)
- Fat Sneaks - Black and Red ($12.00)
- Blue Runners ($10.00)
- Brown Runners ($10.00)
- White B-Ball Shoes ($13.00)
- Shiny White Sneakers ($16.00)
- Old Worn Boots ($12.00)
- Army Boots ($12.00)
- Motorcycle Boots ($20.00)
TOTAL: $820.50
GRAND TOTAL: My calculations might be wrong, but when I added all this up, I came up with $2,167.50 and 255 tickets. However, my 'Money Spent on Clothing' stat says $2,919.50.
Reward: Gold Suit (Elvis costume)
Odd Jobs
6 Radio Transistors
1) Collected during the story mission "A Little Help." It's on the roof of the auto shop; find the ladder leaning against the building to climb up there.
2) In the school's boiler room. You'll (unintentionally) have to collect this during the mission "Help Gary."
3) In a short alley in New Coventry, right next to the window you crawl into during the mission "The Tenements." I don't think there's any way to avoid picking it up then.
4) On the the road on the dam between Old Bullworth Vale and Bullworth Town. You take a picture of the dam in Photography 4, and it's the quickest way to get to the church you also have to take a picture of.
5) In the basement of Dragon's Wing Comics in Bullworth Town. This place becomes your safehouse for completing the mission "Nerd Challenge."
6) By the back door of the Mexican Restaurant across the street from the Shiny Bike Shop.
Now take these transistors to the hobo behind the old school bus in the school's west parking lot for the "A Little Help" odd job.
=========================================================== 40 Grottos & Gremlins Cards
Bullworth Academy campus
1) From the northeast corner of the football field, follow the brick path. Instead of turning left, to the observatory, go right, and follow the dirt path until you reach a tunnel on your right (keep an eye on your radar). Follow this tunnel to the next trail. On your right will be another tunnel entrance, where you'll find the card. The card is not in the image because I accidentally collected it during the mission "Galloway Away." image
2) In the observatory's yard, east of the entrance gate (behind the stairs that lead to the spud cannon). image
3) In the boys locker room in the gym, in the toilet stall closest to the door. image
4) Climb up the ladder next to the door to the gym's pool building and drop down into the yard on the other side of the gate. Follow the wall north until it turns; the card is by a bush. image
5) In the Library, by the globe in the southeast corner of the first floor. image
6) On the school's south balcony. Hop up onto the lower balcony, then climb the vine fence to get to the higher level. image
7) Behind a dumpster in the auto shop area. image
8) Just north of the entrance to the parking lot, there's a dirt trail branching off the driveway and heading south. Follow it a short ways until you find a break in the rocks on your left. The card is below the gap in the high fence. image
9) Go to the north wall of the girls dorm and climb the ladder into the attic. The card is at the far end, by the stairs. image
Old Bullworth Vale:
10) You'll find an island between the carnival and the school. If you look at your map, there's a brown shape in the water by the southeast side of the island. That's a half-sunken ship, where you'll find the card. image
11) Just southeast of the dock on the beach, there's a platform out in the water. Get on it via the ramp at its east corner. image
12) At the end of lighthouse's narrow dock. image
13) In the corner of the parking lot by the entrance to the carnival. image
14) In the carnival's souvenier tent, in front of the arcade machines. image
15) Ride the Big Squid at the carnival. image
16) Behind the car in front of Tad Spencer's House. You'll have to complete the mission "Tad's House" before you can enter Spencer Estates. image
17) In the area at the top of the stairs on the west side of the Burger Restaurant. image
18) By the trash can in front of the movie theater. image
19) At the top of the rock-stairs by the bridge at the southeast corner of the beach. image
20) By a grave stone in the cemetary. image
Bullworth Town:
21) In the yard on the south side of Leighson's Bank. Go around back and crawl in through the little hole to reach it. image
22) Behind the Dragon's Wing Comics shop, at the bottom of the stairs. image
23) In your bedroom in the basement of the Dragon's Wing Comics shop, on the couch. You need to complete the mission "Nerds Challenge" before it becomes a safehouse. image
24) In the alley behind The Happy Mullet hair salon. image
25) On the low south roof of the police station (by City Hall). Use the ladder around back to climb up there. image
26) On the dumpster behind the building next to (south of) the police station. image
27) In front of the abandoned motel by the entrance to New Coventry. image
New Coventry
28) On the traintracks above the Bullworth Town entrance, by the train cars. Use the dirt trail south of the entrance to get up there. image
29) By the dirt trail that runs up to the railroad tracks south of New Coventry's west entrance. I accidentally collected this one, so I don't have a picture yet.
30) In The Final Cut, where you purchase clothes. image
31) From the east bus stop, follow the street north, left, then right. Enter the trail on your left. The card is on the right side, just before the left turn. image
32) In the alley just west of the eas bus stop, on a low roof. You can climb up onto the dumpster to reach it. image
33) Across the street to the southwest of the bike garage, by the orange traffic cone on the platform. image
Blue Skies Industrial Park
34) When entering Blue Skies from New Coventry, take the first dirt trail on your left. After the trailer on your left, kick the wooden gate until it brakes. The card is on your left in this yard. image
35) When entering Blue Skies from New Coventry, take the second dirt trail on your right. Just after the train track, there is a trailer on your right, with the card on the other side. image
36) Behind Zoe's house; break down the wooden gate to get back there. Or, if you don't know who Zoe is or where she lives: when entering Blue Skies from New Coventry, take the third dirt trail on your right. Zoe's house is the one right after the medical center's white & red cross sign. image
37) Behind your safehouse; break down the wooden gate to get back there. Or, if you haven't unlocked the Blue Skies safehouse yet: just south of the entrance to the docks area, look for a "Desiccant Juice" billboard (white with purple lettering and an orange wavy stripe). Break down the wooden gate below it to find the card. image
38) In your safehouse, unlocked in the mission "Townies Challenge." image
39) Go up the stairs by the south bus stop. It's by the building with the red and white chequer pattern on its lower half. image
40) From the south bus stop, go east and turn left at the street (under the high "Keep Out" sign; it opens during the mission "Busting In Part I"). Follow the street as it turns right, then make another right into the area with the brick "Wonder Meats" warehouse. Go around to the east side of the building and go through the door. Turn left, then go straight, all the way to the wall. The card's on your left. image
Reward: Grotto Master outfit
===========================================================
75 Rubber Bands
Bullworth Academy campus
1) On the second floor of the Library, between some book shelves on the north wall. image
2) Go to the south side (outside) of the Library and hop the short wall. Then hop the wall on your immediate right. The rubber band is right in the middle of this path. image
3) Go to the south side (outside) of the Library and hop the short wall. When you get to where the path narrows and there are tall boulders on either side, look straight ahead and you'll see it laying in the grass. image
4) From #23, continue following the path and go between the next two large boulders forming a narrow 'doorway.' Look to your left and you'll see it by a tunnel entrance. image
5) In front of the Jocks' clubhouse, at the west end of the football field. image
6) By the door to the gym's indoor basketball court.
7) In a shower stall right inside the girls locker room in the gym. image
8) Climb the first ladder by the door to the gym's pool and drop down onto the dirt path. The band is by some bushes on your right. image
9) In the water in the school fountain, between Harrington House and the auto shop. image
10) On a bench in an auto shop garage. image
11) Directly west of the school's front doors. image
12) In the cafeteria's freezer; walk through the kitchen to get there.
13) In the principal's office, right inside the door. image
14) Enter the school's boiler room and go down the stairs on your right (not straight ahead of you). Go around to the opposite side of The Hole and into the L-shaped hallway. It's at the end. image
15) Enter the school's boiler room and go down the stairs ahead of you (not to your right). Make a right, into the next room. The rubber band is inside that fenced-in area. There is a hole you can crawl under on the left/west side.
16) By the northwest corner of the boys dorm. image
17) Inside the boys dorm, at the north end of the hallway. image
18) By the south (outside) door of the girls dorm. image
19) In the girls dorm, at the top of the stairs. image
20) In the girls dorm, by the showers in the bathroom. image
21) From the school's front gates, look directly north. A little to your left you'll see that the wall is broken. The rubber band is just beyond that break. image
22) In the school's west parking lot, by the red garage door where your bikes from Shop class are stored.
23) Inside the old school bus in the west parking lot. image
24) Halfway down the driveway to the west parking lot, there is a dirt trail that leads off the driveway and goes south behind the parking lot and auto shop. Follow it as it curves to the left, around a boarded up tunnel. Break through the boards and you'll find the rubber band inside.
25) Halfway down the driveway to the west parking lot, there is a dirt trail that leads off the driveway and goes south behind the parking lot and auto shop. Follow it as it curves to the left, around a boarded up tunnel. When you're almost past the tunnel, there is a grass path that branches off to the left. Follow the path and in a few feet there will be a tree bridging two high grassy platforms. The band is on the tree. image
Old Bullworth Vale
26) At the end of the pier on the beach. image
27) Press Select to bring up your map. Look southeast of #26 for a small patch of beach by the school. Normally you wouldn't be able to reach that until chapter 5, but you can swim there from the Bullworth Vale beach. The band is right in front of the tunnel entrance. image
28) Swim to the island south of #26, to the small beach near the southwest corner. Follow the plankts of wood connecting the rocks to the grassy cliffs. When you reach the other end, turn left and follow it to the end, climbing up the rock to get the band. image
29) From the southwest end of Bullworth Vale's beach, get in the water and follow the rocks on your right. When they make a sharp right, look ahead and you'll see a rock formation going over the water, almost like a short tunnel. Swim through it and get to the beach. Immediately on your right will be a tunnel. At the other end, use the tree-bridge to get to the rock and collect the band. image
30) In the Freak Show at the carnival, in front of the Crazy Painted Man. image
31) From the east end of the tunnel that leads to the carnival, follow the street north until it turns right. At the turn, look for the building with a blue awning on your left. Go up the tall flight of stairs next to it and follow the road west. Make your first left (street, not driveway). Just before the loop in the road, go onto the driveway on your left and follow it through the 'tunnel' in the house. The band is at the foot of the broken table/ramp. image
32) From the driveway in #31, continue to the loop and get onto the dirt trail and take your first right, to a small area with benches and a good view of the beach and carnival. The band is by the far guard rail. image
33) Get on the trail behind the lighthouse and follow it north. When the trail turns up and to the left, look to the right to find the band by a bush. image
34) In the alley behind the bike shop, east of the red bike garage. image
35) In the grass behind the Burgers restaurant, behind a short vine fence. image
36) In the planter next to the Aquaberry store. image
37) In the dressing room of the Aquaberry store. image
38) On the second floor of the boxing club, between the bar and the trophy case. image
39) Outside the boxing club, at the southeast corner. image
40) At the northeast end of the beach. image
41) From the northeast end of the beach, follow the path west and follow it as it curves north. When you reach the street, turn left. After the first house on your left, you'll find the rubber band laying next to a tree. image
42) From the east side of the Burgers restaurant, go north and take your first left. Enter Old Bullworth Vale Gardens on your right, then immediately turn right again once inside. Follow this path as it curves slightly east, to the broken table (a ramp facing east). The band is right next to the ramp. image
43) In the gazebo in the Old Bullworth Vale Gardens park. image
44) On the westernmost north-south road on the map, you'll find Hattrick Manor at the sout end, where the road turns east. From Hattrick Manor, go north to the next driveway. If you follow the wall a little further north, you'll find that the part of the top gate is missing. Hop the wall, then hop the vine fence right behind it. Go to the south side of the steps in front of the house and you'll find another vine fence with a low section you can hop over. The band is under the tree in that small yard. image
45) In the northwest corner of the basketball court in the northeast corner of the map (from #44, follow the street north a few yards and look to your right). image
46) I don't think you'll be able to reach this one until you've completed the mission "Tad's House." In the gazebo of the Spencer Estate (the yard on the north side of Tad's house). image
47) From the basketball court mentioned in #45, use the northeast exit to reach the street. Across the street to the northeast, you'll find a house with an open front gate. The band is on the north side of the garage. image
48) From the basketball court mentioned in #45, use the northeast exit to reach the street and go east to the "T" intersection. Use the gate that's leaned up against the wall across the street to get into the yard (you'll be trespassing, so keep your eyes peeled for men in white clothes). Look ahead and to your left and you should spot the band under the small bridge. image
49) Go in the cemetary by the dam, to the east wall of the church. There's a broken section of wall you can jump to get to the church. Walk around to the west door to collect the band. image
Bullworth Town
50) From the trail that goes to the dam, cross the street and go down the paved hill. On your left will be the Oil Spill gas station. Use the ladder leaning against the west wall to get to the roof and collect the band. image
51) In the basement of the Dragon's Wing Comics shop. image
52) In the alley across the street from the Mexican Restaurant. image
53) Go up the ramp behind the abandoned movie theater near New Coventry's southwest entrance, walk on the board to pass over the gap between this building and the next, then climb up the latter on your immediate left. Turn left and you'll see the band on the roof of the theater. To get there, I started at the other end of the roof you're on now and used some of the length of the it to gain speed with my skateboard and jump across. image
54) From the abandoned theater mentioned in #53, follow the sidwalk north; it's right next to the yellow "This Week" sign. image
55) Behind the statue in front of the town hall-like building. image
56) Go up the first set of stairs in front of the town hall-like building and take a left, up another short set of stairs. The band is in the grass on your left. image
57) Go around the east side of the town hall-like building and climb the ladder. Go right and hop up onto the higher platform, the turn left and climb up the next ladder. The rubber band is on this level. image
New Coventry
58) Go to the northeast neighborhood of New Coventry and get onto the dirt trail that heads back west. When it turns south, look in the grassy corner for the rubber band. It's right up by the fence. image
59) Enter New Coventry through the tunnel on the west side (where you meet Johnny for his early missions), go into the first alley on your left. image
60) In front of the Yum Yum Market. image
61) From the bike garage, go directly south. After the first red storage container on your left, look into the alley it's walling off and you should spot the band by the trailer. image
62) In the parking lot next to the Blue Balls Pool hall. image
63) On the northernmost road in the northeast corner of New Coventry, you'll find the band in a short alley on the north side of the road. image
Blue Skies Industrial Park
-If you haven't completed the story missions yet, watch out for the Townies clique; they'll attack you on sight!).
64) This is accessible before Blue Skies is even unlocked. In fact, it's only accessible from New Coventry. Just get on the railroad in New Coventry (there's a trail behind the train yard across the street from the Yum Yum Market that leads up to the tracks) and follow it to the south end. image
65) In the trailer park, in front of a trailer with a couch sitting out front, and a neon "OPEN" sign in the window. image
66) From the southwest exit of the trailer park, follow the road south then turn right to go under the train tracks. Go through it and turn right (like you have any other choice...), then left immediately after the BMX bike. Follow the dock and turn right at the end, then left, then left again at the end, up the ramp. See the abandoned boat in the water? That's where your rubber band is. image
67) From the southwest exit of the trailer park, follow the road south then turn right to go under the train tracks. Go through it and turn right (like you have any other choice...), then left immediately after the BMX bike. Follow the dock and turn right at the end. Go straight and turn right again when you hit the wall. Follow this path around to a caged-in area with the band. image
68) From the southwest exit of the trailer park, look across the street and you'll see a small fenced-in area. The band is in there. Climb over the low wall on the east side of the cage. image
69) When entering Blue Skies from the north bridge, follow the road south until you see a yellow "Bust Stop" sign on your right. The band is on the ground right next to that sign. image
70) On the porch across the street to the east of #68. image
71) From #68, go south and turn right after the first semi trailer on your right. The band is on the ground in front of the trailer, between that and an open train car. image
72) From the trailer mentioned in #70, cross the street to the east and go south a few yards. On the east side of the road, there is a metal ramp going up two levels. There is a door you can open on both of the levels. The rubber band is behind the higher of the two doors. image
73) Look for the Spazz Industries building east of the southern bus stop. At the southwest corner of the building, there is a part of fence missing above the short wall enclosing the pile of storage containers. Climb into the yard and you'll spot the band right away. image
74) Across the street to the south and then west of Spazz Industries, you'll find a shipping yard with a large truck underneath a crane. The band is behind the truck. image
75) Right inside the front gates of the Happy Volts Asylum. To get in there, use the same strategy as in the mission "Galloway Away." Crouch-walk behind the bushes, which should lead you straight to the front gate. To get back out, find the building just south of the rubber band (there's a ladder leaning against its back wall). Climb up the tree nearby to get back onto the dirt trail. image
Reward: Rubber Band Ball (weapon that ricochets off walls)
===========================================================
A Little Help
This is all done with one of the transistors in the story mission of the same name. Go to the school's west parking lot and you'll find an old school bus. Go inside and out the other door. If you have collected atleast one transistor, there will be a marker to begin "A Little Help _," the blank standing for the number of the mission. Each time you collect a transistor, an "H" icon will appear on the radar. Visit the hobo and he'll teach you a fighting move. Use them on him 3 times to master it. You'll get a special cutscene once he's recieved all the transistors and taught you all the moves.
1) Uppercut (hold Square)
2) Leg Sweep (press Square, then hold Square)
3) Heavy Kick (press Square twice, then hold Square)
4) 5 Hit Combo (press Square 5 times)
5) Roundhouse Kick (press Square 3 times, then hold Square)
6) Overhead Punch (press Square 4 times, then hold Square)
===========================================================
Arcade Games
Each game costs $0.50 to play. The racing games aren't required for 100%, so they'll be covered in the Basics section.
ConSumo
Location: Carnival souvenier tent, Dragon's Wing Comics shop basement
High Score: 1,010
Don't worry about this now, as you'll have to beat the high score in the mission "Nerd Challenge." For the sake of this guide though, I'll post the gist of the game here. Use the left analog stick or the D-pad to move your character around and collect the good icons. Your goal is to fill the meter in the top of the screen. If you fail, keep trying until you get it. As you eat more, your guy gets fatter and the screen becomes more crowded with bad items. The key is patience and waiting, sometimes even standing still, until you've got a clear opening. Stay away from the orange puffer fish. This game's actually pretty easy once you get used to t.
Nut Shots
Location: Carnival souvenier tent
High Score: 69,900
Once you begin, the controls and good/bad icons will be displayed on-screen. Destroy the enemies (Hornets, Bats, Eagle) on screen by shooting Nuts at them (X). Avoid flying into the trees or below falling animals or you will lose a life. Destroy 10 Hornets to fight Bats. Destroy three of those to unlock an Eagle. Kill the Eagle to score high. Avoid attacks from the Bats, Bees, and the Salmon missiles the Eagle drops. The Eagle will take several shots before it loses its feathers and drops dead. You score points by destroying animals. Obviously the longer you last, the more animals you can harm.
Monkey Fling
Location: Carnival souvenier tent, New Coventry/Greasers safehouse
High Score: 333
Fling your Poo (X or R1) to knock down Bananas (to eat and gain more poo) and and Spiders (poo kills them). Spiders are worth 2 points a piece, while eating bananas is worth 3. I used to have so much trouble with this game because I conserved my poo for the spiders. When I realised eating was actually worth points, I went all out, shooting at both the bananas and spiders, and before long, I had surpassed the high score on my first try!
===========================================================
Beat Up the Pirate
There's an island between the carnival in Bullworth Vale and the school. On its southeast beach, there's a pirate just waiting to attack you. Knock his sorry ass out (notice his leg isn't really missing; it's tied up behind him!).
Reward: Pirate Hat
===========================================================
Bike Races: Old Bullworth Vale
Location: Old Bullworth Vale, in the alley on the east side of Shiny Bikes, 12:00pm to 11:00pm
Prerequisite: "Beach Rumble"
The bike you use in this race is the one you bring to the marker - or if you don't have a bike, you're given the same one as your opponents. You can even race on a scooter if you've purchased the one from the carnival. The only downside to the scooter is that it doesn't turn very well at speed. There are 7 races you need to win here. Try to lose your opponents, but if they're giving you trouble, get right up next to them and throw your fists around with L1/R1. If you've got firecrackers, drop those and they'll knock them off their bikes. The next checkpoint isn't always immediately visible, so keep an eye on your radar so you know where to turn. Except for race 6 (2 laps), they're all 1 lap.
Rewards:
Race 1: $20.00, Bike Helmet, and Bike Jersey
Race 2: $25.00
Race 3: $30.00
Race 4: $35.00
Race 5: $40.00
Race 6: $45.00
Race 7: $50.00
===========================================================
Bike Races: Bullworth Town
Location: Bullworth Town, in the alley on the north side of Shiny Bikes, 12:00pm to 11:00pm
Prerequisite: "Beach Rumble"
The bike you use in this race is the one you bring to the marker - or if you don't have a bike, you're given the same one as your opponents. You can even race on a scooter if you've purchased the one from the carnival. The only downside to the scooter is that it doesn't turn very well at speed. There are 4 races you need to win here. Try to lose your opponents, but if they're giving you trouble, get right up next to them and throw your fists around with L1/R1. If you've got firecrackers, drop those and they'll knock them off their bikes. The next checkpoint isn't always immediately visible, so keep an eye on your radar so you know where to turn. Races 1 and 2 are two laps, race 3 is more of a sprint (a-to-b), and 4 is one lap. Race 4 is full of last-second turns, so keep your eyes peeled for the directions that the checkpoint markers are pointing.
Rewards:
Race 1: $20.00
Race 2: $25.00
Race 3: $30.00
Race 4: $35.00
===========================================================
Bike Races: New Coventry
Location: New Coventry, just outside the train yard, 12:00pm to 11:00pm
Prerequisite: "Beach Rumble"
The bike you use in this race is the one you bring to the marker - or if you don't have a bike, you're given the same one as your opponents. You can even race on a scooter if you've purchased the one from the carnival. The only downside to the scooter is that it doesn't turn very well at speed. There are 2 races you need to win here. Try to lose your opponents, but if they're giving you trouble, get right up next to them and throw your fists around with L1/R1. If you've got firecrackers, drop those and they'll knock them off their bikes. The next checkpoint isn't always immediately visible, so keep an eye on your radar so you know where to turn. Both races are 2 laps.
Rewards:
Race 1: $30.00
Race 2: $40.00
===========================================================
Bike Race: Bullworth Academy
Location: Bullworth Academy, by the parking lot, 12:00pm to 11:00pm
Prerequisite: "Beach Rumble," win all 13 other bike races
The bike you use in this race is the one you bring to the marker - or if you don't have a bike, you're given the same one as your opponents. You can even race on a scooter if you've purchased the one from the carnival. The only downside to the scooter is that it doesn't turn very well at speed. There is only one race you need to win here. Try to lose your opponents, but if they're giving you trouble, get right up next to them and throw your fists around with L1/R1. If you've got firecrackers, drop those and they'll knock them off their bikes. The next checkpoint isn't always immediately visible, so keep an eye on your radar so you know where to turn. This race will take you halfway around the campus, through Blue Skies, and back to the school.
Reward: $50.00, BMX Helmet
===========================================================
Boxing
Location: The boxing gym. From the bridge that leads to the school, go east and take your first right (street) turn. The gym is straight ahead. Available 3:30pm to 12:30am.
Goal: Defeat Challenger 4 and one "Random Challenger"
You should know how to box from the missions you've done in here during the story mode. The controls are still displayed at the bottom-left corner of the screen. My strategy is to just keep nailing Square, and get a strong punch (hold Square) in whenever I can. Both of you will regain some health at the beginning of another round. Once his health meter is emptied, knock him out with a final strong punch. Don't wait too long to knock him out or he'll regain health.
Reward: Your punches increase in strength for each level completed, $20.00
===========================================================
Buy 100 Sodas
Pretty self-explanatory.
Reward: Sodas become free
===========================================================
Buy All the Clothes
My total clothing item count, including both these and the unlockable/hidden clothes (see basics), is 308.
School Store: On the first floor of Bullworth Academy
Head:
- Bullworth Cap - Team ($3.50)
- Bullworth Cap - Green ($3.50)
- Bullworth Visor - Classic ($3.50)
- Bullworth Visor - Green ($3.50)
- Bullworth Visor - Red ($3.50)
Upper Body:
- Bullworth Letterman Jacket ($?.??; I found this in a locker)
- Gray Bullworth T-Shirt ($3.50)
- Team Polo Shirt ($3.50)
- Team T-Shirt ($3.50)
- Team B-ball Jersey - White ($3.50)
- Team B-ball Jersey - Red ($3.50)
- Team B-ball Jersey - Blue ($3.50)
- Bullworth Hoodie - Gray ($6.00)
- Team Zip-Up ($8.00)
- Bullworth Zip-Up - Green ($8.00)
- Astronomy Club Vest ($7.00)
- School Sweater ($7.00)
- Bullworth Sport Jacket ($11.00)
Left Arm:
- Team Sweatband - Blue ($2.00)
- Team Sweatband - Red ($2.00)
- Team Sweatband - White ($2.00)
Right Arm:
- Team Sweatband - Blue ($2.00)
- Team Sweatband - Red ($2.00)
- Team Sweatband - White ($2.00)
Legs:
- School Shorts ($5.00)
- Bullworth Gym Shorts - Blue ($5.00)
- Bullworth Gym Shorts - White ($5.00)
- Bullworth Gym Shorts - Red ($5.00)
Feet:
- Gym Shoes ($6.00)
- Cheap Dress Shoes ($10.00)
TOTAL: $133.50+ (I'll look up the cost of the Letterman Jacket)
Carnival Souvenier Tent
- Devil Horn Hair Band (15 tickets)
- Some Incredibly Strange Hat (40 tickets)
- Clown Trousers (40 tickets)
- Clown Shoes (40 tickets)
- "I'm With Stupid" T-Shirt (20 tickets)
- Big Novelty Watch (10 tickets)
- Clown Wig (40 tickets)
- Beaded Bracelet (15 tickets)
- Checkered Party Hat (20 tickets)
- Angel Halo Hair Band (15 tickets)
TOTAL: $133.50
Aquaberry: Blue shirt icon in Old Bullworth Vale
Head:
- Luxury Stud Hat - Gray ($14.00)
- Luxury Stud Hat - Brown ($14.00)
- Luxury Stud Hat - Black ($14.00)
- Panama Hat ($25.00)
- Porkpie Hat ($25.00)
- Top Hat ($55.00)
Upper Body:
- Aquaberry Vest ($17.50; bought during the mission "The Eggs")
- Aquaberry Sweater ($17.50)
- Aquaberry Shirt ($17.50)
- Rough 'n Rich Shirt - White ($12.50)
- Rough 'n Rich Shirt - Blue ($12.50)
- AB Casual Polo - Black ($14.00)
- AB Casual Polo - Brown ($14.00)
- AB Casual Polo - Blue ($14.00)
- Zip Sweater - Crimson ($17.50)
- Zip Sweater - Slate ($17.50)
- Zip Sweater - Forest ($17.50)
- Zip Sweater - Coal ($17.50)
- Urban Parade Sweater ($28.00)
- Lambswool V-Neck Sweater ($28.00)
- LS Training Jacket ($28.00)
- LS Casual Jacket ($28.00)
- Duffel Coat ($50.00)
- Tuxedo Jacket ($100.00)
Left Arm:
- Aquaberry Watch - Gold ($35.00)
- Aquaberry Watch - Steel ($25.00)
- Aquaberry Watch - Silver ($30.00)
- Aquaberry Watch - White Gold ($35.00)
Right Arm:
- Bracelet - Gold ($30.00)
- Bracelet - Silver ($30.00)
- Bracelet - Steel ($25.00)
- Bracelet - Onyx ($25.00)
Legs:
- LS Casual Pants - Gray ($20.00)
- LS Casual Pants - Black ($20.00)
- Aquaberry Slacks - Slate ($28.00)
- Aquaberry Slacks - Cream ($28.00)
- RnR Shorts - Black ($14.00)
- RnR Shorts - Burgundy ($14.00)
- RnR Shorts - Green ($14.00)
- RnR Shorts - Tan ($14.00)
- RnR Shorts - Blue ($14.00)
- Tuxedo Pants ($70.00)
Feet:
- LS Casual Moccasins ($18.00)
- LS Casual Sneakers ($18.00)
- RnR Suede Sneakers ($18.00)
- Aquaberry Loafers ($22.50)
- Aquaberry Boots ($25.00)
- Country Boots ($25.00)
- Italian Shoes ($35.00)
TOTAL: $1,213.50
Worn Ja Used Clothing: Blue shirt icon in Bullworth Town
Head:
- Ball Cap - Blue and White ($6.00)
- Ball Cap - Black ($6.00)
- Ball Cap - White ($6.00)
- Ball Cap - Quartered ($6.00)
- Ball Cap - White and Green ($6.00)
- Ball Cap - White and Blue ($6.00)
- Tradesman Cap - Blue ($7.50)
- Tradesman Cap - Brown ($7.50)
- Wool Hat - Boarder Style ($7.50)
- Wool Hat - Urban Style ($7.50)
- Beach Bucket Hat ($8.50)
- Urban Bucket Hat ($8.50)
- Newsie Hat ($8.50)
- Old Time Racing Hat ($10.00)
- Shortbeaked Cap ($8.50)
- Unionist Hat ($10.00)
- Lumberjack Hat ($10.00)
- Cowboy Hat - Brown ($14.00)
Upper Body:
- Soccer Polo - Snow ($7.00)
- Soccer Polo - Emerald ($7.00)
- Rugby Jersey - LB ($7.00)
- Rugby Jersey - Celt ($7.00)
- Football Jersey - Green ($7.00)
- Football Jersey - Black ($7.00)
- Hockey Jersey - Blue ($7.00)
- Hockey Jersey - Black ($7.00)
- Dark Side Baseball Jersey ($7.00)
- Bright Side Baseball Jersey ($7.00)
- Tiki Shirt ($9.00)
- Hawaiian Shirt ($9.00)
- Lips Long T-Shirt ($9.00)
- 68 Long T-Shirt ($9.00)
- Urban Sports Long T-Shirt ($9.00)
- Zip Up Black Hoodie ($10.00)
- Sevener Black Hoodie ($10.00)
- Conduct Hoodie ($10.00)
- Green Bomber Jacket ($12.00)
- Black Hooded Jacket ($12.00)
- Jean Jacket ($12.00)
Left Arm:
- Classic Watch ($13.00)
- Black Digital Watch ($13.00)
- Black Sports Watch ($13.00)
- Blue Sports Watch ($13.00)
- Low Profile Watch ($13.00)
Right Arm:
- Good Luck Wrist Band ($6.50)
- Wristband - Black ($10.00)
- Wristband - Brown ($10.00)
- Wide Wrist Band - Black ($11.00)
- Wide Wrist Band - Brown ($11.00)
Legs:
- Track Pants - Green ($10.00)
- Track Pants - Black ($10.00)
- Army Cargo Pants ($12.00)
- Desert Cargo Pants ($12.00)
- Ratty Jeans ($14.00)
- Soccer Shorts - Snow ($9.00)
- Soccer Shorts - Emerald ($9.00)
- 3/4 Shorts - Tan ($11.00)
- 3/4 Shorts - Brown ($11.00)
- 3/4 Shorts - Black ($11.00)
- Beach Shorts ($9.00)
- Cargo Shorts ($11.00)
- Crisp Jeans ($14.00)
Feet:
- Urban Loafers - Brown ($9.00)
- Urban Loafers - Black ($9.00)
- Fashion Boots - Tan ($12.50)
- Fashion Boots - Brown ($12.50)
- Skate Shoes - Black ($9.00)
- Urban Walker Classic ($7.00)
- Urban Walker Canvas ($7.00)
- Riot Shoes - Classic ($7.00)
- Riot Shoes - Caramel ($7.00)
- Riot Shoes - Chocolate ($7.00)
- Riot Shoes - Black ($7.00)
- Budget Basketball Sneaks ($7.00)
- Workman Boots ($10.00)
- Brown Loafers ($17.00)
- Country Shoes ($20.00)
TOTAL: $729.50
The Final Cut: Barber shop in New Coventry
Head:
- Cap - Blue ($5.00)
- Cap - Purple and Black ($5.00)
- Cap - Red and Tan ($5.00)
- Cap - White and Black ($5.00)
- Cap - Yellow and Black ($5.00)
- Cap - Black and Red ($5.00)
- Army Cap ($5.00)
- Army Bucket Hat ($5.00)
- Army Wool Hat ($5.00)
- Bandana - Blue ($3.50)
- Bandana - Red ($3.50)
- Bandana - Black ($3.50)
- Skater Beanie - Black ($5.00)
- Skater Beanie - Red ($5.00)
- Skater Beanie - Gray ($5.00)
Upper Body:
- T-Shirt - White ($5.00)
- T-Shirt - Blue ($5.00)
- T-Shirt - Red ($5.00)
- T-Shirt - Yellow ($5.00)
- T-Shirt - Green ($5.00)
- T-Shirt - Black ($5.00)
- T-Shirt - Gray ($5.00)
- Undershirt - Black ($3.00)
- Undershirt - Blue ($3.00)
- Undershirt - Gray ($3.00)
- Long T-Shirt - White ($9.00)
- Long T-Shirt - Dark Blue ($9.00)
- Long T-Shirt - Yellow ($9.00)
- Long T-Shirt - Light Blue ($9.00)
- Long T-Shirt - Red ($9.00)
- Long T-Shirt - Green ($9.00)
- Long T-Shirt - Black ($9.00)
- Long T-Shirt - Gray ($9.00)
- Metal T-Shirt ($9.00)
- Creepy Clown T-Shirt ($9.00)
- Fool Hammer T-Shirt ($9.00)
- New Flannel Shirt ($9.00)
- Worn Flannel Shirt ($9.00)
- Punk Hoodie ($11.00)
- Army Sweater - Green ($11.00)
- Army Sweater - Black ($11.00)
- Hoodie - Black ($9.00)
- Hoodie - Blue ($9.00)
- Hoodie - Gray ($9.00)
- Rock On Shirt ($7.00)
- Rocker Hoodie ($9.00)
- Army Jacket ($13.00)
- Arctic Camo Jacket ($13.00)
- Forest Camo Jacket ($13.00)
- Black Bomber Jacket ($13.00)
- Old School Punk Vest ($22.50)
- Leather Jacket ($30.00)
Left Arm:
- Cheap Digital Watch ($9.00)
Right Arm:
- Red Bandana ($3.00)
- Narrow Studded Punk Brace ($7.00)
- Square Studded Brace ($7.00)
- Wide Studded Punk Brace ($9.00)
- Spiky Studded Punk Brace ($9.00)
- Leather Archer Brace ($11.00)
- Black Restraint Brace ($13.00)
- Black Bracelet ($12.00)
Legs:
- Jogging Pants ($6.00)
- Ripped Jeans ($12.50)
- High Cuffed Jeans ($10.00)
- Black Cargo Pants ($10.00)
- Desert Cargo Shorts ($8.00)
- Camo Cargo Shorts ($8.00)
- Forest Camo Cargo Pants ($8.00)
- Cut-Off Camo Shorts ($6.00)
- Cut-Off Jean Shorts ($6.00)
- Plaid Punk Pants ($15.00)
- Pistol Pants ($20.00)
Feet:
- Low Tops - Black ($6.00)
- Low Tops - Gray ($6.00)
- Low Tops - Green ($6.00)
- Low Tops - Red ($6.00)
- Low Tops - Brown ($6.00)
- Skate Shoes - Green ($9.00)
- Skate Shoes - Red ($9.00)
- Skate Shoes - Brown and Tan ($9.00)
- Skate Shoes - Black ($9.00)
- Fat Sneaks - Black and White ($12.00)
- Fat Sneaks - Gray and White ($12.00)
- Fat Sneaks - Gray ($12.00)
- Fat Sneaks - Red and Gold ($12.00)
- Fat Sneaks - Black and Red ($12.00)
- Blue Runners ($10.00)
- Brown Runners ($10.00)
- White B-Ball Shoes ($13.00)
- Shiny White Sneakers ($16.00)
- Old Worn Boots ($12.00)
- Army Boots ($12.00)
- Motorcycle Boots ($20.00)
TOTAL: $820.50
GRAND TOTAL: My calculations might be wrong, but when I added all this up, I came up with $2,167.50 and 255 tickets. However, my 'Money Spent on Clothing' stat in the pause menu says $2,919.50.
Reward: Gold Suit (Elvis costume)
===========================================================
Carnival Games
Once you complete Photography class 5, you earn twice as many tickets for winning each game. Use them to buy out the Souvenier Tent.
Strike Out ($1.00; by the Souvenier Tent) - You have six baseballs to hit the moving targets in front of you (throw with R1). Hit the catchers (crouching figures) to get a strike and gain points - take one out in each row. Hit the rare baseball mit for a bonus ticket. If you hit a batter (red shirt, holding baseball bat), it's a walk and doesn't count towards your score. If you hit an umpire (white shirt), you're out.
High Striker ($1.00; south side of the Big Squid ride) - Rapidly press X to hit the ball as high as possible. You get 1 ticket for hitting atleast 70, 2 tickets for atleast 80, and 3 tickets if you can make it to the top. This game is the quickest and easiest way to earn tickets at the carnival.
Splish Splash ($1.00; next to High Striker) - Just like the Penalty Shots odd job, move the left analog stick to change the direction that the moving ball is going in. Once it's over the target, hit X to throw the ball. If you hit it and knock the guy into the water, you get 3 tickets.
Shooting Range ($2.00; next to the Fun House) - Try to shoot the cowboys and booze bottles, but avoid the girls. Shoot the rare sheriff star for a bonus ticket.
Souvenier Tent:
- Teddy Bear (10 tickets, bought during the mission "Carnival Date")
- Devil Horn Hair Band (15 tickets)
- Girlie/Car Poster (10 tickets; dorm room trophy)
- Some Incredibly Strange Hat (40 tickets)
- Clown Trousers (40 tickets)
- Scooter (75 tickets; free if you ever lose it; spawns in red garages with bikes)
- Clown Shoes (40 tickets)
- "I'm With Stupid" T-Shirt (20 tickets)
- Big Novelty Watch (10 tickets)
- Clown Wig (40 tickets)
- Rock Band Poster (10 tickets; dorm room trophy)
- Beaded Bracelet (15 tickets)
- Checkered Party Hat (20 tickets)
- Angel Halo Hair Band (15 tickets)
TOTAL: 360 tickets
===========================================================
Carnival Go-Kart Races
Location: By the ferris wheel
Goal: Win 5 races
Simply pay your admission to the race ($1 per race). The controls are displayed on screen, and as it's just a race around a closed circuit, it's all pretty straight forward. Avoid crashing into the other drivers or you'll slow yourself down. There's one U-turn where you can cut the grass before the actual corner that will gain you a little distance ahead of those behind you.
Rewards:
Race 1: Crash Helmet
Races 2-4: None
Race 5: Unlocks city race
==========================================================
Carnival Rides
Simply ride all the rides:
- Ferris Wheel ($1)
- Big Squid ($1; west side of the ferris wheel - you automatically collect a G&G Card the first time you ride it)
- Big Canyon Railway ($1; big roller coast west of the Big Squid)
===========================================================
Destroy 19 Halloween Tombstones
When it's not Halloween, these are stored in the Spencer Shipping warehouse in Blue Skies Industrial Park (unlocked for completing chapter 4 of the story). If you want to find and destroy them all while they're decorating the school during Halloween, I'll write up a guide soon, including pictures.
Reward: Edna Mask and tombstone dorm trophy
===========================================================
Destroy 25 Lawn Gnomes
Bullworth Academy campus
1) In Harrington House's north yard. image
Old Bullworth Vale
2) On the southeast beach of the between the carnival and the school; watch out for the pirate that will try to beat you up. Beat him up and you'll complete an odd job, earning yourself the Pirate Hat. image
3) The street on the south side of the Burger Restaurant heads directly (west) towards a tunnel and up a long set of stairs. Go to the top, straight onto the road, and into the first driveway on your left. The gnome is on the west side of this house. image
4) Just like #3, turn onto the first street on your left (it loops at the end). It's by the front door of the only house on the east side of the loop. image
5) On the west side of the street with the loop (see #4), there's a gate you can open to enter house 29's yard. The gnome is right by the door. image
6) By the garages across the street from #3. image
7) In the yard of the house next door to the north of Hattrick Manor. Just north of its front gate, there is a part of the wall you can hop over. The gnome is in the front yard on the south side of the house's front steps. image
8) In Tad's yard, next to one of the small vine fences just before the stairs that lead down to the gazebo. You need to complete the mission "Tad's House" before you're able to open his gate. image
9) In Tad's yard, by the gazebo. You need to complete the mission "Tad's House" before you're able to open his gate. image
10) Exit the park from the northwest (by Tad's house) and follow this road north, straight to a big house with a bunch of fountains in the yard. image
11) By the front door of the house across the street to the southeast of #11. There's a broken bit of wall you can hop over on the west side. image
12) At the bottom of the steps of Old Bullworth Vale's northernmost house (west of the cemetary). image
13) By the flowers at the northeast corner of the Happy Endings Retirement Home. image
14) On the left side of the park's north entrance (southwest corner of Happy Endings Retirement Home). image
15) On the right side of the park's north entrance (southwest corner of the Happy Endings Retirement Home). image
16 & 17) In the park. Enter by the southwest corner of the Happy Endings Retirement Home, turn left immediately, and head to the port-o-potty. They're in the little hut next to it. image
18) By the park's southeast entrance. image
19) In front of the house at the park's northeast corner. image
20) Two houses east, on the same side of the street, from #19 (by the trail that goes south and then east to the beach, or east then north to the cemetary). image
21) At the cemetary, on the west side of the church's front door. image
Bullworth Town
22) By the police station's front door (next to City Hall). image
Blue Skies Industrial Park
23) When entering Blue Skies from New Coventry, turn onto the first dirt trail on your right. After the train tracks, find the wooden gate just before the second house on your right. Break it down to find the gnome in this back yard. image
24) In the northernmost part of the docks area, on the separate platform with all the dirt piled into it. The only way to get there is to gain speed with a bike and jump across the water gap. image
25) At the Happy Volts Asylum, by the big statue in the front yard. You'll have to enter the usual way, but if you have the Orderly Uniform (complete the mission "Finding Johnny Vincent"), then you won't have to worry about being busted for trespassing. image
Reward: Viking Helmet - Plastic, Gnome outfit, Gnome dorm trophy
===========================================================
Destroy 27 Halloween Jack-o-Lanterns
When it's not Halloween, these are stored in the school's Boiler Room. If you want to find and destroy them all while they're decorating the school during Halloween, I'll write up a guide when I get time.
Reward: Pumpkin Head Mask and jack-o-lantern dorm trophy
===========================================================
Drink 500 Sodas
Pretty self-explanatory.
Reward: Two-Can Hat
===========================================================
Errands
Goal: 31 errands
While you're hanging around near the school or in town, people will approach you for favors. To accept the errand, target them with R1, then press X. Here's a list of all 50 of the game's errands; as said above, only 31 are required if you do everything else in this guide (Story Missions, Classes and Odd Jobs). If the people aren't showing up for you, try coming back at a different time of day.
Bullworth Academy:
Algernon
- Prerequisite: "Save Algie"
- Location: Second floor of school
- Job: Escort him to the Library; beat up anyone that tries to harm him.
- Reward: $15
Casey
- Prerequisite: "Help Gary"
- Location: Second floor of school, by office
- Job: Stuff 2 kids into lockers.
- Reward: $10
Christy
- Prerequisite: "Defend Bucky"
- Location: West parking lot
- Job: Escort her to the girls dorm; beat up anyone that tries to harm her.
- Reward: $10
Constantinos
- Prerequisite: "The Eggs"
- Location: By the boys dorm
- Job: Egg the girls dorm.
- Reward: $10
Constantinos
- Prerequisite: "Defend Bucky"
- Location: Second floor of school, between office and Art room
- Job: Plant flowers in a locker.
- Reward: $10
Gloria
- Prerequisite: "Defend Bucky"
- Location: Middle of school, first floor
- Job: Pick 3 lockers
- Reward: $10
Karen
- Prerequisite: "The Eggs"
- Location: By girls dorm
- Job: Egg the boys dorm.
- Reward: $10
Max
- Prerequisite: "Boxing Challenge"
- Location: First floor of school, boys bathroom
- Job: Get him toilet paper from the Boiler Room. Toss it over by aiming above his stall door and throwing it up.
- Reward: $15
Melody
- Prerequisite: "Defend Bucky"
- Location: First floor, by English room
- Job: Plant chocolates in Trevor's locker.
- Reward: $10
Pedro
- Prerequisite: "Help Gary"
- Location: Right behind the school
- Job: Stuff 3 kids into trash cans.
- Reward: $15
Sheldon
- Prerequisite: "Boxing Challenge"
- Location: By the stairs in the school
- Job: Drop a firecracker into the marked toilet.
- Reward: $10
Sheldon
- Prerequisite: "Defend Bucky"
- Location: By the stairs in the school
- Job: Pull the fire alarm
- Reward: $15
Vance
- Prerequisite: "Help Gary"
- Location: First floor of school, boys bathroom
- Job: Get him toilet paper from the Boiler Room. Toss it over by aiming above his stall door and throwing it up.
- Reward: $10
Bullworth Town:
Make sure to do these first three errands, as they unlock clothes and water balloons.
Cop
- Prerequisite: "The Rumble"
- Location: In front of Town Hall
- Job: Take a picture of a dirty cop (marked on the radar) and take it back to the one at town hall.
- Reward: $25 and Incognito Hat
Hobo
- Prerequisite: "Boxing Challenge"
- Location: Between Dragon's Wing Comics shop and Mental Dental
- Job: Simply give the hobo some change and he'll give you a hat.
- Reward: Black Cowboy Hat
Townie
- Prerequisite: "Help Gary"
- Location: On the roof of The Happy Diner; go around back, jump over the low wall, and climb the ladder to the roof
- Job: Fill up water balloons using the faucet up here, and throw them at people on the sidewalks below; just stay on the roof to lose your heat.
- Reward: $20 and water balloons (every time you use a sink or water fountain from now on, you'll fill up a water balloon.
Algernon
- Prerequisite: "Boxing Challenge"
- Location: In front of the police station
- Job: Find his lost jacket. Go up the stairs behind the movie theater, cross the 'bridge', then climb up the ladder on the left. Return it to him.
- Reward: $20
Bike shop owner
- Prerequisite: "Help Gary"
- Location: In front of Shiny Bikes
- Job: Chase down the bike theif, knock him off, and ride the bike back to the owner.
- Reward: $15
Cop
- Prerequisite: "Help Gary"
- Location: Oil Spill gas station, any time
- Job: Knock out the Greasers. Go around to the back of the gas station, climb the ladder to the roof, and use any of your weapons (or fists) to knock them out.
- Reward: $15
Hobo
- Prerequisite: "Help Gary"
- Location: By Easy Drugs
- Job: Go into the alley behind the drug store and kick the trash cans until you find the medication.
- Reward: $15
Man 1
- Prerequisite: "Help Gary"
- Location: Between Dragon's Wing Comics and Mental Dental
- Job: Find his dog behind Mental Dental (go around the south end of the building), walk up to it to make it follow you, then slowly go back to the guy.
- Reward: $15
Woman 1
- Prerequisite: "Help Gary"
- Location: In front of Worn Ja Used Clothing
- Job: Find his dog at the hotel, walk up to it to make it follow you, then slowly go back to the lady.
- Reward: $15
Old Bullworth Vale
Make sure to do these first two errands to earn more clothes.
Burgers restaurant owner
- Prerequisite: "Help Gary"
- Location: Burgers restaurant
- Job: Deliver the food to the bike shop, hotel, and house.
- Reward: $25 and Fast Food outfit
Justin
- Prerequisite: "Help Gary"
- Location: On the beach in front of the lighthouse
- Job: Swim around the buoy and get back to the beach before time runs out.
- Reward: $20 and Tiny Swimsuit
Casey
- Prerequisite: "The Tenements"
- Location: Higher area of the park, with the soda machine and round tables
- Job: Spray 3 anti-Prep tags. You're not timed, so just look around Vale for any three separate tag marks (red circles with dots in the middle) on walls.
- Reward: $20
Dry Seaman Bar owner
- Prerequisite: "Help Gary"
- Location: In front of Dry Seaman Bar (teehee)
- Job: Swim out to the six crabs and pick them up to bring back to the bar.
- Reward: $20
Karen
- Prerequisite: "Help Gary"
- Location: On the southeast side of the beach (southwest of the bridge to school)
- Job: Beat up the Bully that took her bear and return it to her (Triangle to pick it up; you'll have to walk to hold onto it)
- Reward: $15
Mailman
- Prerequisite: "Boxing Challenge"
- Location: Outside the southeast entrance to the park
- Job: Collect the package and return it.
- Reward: $20
Mrs. Lisburn
- Prerequisite: "The Rumble"
- Location: Front yard of Happy Endings Retirement Home
- Job: Place flowers on her husband's grave.
- Reward: $15
Mrs. Lisburn
- Prerequisite: "Boxing Challenge"
- Location: Front yard of Happy Endings
- Job: Escort Mrs. Lisburn to the park entrance (she walks slow...).
- Reward: $25
Pedro
- Prerequisite: "Help Gary"
- Location: End of the pier
- Job: Swim around to the other side of the island to the half-sunken ship.
- Reward: $15
Pedro
- Prerequisite: "Help Gary"
- Location: End of the pier
- Job: Get to the beach on the southwest corner of the island and follow the make-shift bridges to the marker.
- Reward: $20
Photographer
- Prerequisite: "Boxing Challenge"
- Location: In the carnival, by the souvenier tent
- Job: Take a picture of the Big Squid, ferris wheel, Big Canyon Railway, and Fun House; return them to the photographer.
- Reward: $20
New Coventry
Christy
- Prerequisite: "The Big Game"
- Location: In front of Slab O' Meat (northeast of Yum Yum Market)
- Job: Walk her to the motel (there might be Greasers to defend her from)
- Reward: $30
Construction worker
- Prerequisite: "Boxing Challenge"
- Location: By The Final Cut
- Job: Take a picture of his girlfriend kissing another man and return it to him.
- Reward: $25
Cop 1
- Prerequisite: "The Rumble"
- Location: In front of the tenements (abandoned apartments in northeast neighborhood of town)
- Job: Go in the aparments and use your slingshot to kill all the rats.
- Reward: $25
Cop 1
- Prerequisite: "The Rumble"
- Location: In front of the tenements (abandoned apartments in northeast neighborhood of town)
- Job: Put out the 6 fires in the apartments (use manual aim for more precision).
- Reward: $25
Cop 2
- Prerequisite: "Tagging"
- Location: By the east bus stop.
- Job: Wait for a blue X to show up on the radar, indicating a Greaser about to tag something, and get a picture of him to return to the cop; you've gotta be quick to get the picture.
- Reward: $25
Justin
- Prerequisite: "Boxing Challenge"
- Location: By the Spazz Industries building.
- Job: Throw three eggs at the Greasers building.
- Reward: $20
Old lady
- Prerequisite: "The Tenements"
- Location: By the broken down brick building near Blue Balls..
- Job: Escort her to the tenements; there's a dirt trail shortcut on the east side of the brick building.
- Reward: $40
Safety worker
- Prerequisite: "The Big Game"
- Location: In front of the Spazz Industries building between the bike park and medical center
- Job: Deliver a package to the Spazz Industries in Blue Skies.
- Reward: $20
Townie
- Prerequisite: "The Tenements"
- Location: By Coventry's tunnel entrance
- Job: Spray any separate 3 tags in New Coventry.
- Reward: $25
Vance
- Prerequisite: "Boxing Challenge"
- Location: Between Yum Yum Market at Coventry's tunnel entrance
- Job: Hit the car by the train yard 11 times (6 windows, 4 lights, 1 hood)
- Reward: $25
Blue Skies Industrial Park
Asylum orderly
- Prerequisite: "The Big Game"
- Location: The front gate of the Happy Volts asylum
- Job: Find the two "crazies" (one should be on the path to the asylum and the other by your safehouse), then return to the asylum slowly enough for them to follow you.
- Reward: $30
Dock worker
- Prerequisite: "The Big Game"
- Location: North end of the docks
- Job: Kill the rats on the dock - if you're lucky, they'll fall in the water and drown themselves.
- Reward: $30
Dock worker
- Prerequisite: "The Big Game"
- Location: Enter the docks and make a left after the building with the bike next to it; he'll be around here
- Job: Swim out to the boat by the north end of the docks, pick up the package, and take it back to the dock worker.
- Reward: $30
Man 1 (blue jumpsuit)
- Prerequisite: "The Big Game"
- Location: Next to your safehouse
- Job: Deliver a package to the guy at the police station
- Reward: $30
Man 1 (it's the same guy as above)
- Prerequisite: "The Big Game"
- Location: By the Spencer Shipping warehouse
- Job: Destroy the four satellite dishes with your slingshot, spud cannon, etc.
- Reward: $30
Townie 1 (same guy that had you throwing water balloons)
- Prerequisite: "Busting In Part II"
- Location: By the police station
- Job: Egg the Greasers
- Reward: $30
Townie 1
- Prerequisite: "Busting In Part II"
- Location: In front of the Wonder Meats warehouse (where Russell hid in "Complete Mayhem")
- Job: He'll give you a bat to beat up a car across the street. Hit it 11 times (your bat will break long before then, so use your slingshot). The windows count for 6, the head/tallights add 4, then the hood for the final point.
- Reward: $30
===========================================================
Fail 5 Classes
These do not have to be all in a row.
Reward: Dunce Cap
==========================================================
Go-Kart Street Races
Prerequisite: Win 5 Go-Kart races at the carnival. For the street races, win one to unlock the next.
These races are just like the ones at the carnival, only you're racing on city streets. Instead of checkpoints, like in the bike races, different streets, driveways, etc are blocked off to guide you to the finish line. There are also arrows to follow.
Race 1: Old Bullworth Vale, across the street to the east of the Happy Endings Retirement Home. 3 laps.
Race 2: Old Bullworth Vale, across the street to the west of the medical center. 3 laps.
Race 3: Blue Skies Industrial Park, across the street to the north of Wonder Meats. 3 laps.
Rewards:
Race 1: $20.00
Race 2: $25.00
Race 3: $30.00, the Go-Kart spawns in the school parking lot
===========================================================
Keep-Ups
Location: Northeast corner of the football field, 11:30am to 1:00pm and 3:30pm to 7:00pm
Once you begin, increase or decrease your bet with the Up and Down buttons, then press X to start. Two icons will appear at the bottom of your screen, representing each the left and right analog sticks. In a moment, an arrow will appear next to one of those arrows, telling you to move that stick in that direction. Keep moving the sticks as you're instructed until you win the bet. The key here is to keep your eyes on the stick icons, and not at all on Jimmy.
Reward: However much you bet
===========================================================
Lawn Mowing: Old Bullworth Vale Gardens
Location: Old Bullworth Vale Gardens park; enter from the south and follow the path on your immediate right up to the blue marker on the ground. It's marked on the radar with a green "$" sign.
Goal: Complete Park (level) 3
If you've ever served detention in a non-winter season, this is exactly like that. Just drive over the long grass to cut it. Cut the specified amount of the grass (lvl 1: 70%; lvl 2: 80%; lvl 3: 90%) before time (the red meter around your clock) runs out. You earn a bonus for mowing 100% of the lawn. Complete three levels here.
Reward: $15.00 (minimum % of grass cut) - $25.00 (100%)
===========================================================
Lawn Mowing: House 23
Location: From the northwest exit of the park, go directly north, to the open driveway. It's marked on your radar with a green "$" sign.
Prerequisite: Complete 3 levels of mowing in the park, and unlock Chapter 4 of the story.
Goal: Complete House (level) 3
It's exactly like the mowing in the park, only you earn more money.
Reward: $20.00 - $40.00
===========================================================
Paper Route
Location: Old Bullworth Vale, across the street from the Burger Restaurant (marked on your radar with a green "$" icon).
Goal: Complete level 5.
Head north to pick up the stack of papers and activate a short tutorial. You have seven mailboxes to deliver to before time runs out. Holding R1 will target the box, and releasing it will throw the paper. You don't even need to stop by each box, or be directly in front of them, to toss the papers in. If you haven't delivered all 7 papers, and there's no yellow "x" on your radar, just ride around until more pop up. Repeat for levels 2-5 (run over the stack of papers to collect them), with more mailboxes being added to each level.
Rewards:
lvl 1: $14.00 and 3 new customers
lvl 2: $20.00 and 4 new customers
lvl 3: *
lvl 4: *
lvl 5: *
*I lost the reward info for levels 3-5, so they'll have to wait until I have time to go through the game again. Thanks Freewebs!
===========================================================
Penalty Shots
Location: Basketball court in front of the gym's pool building, 11:30am to 1:00pm, 3:30pm to 7:00pm
Once you begin, increase or decrease your bet with the Up and Down buttons, then press X to start. An "x" icon will appear in the white square the kid is standing in. Tilt your left analog stick to move it; it will keep going straight until it either bounces off the side of the white square or you change its direction with your left stick. Press X when it's over the kid to knock him down. Do this until his health meter is empty and you win the bet.
Reward: However much you bet
===========================================================
Pull the Fire Alarm 20 Times
It's simple enough; just don't get caught. The easiest way to do this is to pull the one right outside your dorm room, wait until it stops ringing (20 seconds), then pull it again. Prefects and teachers never come in here, so you don't have to worry about getting caught. You can check how many you've pulled by pressing Start to pause your game, then scrolling down the 'general' list to 'Props' and 'Fire Alarms Pulled.'
Reward: Firefighter Helmet
===========================================================
Travel 41.8 Kilometers on Foot
Pretty self-explanatory.
Reward: Running Shorts.
===========================================================
Travel 100 Kilometers on Bike
Pretty self-explanatory.
Reward: Spandex Bike Shorts.
===========================================================
Yearbook Photos
The yearbook is unlocked for completing Photography class 2. The easiest way to get peoples' pictures in the yearbook is to run up to every random student you see and snap their picture. Some pictures you don't even have to worry about if you're going to complete all the missions. For the rest, I'll try to help you by naming off places I've seen them. If I describe someone as "Girl" or "Boy," I mean that they aren't part of any clique.The same goes for "Little boys" and "Little girls," except they're much shorter (in a noticeably lower grade than Jimmy). Girls wear white shirts with green and black skirts, while Boys wear blue-green vests with the school badge. When I say I found someone "around _____," it means they were spotted in, or just outside, said building.
Click here for pictures of all the students.
- Algernon: Nerd (caucasian, orange hair, fat, open zipper, aka "Pee Stain"). Around school,Library, basement of Dragon's Wing Comics (Bullworth Town).
- Angie: Girl (caucasian, black hair). Around school.
- Beatrice: Nerd (caucasian, pointy blue glasses). Around school, Library.
- Bif: Prep (caucasian, taller than Jimmy, brown hair). Around Harrington House.
- Bo: Jock (African American, hat, jacket). Around gym.
- Bryce: Prep (caucasian, brown hair). Around Harrington House.
- Bucky: Nerd (caucasian. only has two front teeth, brown hair, glasses). Around Library.
- Casey: Jock (caucasian, brown hair, hat, letterman jacket). Around gym.
- Chad: Prep (African American, cast on right wrist). Around Harrington House.
- Christy: Girl (caucasian, red hair). Around school.
- Constantinos: Boy (possibly Latin, black hair). Around school.
- Cornelius: Nerd (African American, high-pitched voice). Around school.
- Damon: Jock (African American). Around school, gym.
- Dan: Jock (caucasian, parted red hair, big "B" on blue shirt). Around gym.
- Derby: Prep. Automatically entered upon completion of the story mission "Prep Challenge."
- Davis: Bully (caucasian, brown hair). Around boys dorm.
- Donald: Nerd (caucasian, brown hair, thin, glasses). Around school Library.
- Ernest: Nerd. Automatically entered upon completion of the story mission "Stronghold Assault."
- Ethan: Bully (African American). Around school.
- Eunice: Girl... big Girl. Around school.
- Fatty: Nerd (caucasian, orange hair, gloves, not as fat or short as Algie). Around school.
- Gary: Automatically entered upon completion of the mission "Complete Mayhem."
- Gloria: Little Girl (African American). Around school.
- Gord: Prep (caucasian, brown hair). Around Harrington House.
- Gordon: Boy (caucasian, brown hair). Around boys dorm.
- Hal: Greaser (caucasian, fat, brown hair, brown jacket).
- Ivan: Boy (caucasian; brown, almost messy, hair). Around school.
- Jimmy: Automatically entered when you recieve the book.
- Johnny: Greaser. Automatically entered upon completing the story mission "The Rumble."
- Juri: Jock (caucasian, brown hair, letterman jacket).
- Justin: Prep (caucasian, brown hair, parted on his right side). Around Harrington House.
- Karen: Little girl (caucasian, dark yellow hair). Around school.
- Kirby: Jock (caucasian, brown hair, blue "B" shirt). Around gym.
- Lance: Boy (African American). Around school.
- Lefty: Greaser (caucasian, black hair, light blue jacket). Around auto shop.
- Lola: Greaser (brown hair, black jacket over small top). Around school (after completing the mission "Lola's Race"), New Coventry.
- Lucky: Townie. I got his picture while fighting him in the story mission "Greasers Challenge."
- Luis: Jock (caucasian, taller and broader than Jimmy, short brown hair). Around gym/football field.
- Mandy: Cheerleader. Around the girls dorm and gym/football field.
- Melody: Little girl (caucasian, black hair). Around school.
- Melvin: Nerd (caucasian, light brown hair, pencil in his ear, glasses). Around school.
- Norton: Greaser (African American, tall, brown jacket). Around auto shop.
- Parker: Prep (caucasian, black hair). Around Harrington House.
- Peanut: Greaser (brown hair and jacket). Around auto shop.
- Pedro: Little boy (caucasian, shorts, red shoes). Around boys dorm.
- Petey: Automatically entered when you recieve the book.
- Pinky: Prep (girl, brown hair). Around Harrington House.
- Ray: Boy (caucasian, fat, orange hair). Around school.
- Ricky: Greaser (caucasian, brown hair, black jacket). Around auto shop.
- Russell: Bully. Automatically entered upon completing the mission "Help Gary."
- Sheldon: Little boy (African American). Around school.
- Tad: Prep (caucasian, brown hair). Around Harrington House.
- Ted: Jock. I think this is automatically entered after completing the mission "Total Mayhem."
- Thad: Nerd (caucasian, parted orange hair, pointy glasses). Around the school.
- Tom: Bully (caucasian, wavy brown hair, bruised eye). Around school.
- Trent: Bully (caucasian, blonde hair, pimples on forehead). Around school.
- Trevor: Boy (African American, slightly taller and thinner than Jimmy). Around school.
- Troy: Bully (caucasian, short yellow/light brown hair). Around school.
- Vance: Greaser (caucasian, might be seen combing his orange hair, black jacket). Around auto shop.
- Wade: Bully (caucasian, brown/orange hair). Around boys dorm.
- Zoe: Townie (caucasian, orange hair, white shirt, orange skirt). Around the school and girls dorm after completing the mission "Complete Mayem."
Reward: Black Ninja Costume (makes you immune to curfew, trespassing, and truancy)
